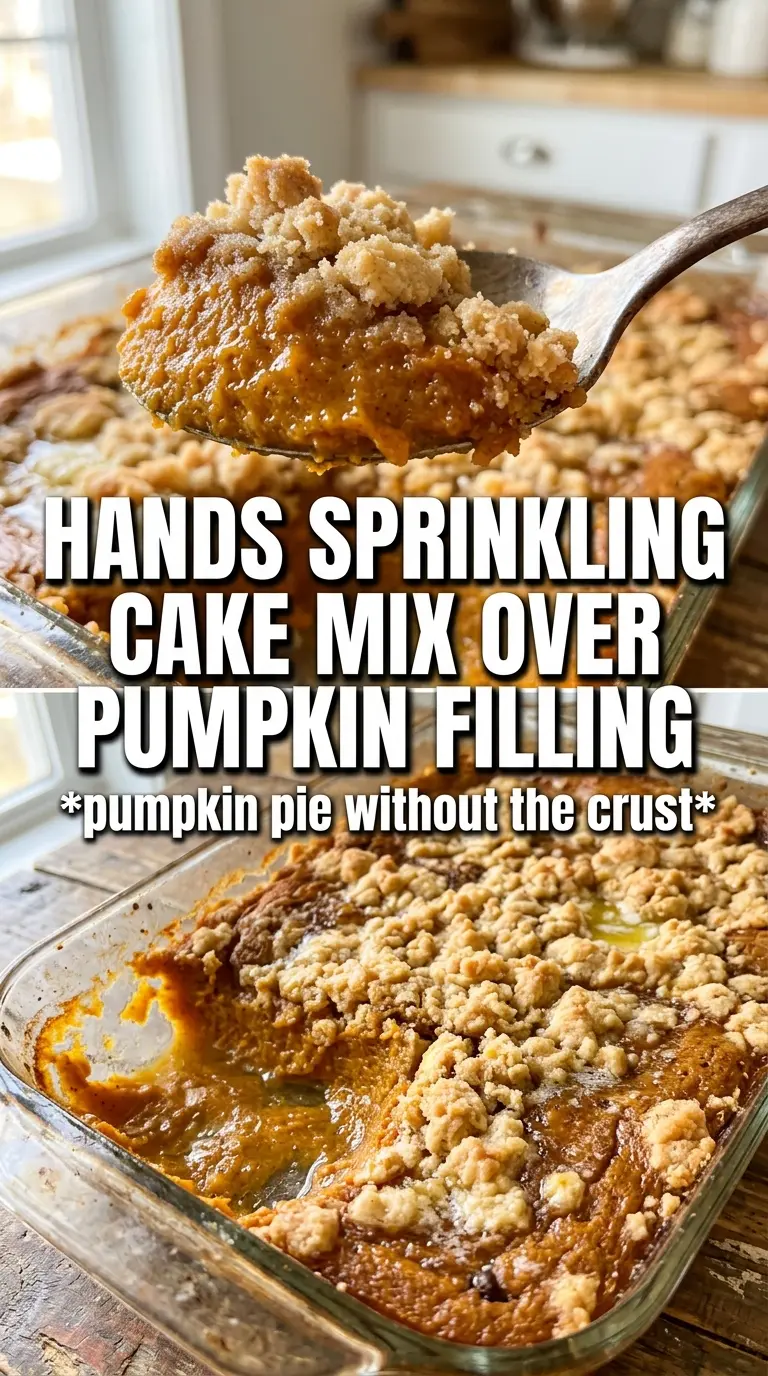
Pumpkin Pie Dump Cake bakes up with two textures that belong together: a silky pumpkin custard on the bottom and a crisp, buttery spice-cake lid on top. The first spoonful is soft and warm, then you hit those caramelized edges where the butter soaked through the cake mix and turned the surface golden and crackly. That contrast is what keeps this dessert from tasting flat.
The trick is leaving the cake mix dry and covering it with thin slices of butter instead of melting the butter and pouring it on. That gives you the evenest topping, with fewer dry patches and fewer greasy spots. The pumpkin layer also needs enough structure to set, which is why the eggs and evaporated milk matter here; they bake into a custard that slices more cleanly after a short rest.
Below you’ll find the small details that matter most, from getting full coverage on the topping to knowing when the center has set without overbaking the edges. I also included the swaps I’d actually use if I needed to work around the spice cake mix or make it a little more weeknight-friendly.
The pumpkin layer set up beautifully and the topping stayed crisp instead of soggy. I baked it 48 minutes and the butter slices browned into the best little crunchy spots around the edges.
Love that buttery spice-cake top and pumpkin custard center? Save this Pumpkin Pie Dump Cake for the next time you want a low-effort dessert with crisp edges and warm fall spice.
The Butter Slices Are What Keep the Topping From Staying Dry
This kind of dump cake fails when the top layer never gets enough fat. Dry cake mix needs steady coverage, not a few random drizzles of melted butter, or you end up with powdery patches that bake into hard little pockets. Thin butter slices melt gradually and spread across the surface as the cake bakes, which is how the top turns crisp instead of sandy.
The other place people go wrong is stirring the cake mix into the pumpkin filling. Don’t. The layers need to stay separate so the bottom can bake into custard while the top stays crumbly and brown. If you mix them together, you lose the contrast that makes this dessert worth making in the first place.
Pull it when the topping is deeply golden and the center gives only a slight wobble. If the middle still sloshes, it needs more time; if the top is dark before the custard sets, lay a loose piece of foil over it for the last few minutes.
What Each Ingredient Is Doing in This Pumpkin Pie Dump Cake
- Pumpkin puree — This gives you the dense pumpkin base and the classic pie texture. Use plain pumpkin puree, not pumpkin pie filling, or the dessert will come out too sweet and heavily spiced before you’ve even added the rest.
- Evaporated milk — It adds richness without watering down the filling. Regular milk works in a pinch, but the custard won’t be as plush or set as cleanly.
- Eggs — These are what turn the pumpkin mixture into a sliceable custard. If your center stays loose after baking, the usual problem is too few eggs or not enough bake time.
- Spice cake mix — This does the heavy lifting on the topping. Yellow cake mix will work, but you’ll lose some of the warm spice that makes the whole dessert taste unified.
- Butter — Use unsalted butter so you control the salt level in the custard. Slice it thin and cover the full surface; thick chunks leave dry spots behind.
The Bake That Gives You a Crisp Top and a Set Pumpkin Layer
Building the Custard Base
Whisk the pumpkin puree, evaporated milk, eggs, sugar, spices, and salt until the mixture looks completely smooth and evenly colored. Any streaks of egg white will show up in the baked custard, so take an extra minute here. Pour it into a well-greased 9×13 dish and level it gently so the topping bakes evenly. If the filling is thicker on one side, that side tends to overbake before the rest sets.
Layering the Dry Cake Mix
Sprinkle the dry cake mix across the surface in an even layer, right to the corners. Don’t press it into the pumpkin layer or stir it in; the dry mix needs room to absorb butter from the top down. If you see bare spots, the finished topping will bake up patchy and pale there. A light, even hand here gives you the best crumbly crust.
Covering Every Inch with Butter
Lay thin slices of butter over the entire top so the cake mix is covered as completely as possible. Overlap the slices slightly if you need to, especially around the edges and corners where dry spots like to hide. The butter melts into the cake mix while the cake bakes, which is what creates the crisp, golden top. If you leave gaps, those areas stay dusty and underdone.
Knowing When It’s Finished
Bake until the top is deeply golden and the pumpkin layer has set around the edges with only a slight jiggle in the center. Start checking at 45 minutes, but don’t pull it the second the top looks brown; the custard needs a little more time to firm up. Let it cool for at least 15 minutes before serving so the filling settles and the spoonfuls hold together better. It’s best warm, when the topping still has some crunch.
How to Adapt It Without Losing the Crunchy-Topped, Custardy Finish
Gluten-Free Swap
Use a gluten-free spice cake mix with the same amount of butter. The topping won’t brown quite the same way as a wheat-based mix, but you’ll still get the crisp, crumbly surface if you keep the butter coverage even.
Dairy-Free Version
Swap the evaporated milk for canned coconut milk and use a plant-based butter that melts well. You’ll pick up a faint coconut note, and the top may brown a little faster, so start checking a few minutes early.
Less Sweet, More Pumpkin Forward
Cut the granulated sugar back to 3/4 cup if you want the pumpkin to stand out more. The dessert will still set the same way, but the final flavor lands a little more like pumpkin pie than cake.
Storage and Reheating
- Refrigerator: Store covered for up to 4 days. The topping softens a bit as it sits, but the flavor holds up well.
- Freezer: It freezes well in portions. Cool completely, wrap tightly, and freeze for up to 2 months; thaw in the refrigerator before reheating.
- Reheating: Warm individual slices in the microwave in short bursts or reheat the whole dish in a 300F oven until heated through. The biggest mistake is blasting it too hot, which can turn the custard grainy and make the top tough.
Answers to the Questions Worth Asking

Pumpkin Pie Dump Cake
Ingredients
Equipment
Method
- Preheat the oven to 350°F and grease a 9x13 baking dish for easy release. You should see a smooth, lightly coated surface when you’re done greasing.
- Whisk together pumpkin puree, evaporated milk, eggs, granulated sugar, pumpkin pie spice, cinnamon, ginger, cloves, and salt until smooth and evenly combined. The mixture should look uniform with no streaks of egg or spice.
- Pour the pumpkin mixture into the greased dish and spread it into an even layer. Make sure the surface is level so the topping bakes evenly.
- Sprinkle the dry spice cake mix evenly over the pumpkin—do not stir. Keep the topping as a dry layer so it forms a crisp, golden crust.
- Cover the entire surface with thin slices of butter, leaving no gaps. You should be able to see butter across the whole top like an even blanket.
- Bake for 45-50 minutes at 350°F until the top is deeply golden and the bottom layer is set. Look for a firm custard edge around the sides and a crisp, browned cake surface.
- Cool slightly before serving so the custard thickens and slices hold their shape. Serve while warm for the best contrast between custard and crisp topping.
- Serve with whipped cream and a dusting of cinnamon. Add them right before eating so the topping stays crisp.