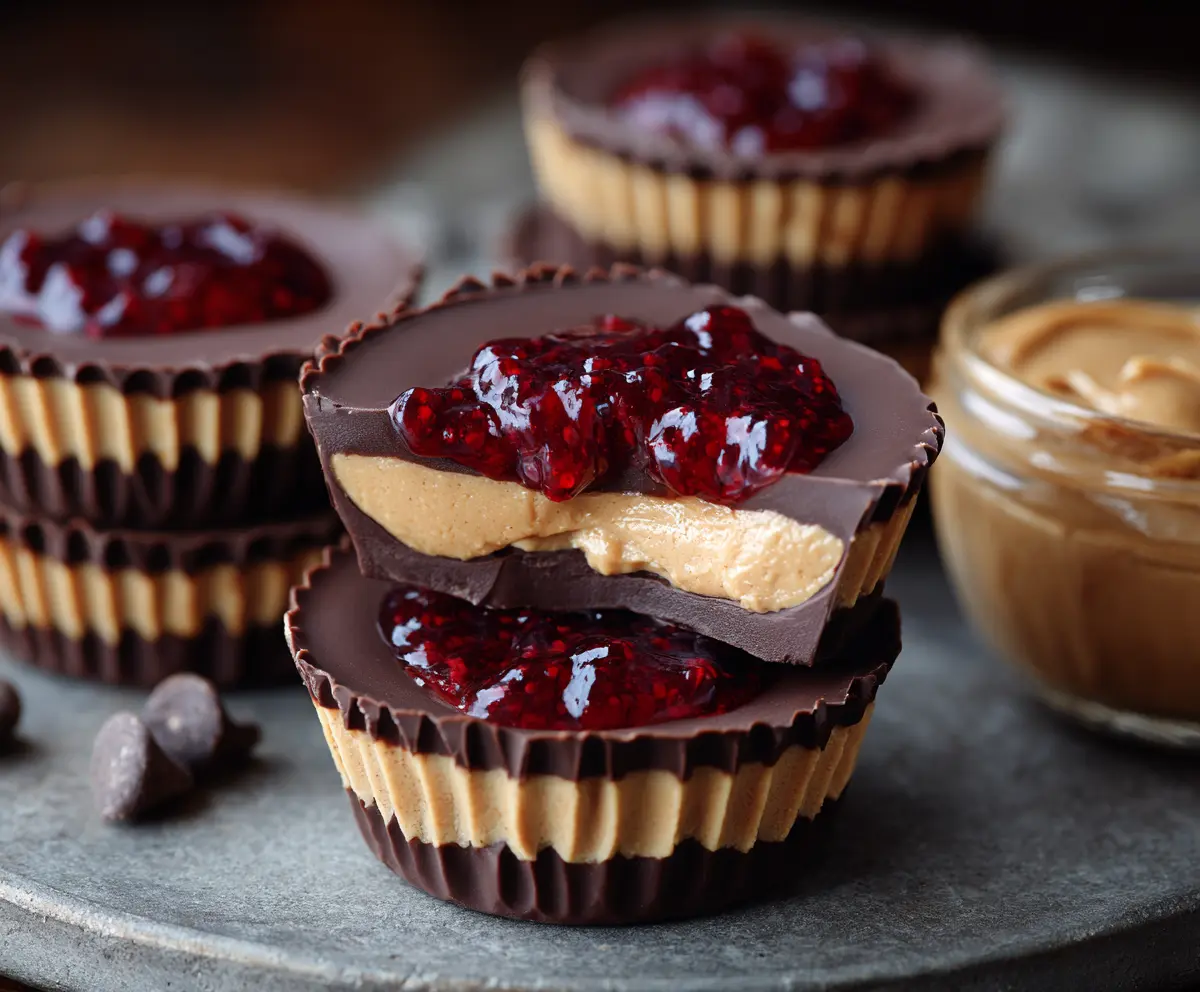
Imagine a sweet little cup filled with creamy peanut butter and a splash of fruity jelly. These Peanut Butter and Jelly Cups are fun, tasty treats that bring back childhood memories!
Making these is a breeze! I love to pop them in the fridge and then enjoy them as a quick snack. Plus, they’re a hit with both kids and adults—who can resist that classic combo? 🍇🥜
Key Ingredients & Substitutions
Creamy Peanut Butter: This is the star of the show! Use a smooth variety for easy spreading. If you’re looking for alternatives, almond or cashew butter can work too—just keep in mind they’ll change the flavor a bit!
Powdered Sugar: It helps sweeten the peanut butter and makes it creamy. If you want a healthier option, try using honey or maple syrup, but reduce the amount slightly as they are sweeter.
Unsalted Butter: This adds richness to the filling. You can replace it with coconut oil for a dairy-free option, but the texture may vary a little.
Chocolate Chips: Semi-sweet or dark chocolate gives a rich taste. Milk chocolate is a sweeter substitute, while white chocolate will add a different flavor altogether.
Fruit Jelly or Jam: I love raspberry jam for its tartness! You can also use strawberry or grape jelly, depending on your preference. For a low-sugar version, look for no-sugar-added varieties.
How Do I Get Even Chocolate Layers?
Getting the chocolate layers just right can make a big difference in the flavor and look of your cups. Here’s how to do it:
- Make sure your chocolate is fully melted and smooth before pouring. Stirring helps avoid clumps.
- When spooning chocolate into the liners, be careful to cover all the sides and bottom. Use the back of the spoon to press the chocolate up the sides a bit.
- Chill the first layer in the fridge until it’s firm but not rock hard—this usually takes around 10-15 minutes.
- When adding the final chocolate layer, gently pour it right over the peanut butter and jelly to ensure it seals properly. Don’t stir; let it settle to avoid mixing.
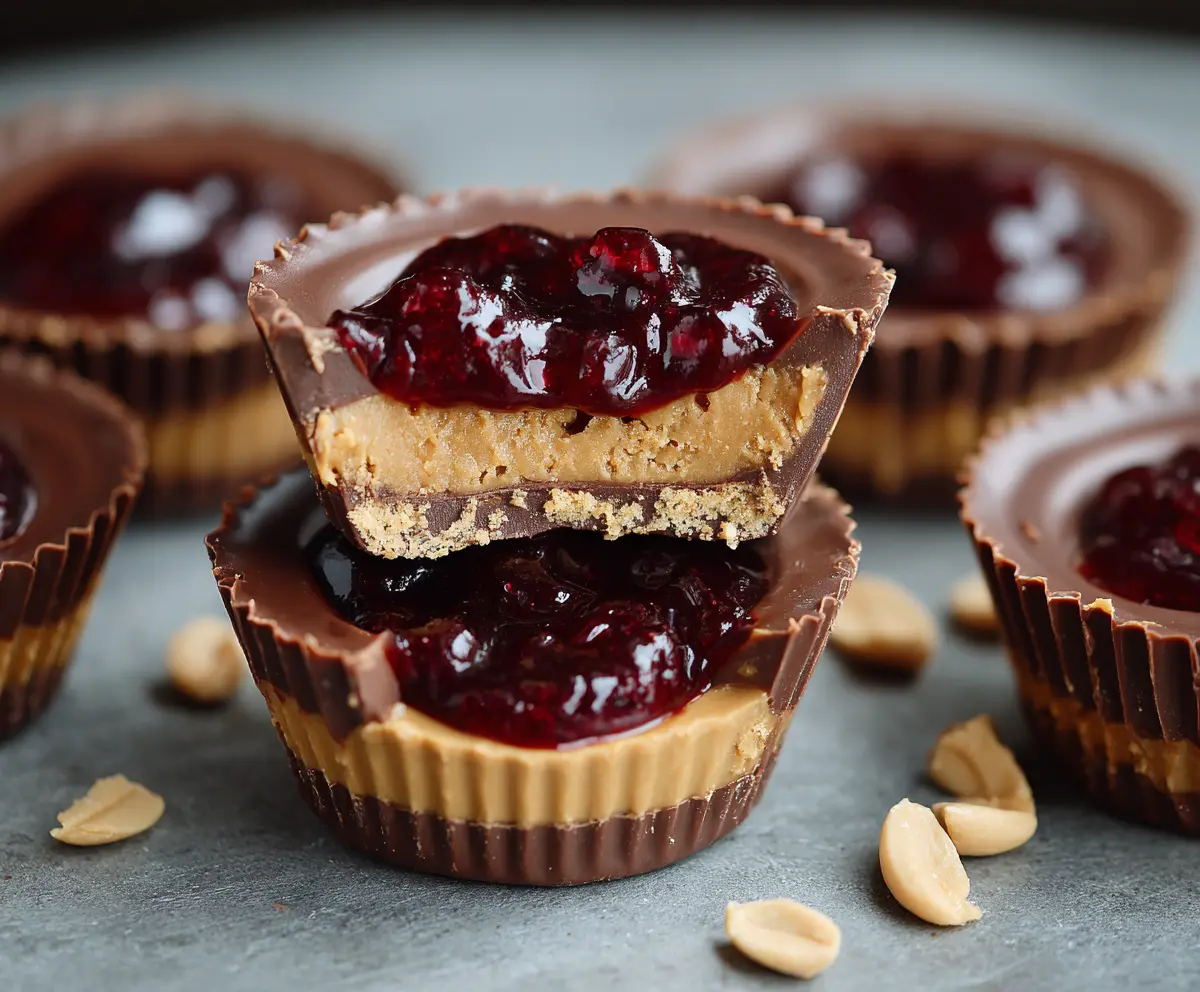
Peanut Butter And Jelly Cups
Ingredients
- 1 cup creamy peanut butter (smooth and spreadable)
- 1/4 cup powdered sugar (for sweetness and texture)
- 1/4 cup unsalted butter, softened
- 2 cups semi-sweet or dark chocolate chips
- 1/2 cup fruit jelly or jam (such as raspberry or grape)
- Optional: Sea salt flakes for garnish
How Much Time Will You Need?
This recipe takes about 15 minutes to prep and assemble, plus at least 1 hour for chilling in the refrigerator. So you can whip these up in no time and then just wait for them to set before enjoying! Perfect for a sweet treat anytime!
Step-by-Step Instructions
1. Prepare the Muffin Tin
Start by lining a muffin tin with paper cupcake liners. This will make it easy to pop the cups out once they are set.
2. Melt the Chocolate
Melt 1 cup of chocolate chips in a microwave-safe bowl. Heat them in 30-second intervals, stirring well between each interval until the chocolate is completely smooth.
3. Create the Chocolate Base
Scoop about 1 tablespoon of the melted chocolate into the bottom of each cupcake liner. Use the back of a spoon to spread it evenly along the bottom and slightly up the sides. Place the muffin tin in the fridge to set for about 10 minutes.
4. Make the Peanut Butter Mixture
While the chocolate layer is setting, combine the creamy peanut butter, powdered sugar, and softened butter in a medium bowl. Mix well until everything is smooth and thoroughly combined.
5. Add the Peanut Butter Layer
Once the chocolate base has set, scoop about 1 tablespoon of the peanut butter mixture on top of the chocolate layer in each cup. Spread it out evenly.
6. Add the Jelly
Next, place a small dollop (about 1 teaspoon) of your favorite jelly on top of the peanut butter layer in each cup.
7. Seal with Chocolate
Now melt the remaining 1 cup of chocolate chips and pour it over each cup, covering the peanut butter and jelly layers completely. This seals them in.
8. Chill to Set
Refrigerate the cups for at least 1 hour, or until the chocolate is completely hardened.
9. Finishing Touch
If desired, sprinkle a pinch of sea salt flakes on top of each cup before you put them in the fridge. This adds a delicious contrast to the sweetness!
10. Serve and Enjoy!
Once they are set, carefully remove the cups from the liners. Serve them chilled and enjoy your delightful homemade Peanut Butter and Jelly Cups! Perfect for sharing—or keeping all to yourself!
Can I Use Different Nut Butters?
Absolutely! You can substitute creamy peanut butter with almond or cashew butter for a unique twist. Just keep in mind that the flavor will change a bit according to the nut butter you choose!
What If I Don’t Have Cupcake Liners?
No problem! You can grease the muffin tin well with cooking spray or butter instead of using liners. Just make sure to let the cups cool completely before trying to remove them to prevent sticking.
How Do I Store Leftovers?
Store any leftovers in an airtight container in the refrigerator for up to 5 days. Enjoy them chilled, or let them sit at room temperature for a few minutes for a softer bite!
Can I Make These Vegan?
Yes! To make these cups vegan, use dairy-free chocolate chips and substitute the butter with coconut oil or a vegan butter alternative. Ensure your jelly is also vegan-friendly!