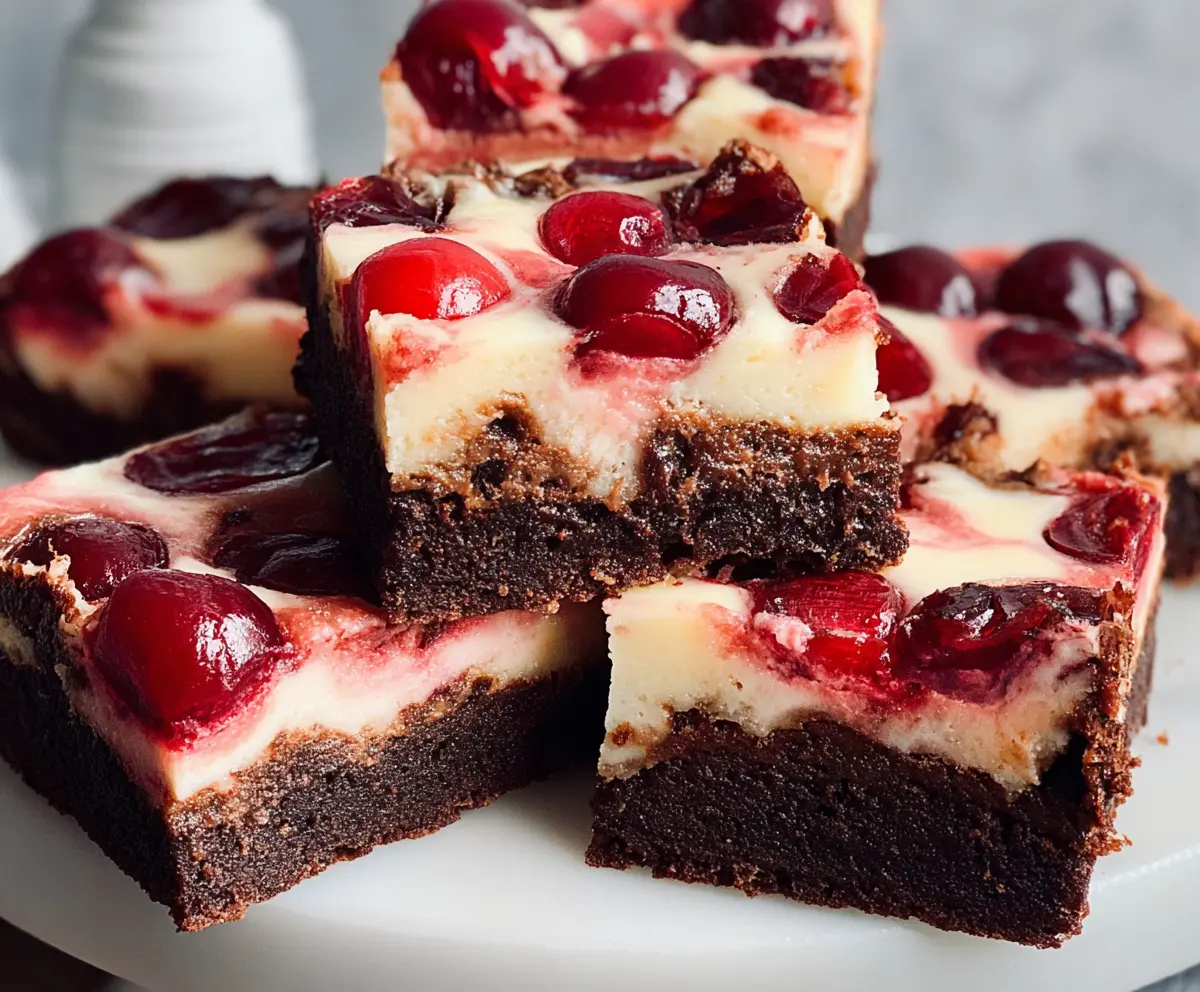
Cherry cheesecake brownies are a delightful treat that combines rich chocolate brownies with a creamy cheesecake layer and sweet cherries on top. Each bite is a tasty mix of flavors!
I love how easy they are to make! Just whip up the brownie base, add the cheesecake, and throw on some cherries. It’s like a party in your mouth—who wouldn’t want that? 🎉
Key Ingredients & Substitutions
Unsalted Butter: This adds richness to the brownie layer. If you’re looking for a non-dairy option, you can use coconut oil or a vegan butter substitute. I often like to stick with unsalted butter, as it gives me better control over the saltiness of the dish.
Granulated Sugar: This provides sweetness to both the brownie and cheesecake layers. For a healthier option, you could use coconut sugar or even a sugar substitute like agave if you prefer. However, I recommend sticking with regular sugar for the best texture.
Cocoa Powder: Unsweetened cocoa powder is essential for that rich chocolate flavor. If you’re out, you could use Dutch-processed cocoa, but just remember it might alter the taste slightly. I find that sticking to unsweetened gives the brownies a deeper chocolate flavor.
Cream Cheese: The star of the cheesecake layer! If you want a lighter version, you can try Neufchâtel cheese, which has less fat. For a dairy-free option, look for vegan cream cheese made from nuts.
Cherries: Fresh cherries are wonderful, but if it’s off-season, canned cherries work just fine! Just be sure to drain them well. I’ve often used frozen cherries; if you do, let them thaw and drain to avoid extra moisture.
How Do I Get the Perfect Cheesecake Layer?
Creating a smooth cheesecake layer can make a big difference in your brownies! Here are some tips:
- Start with softened cream cheese. This helps achieve a creamy texture without lumps. Take it out of the fridge an hour before you begin baking.
- Beat the cream cheese first until it’s very smooth. Then, slowly add the sugar and mix until combined, being careful not to overmix.
- Always add the egg last and mix just until it’s incorporated. Overmixing can add air, which isn’t ideal for a dense cheesecake layer.
- When pouring the cheesecake over the brownie batter, use a spatula to gently spread it, ensuring it covers the brownie evenly. This helps achieve a lovely layer.
With these tips, you’ll be on your way to making a perfectly rich and creamy cheesecake layer in your brownies!
Cherry Cheesecake Brownies
Ingredients You’ll Need:
For the Brownie Layer:
- 1/2 cup (115g) unsalted butter, melted
- 1 cup (200g) granulated sugar
- 2 large eggs
- 1 teaspoon vanilla extract
- 1/3 cup (35g) unsweetened cocoa powder
- 1/2 cup (65g) all-purpose flour
- 1/4 teaspoon salt
- 1/4 teaspoon baking powder
For the Cheesecake Layer:
- 8 oz (225g) cream cheese, softened
- 1/4 cup (50g) granulated sugar
- 1 large egg
- 1 teaspoon vanilla extract
For the Cherry Topping:
- 1 to 1 1/2 cups fresh or canned pitted cherries, halved (if canned, drained)
How Much Time Will You Need?
This recipe takes about 20 minutes for preparation and another 35-40 minutes for baking. After baking, let your brownies cool for at least 2 hours in the refrigerator to set the layers perfectly. So, plan for around 3 hours in total from start to finish, including chilling time!
Step-by-Step Instructions:
1. Preheat the Oven:
Start by preheating your oven to 350°F (175°C). Prepare an 8×8 inch baking pan by greasing it or lining it with parchment paper. Leave a little overhang on the sides; this will help you lift the brownies out later!
2. Make the Brownie Batter:
In a medium bowl, mix together the melted butter and granulated sugar. Stir well until combined and smooth. Then, add the eggs and vanilla extract, mixing until everything is blended.
3. Combine Dry Ingredients:
In a separate bowl, whisk together the cocoa powder, flour, salt, and baking powder. Gradually add this dry mixture to the wet ingredients, folding gently until just mixed. Be careful not to overmix; it’s okay if there are a few small lumps!
4. Layer the Brownie Batter:
Pour the brownie batter into your prepared pan and spread it into an even layer using a spatula.
5. Prepare the Cheesecake Layer:
In a clean bowl, beat the softened cream cheese using a mixer until it’s nice and smooth. Add in the sugar, egg, and vanilla extract, mixing until everything is well incorporated and creamy.
6. Assemble the Layers:
Pour the cheesecake mixture over the brownie batter, spreading it evenly. Next, take the halved cherries and distribute them over the cheesecake layer. Press them in slightly to ensure they stick!
7. Swirl It Up:
Using a butter knife or a skewer, gently swirl the cheesecake layer into the brownie batter in a few places. This will create a beautiful marbled effect.
8. Bake:
Place the pan in your preheated oven and bake for 35-40 minutes. The cheesecake layer should be set, and the edges will appear firm while the center can still have a slight jiggle.
9. Cool and Chill:
Once done baking, remove your brownies from the oven and let them cool completely in the pan on a wire rack. After they are cool, pop them in the refrigerator for at least 2 hours to help them set.
10. Serve and Enjoy:
Once chilled, lift the brownies out of the pan using the parchment paper overhang. Cut into squares and serve them chilled or at room temperature. Enjoy the rich fudgy chocolate, creamy cheesecake, and sweet cherries!
Enjoy your luscious cherry cheesecake brownies — a perfect balance of flavors that everyone will love!
Can I Use Other Fruits Instead of Cherries?
Absolutely! Feel free to substitute cherries with other fruits like blueberries, raspberries, or even strawberries. Just make sure to adjust the amount based on the fruit size. Fresh or frozen fruits can work well; just drain any excess moisture if using frozen.
How Do I Store Leftovers?
Store any leftover brownies in an airtight container in the refrigerator, where they’ll keep well for up to 3 days. Just bring them to room temperature before serving or enjoy them straight from the fridge for a refreshing treat!
Can I Use a Different Size Pan?
Yes! If you use a larger pan (like a 9×13 inch), your brownies might bake more quickly, so keep an eye on them and check for doneness a few minutes earlier. Conversely, if you use a smaller pan, the brownies will be thicker and may need additional baking time.
What’s the Best Way to Cut Brownies Cleanly?
The best way to cut brownies is to use a sharp knife dipped in warm water, wiping it clean between cuts. This prevents the edges from crumbling and helps achieve neat squares. Alternatively, you can use a plastic knife for a smoother cut!