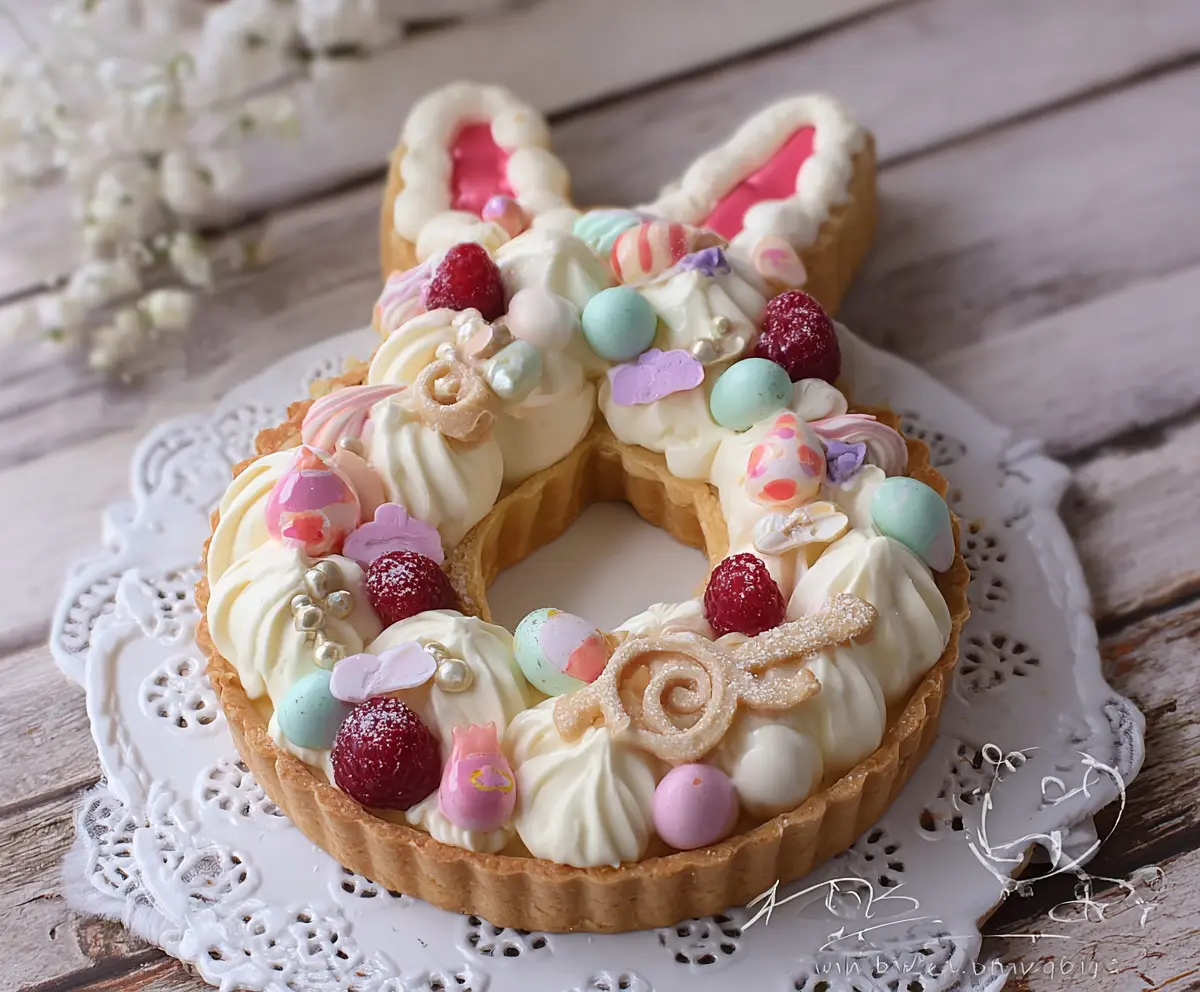
This Easter Bunny Cream Tart is a fun and sweet treat perfect for celebrating spring! With a creamy filling and a buttery crust, it’s both cute and delicious.
The best part? You get to decorate it like a bunny, so channel your inner artist! I love serving this with fresh berries—makes it extra special and even tastier!
Key Ingredients & Substitutions
All-Purpose Flour: This is the base for your tart shell. While all-purpose flour works great, you can also use gluten-free flour blends for a gluten-free version. Just ensure they have a binding agent.
Butter: Unsalted butter is best for controlling the saltiness. In a pinch, you can substitute with cold coconut oil or vegan butter for a dairy-free option, but the flavor may change slightly.
Heavy Cream: Key for the creamy filling, heavy cream gives a luscious texture. For a lighter version, try using half-and-half or coconut cream for a dairy-free option, though the texture will be different.
Gelatin: Gelatin helps stabilize the cream filling. If you’re vegetarian or vegan, look for agar-agar or a plant-based gelatin substitute. Just adjust the amount as needed.
Decorations: You can get creative! If you can’t find pastel meringue kisses, use mini marshmallows or whipped cream. Fresh fruits like strawberries or blueberries work well as substitutes for raspberries, and nuts could replace the edible pearls.
What’s the Best Way to Prepare a Tart Shell?
Making a tart shell can seem tricky, but it’s about handling the dough gently. Here are steps to ensure the perfect tart shell:
- Chill the butter and water to keep the dough cool, preventing it from becoming tough.
- Pulse the ingredients just until they resemble crumbs; overmixing can result in a dense shell.
- Remember to press the dough evenly into the pan, especially around the edges—this helps it hold its shape while baking.
- Baking with weights prevents the dough from puffing up. Don’t skip this step!
- Lastly, let the shell cool completely. This ensures no soggy bottom once you add the filling.
How to Make Easter Bunny Cream Tart
Ingredients You’ll Need:
For The Tart Shell:
- 1 1/4 cups (160g) all-purpose flour
- 1/2 cup (115g) unsalted butter, cold and cubed
- 1/4 cup (50g) granulated sugar
- 1 large egg yolk
- 2-3 tbsp cold water
For The Cream Filling:
- 1 cup (240ml) heavy cream
- 1/4 cup (50g) granulated sugar
- 1 tsp vanilla extract
- 1 tsp gelatin powder or 1 sheet gelatin (optional, for stability)
- 1 tbsp cold water (if using gelatin powder)
For Decorations:
- Fresh raspberries (about 1/2 cup)
- Edible pastel-colored meringue kisses or mini meringue shapes
- Small edible pearls or sugar beads
- Pastel-colored candy eggs (sugar-coated chocolate eggs or similar)
- Pink and white icing or colored jelly for the inner ears
- Powdered sugar for dusting
- Edible glitter or dust (optional) for sparkle
- Colored fondant or sugar decorations in Easter shapes (optional)
How Much Time Will You Need?
This delightful Easter Bunny Cream Tart takes about 20 minutes to prepare, and you’ll need about 1 hour and 30 minutes for chilling and baking. Total time is around 2 hours. This includes making the tart shell, preparing the cream filling, and decorating your tart. A bit of patience pays off for a beautiful dessert!
Step-by-Step Instructions:
1. Prepare the Tart Shell:
Start by pulsing the flour, granulated sugar, and cold butter in a food processor until you see a mixture that looks like coarse crumbs. Next, add in the egg yolk and pulse just to combine. Gradually add cold water, one tablespoon at a time, pulsing until the dough starts to hold together. Once it’s ready, turn the dough onto a clean surface, shape it into a disk, wrap it in plastic wrap, and pop it into the fridge for 30 minutes. Preheat your oven to 350°F (175°C) during this time.
After chilling, roll out the dough to about a 1/4 inch thickness. If you have a bunny-shaped tart pan, great! If not, you can use a template to cut out the shape, including the ears and any holes needed. Gently transfer the dough to your tart pan and prick the bottom with a fork. Line the crust with parchment paper and fill it with pie weights or dried beans to prevent it from puffing up. Bake for 15 minutes, then remove the weights and parchment and bake for another 10-12 minutes until golden brown. Let your tart shell cool completely on a wire rack.
2. Prepare the Cream Filling:
To make the cream filling, sprinkle gelatin powder over cold water in a small bowl and let it bloom for about 5 minutes. If you’re skipping the gelatin, you can move on to the next step. If you’re using it, gently heat the bloomed gelatin until it’s dissolved and then let it cool slightly. In a separate large bowl, whisk together the heavy cream, sugar, and vanilla until soft peaks form. Gradually add the dissolved gelatin while continuing to beat until stiff peaks form, then place it in the fridge until you’re ready to pipe the filling.
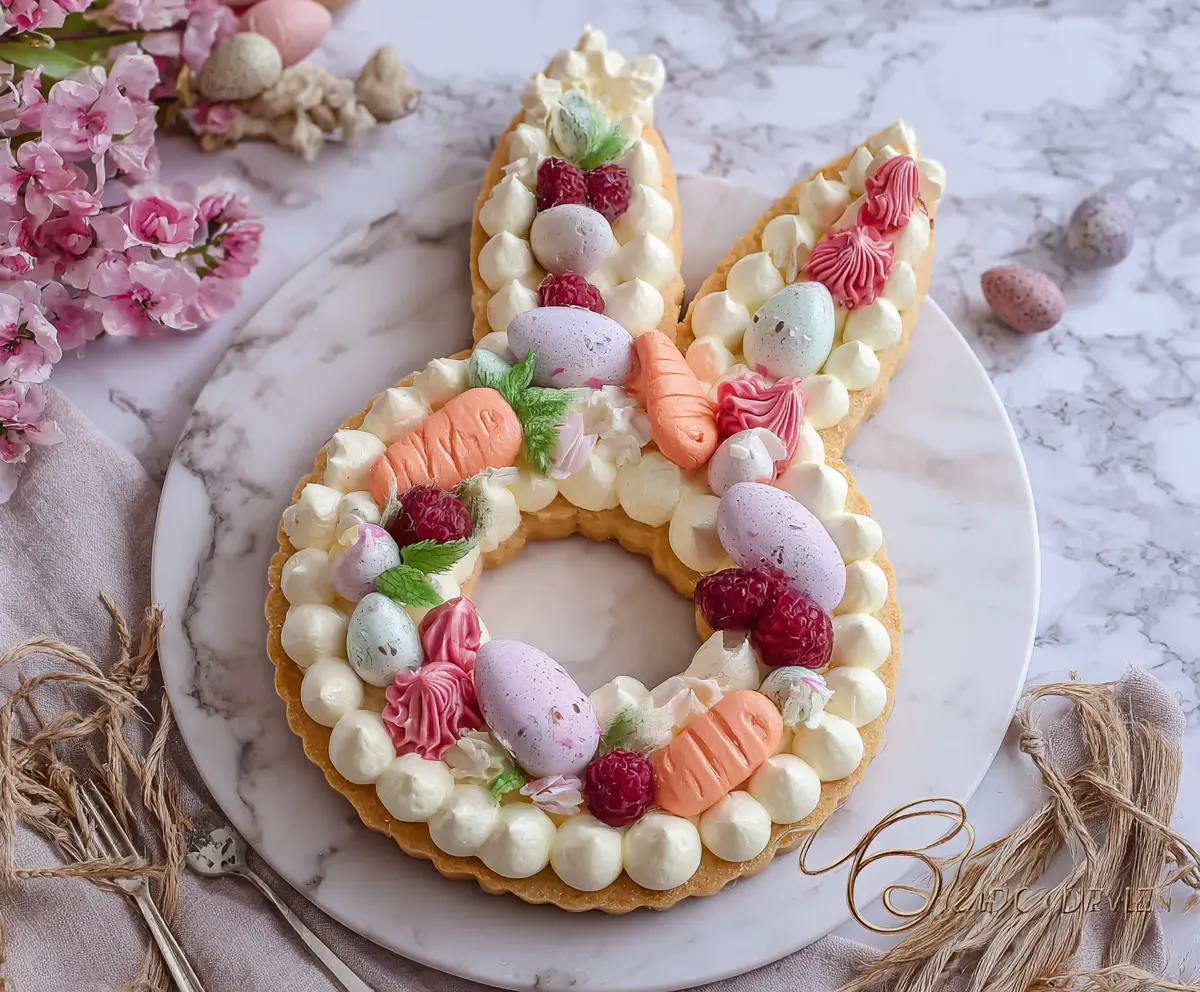
3. Decorate the Tart:
Once your tart shell is cool, fill a piping bag fitted with a large star or round tip with the whipped cream. Pipe swirls or dollops evenly around the inside of the tart shell, including the ear sections. Use pink icing or jelly to spread on the inner ear sections to give the bunny its cute ears. Now the fun part! Decorate with fresh raspberries, pastel meringue kisses, candy eggs, and edible pearls on top of the cream. If you like, you can add fondant or sugar decorations in cute Easter shapes. For an extra festive touch, dust lightly with powdered sugar and sprinkle with optional edible glitter.
4. Serve:
Finally, chill the tart for at least 1 hour before serving to let the cream firm up a bit. When it’s ready, slice it up and enjoy your charming Easter Bunny Cream Tart with family and friends. It’s sure to be a hit!
This recipe is perfect for Easter celebrations, offering a beautiful combination of a crisp tart shell, fluffy vanilla cream, and delightful decorations for a festive treat!
Can I Use a Different Type of Sweetener?
Absolutely! You can substitute granulated sugar with powdered sugar or a sugar substitute like Stevia or erythritol for a lower-calorie option. Just keep in mind that the sweetness level may vary, so adjust to your taste.
How Long Can I Store Leftovers?
Leftover tarts can be stored in the refrigerator in an airtight container for up to 3 days. However, for the best texture and flavor, try to consume it within the first day or two after making it.
Can I Freeze the Tart?
While it’s best enjoyed fresh, you can freeze the tart shell before filling it. Wrap it tightly in plastic wrap and aluminum foil before freezing for up to a month. When ready to use, thaw it in the fridge overnight before filling and decorating.
What if I Don’t Have Gelatin?
No problem! If you’re looking for a vegetarian or vegan alternative, you can use agar-agar or a store-bought setting agent suitable for your dietary preference. Just follow the package instructions for the best results.