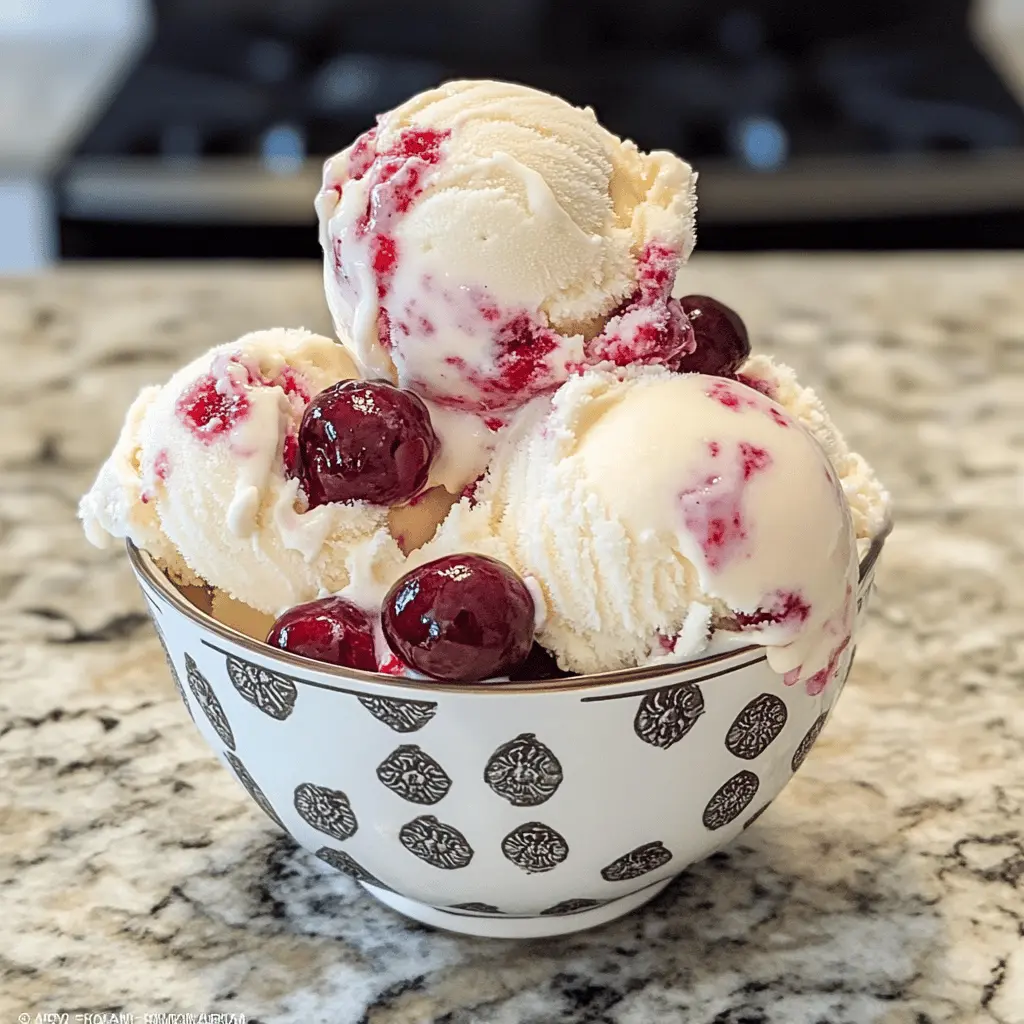
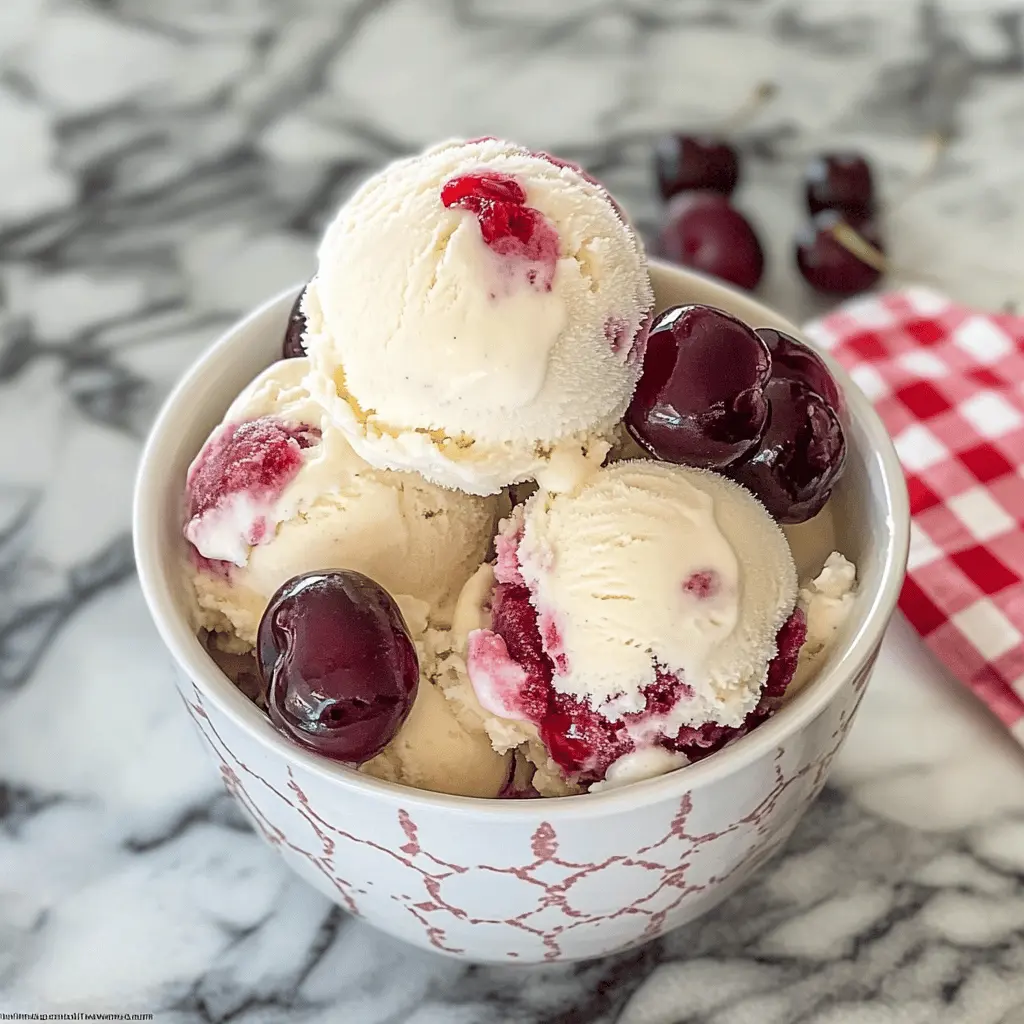
This easy homemade cherry vanilla ice cream is creamy and sweet, packed with juicy cherries and vanilla goodness! It’s the perfect treat for hot days.
Making this delight is a breeze! Just mix, freeze, and scoop. I love how the cherries pop with flavor. Serve it in a bowl or a cone—either way, it’s a hit!
Key Ingredients & Substitutions
Heavy Cream: This is crucial for a rich and creamy texture. If you want a lighter version, try using half-and-half. It won’t be as creamy but will still taste great. I prefer full-fat cream for the best flavor!
Whole Milk: You can substitute with 2% or even almond milk for a dairy-free option. Just keep in mind that using lower-fat milk will lead to a less creamy ice cream.
Granulated Sugar: Regular sugar works best, but honey or maple syrup can be used for a natural sweetness. If you use a liquid sweetener, you might need to adjust the other liquids slightly.
Fresh or Frozen Cherries: Fresh cherries are delicious, but if they’re out of season, frozen cherries work just fine! Be sure to drain them well to keep your mixture from becoming too watery. I love using ripe, juicy cherries for the best flavor!
Cherry Preserves: This is optional, but it adds a nice swirl and boosts the cherry flavor. If you don’t have any, you can skip it or use another jam. A raspberry jam could also be nice!
How Do You Get the Right Consistency When Churning Ice Cream?
The key to creamy homemade ice cream is in the churning process! Follow these steps to achieve the right texture:
- Make sure your ice cream maker bowl is pre-frozen if it’s a freezer bowl model. This helps it freeze properly.
- Churn for about 20-25 minutes until it reaches soft-serve consistency. Don’t rush this process!
- During the last few minutes of churning, add your chopped cherries to keep them fresh and evenly mixed.
After churning, let it harden in the freezer for at least 4 hours. For the best scoop, allow it to sit at room temperature for a few minutes before serving. Enjoy your ice cream in bowls or cones!
Easy Homemade Cherry Vanilla Ice Cream
Ingredients You’ll Need:
- 2 cups heavy cream
- 1 cup whole milk
- 3/4 cup granulated sugar
- 1 tablespoon pure vanilla extract
- 1 1/2 cups fresh or frozen cherries, pitted and chopped (if frozen, thaw and drain excess liquid)
- 2 tablespoons cherry preserves or jam (optional, for extra cherry flavor and swirl)
How Much Time Will You Need?
This recipe takes about 10 minutes to prepare, plus 20-25 minutes for churning and at least 4 hours for freezing. So, in total, you’ll spend about 4 hours and 35 minutes to have this delicious cherry vanilla ice cream ready to enjoy! The wait is worth it, I promise!
Step-by-Step Instructions:
1. Prepare the Ice Cream Base:
In a large mixing bowl, whisk together the heavy cream, whole milk, granulated sugar, and vanilla extract until the sugar is fully dissolved. This creamy base is what makes the ice cream so delicious!
2. Add Cherry Flavor:
If you want a pretty cherry swirl, gently mix the cherry preserves into the base. Swirl it in without fully combining, so you can have delightful streaks of cherry throughout your ice cream.
3. Churn the Mixture:
Pour the ice cream mixture into your ice cream maker. Churn according to the manufacturer’s instructions, usually about 20-25 minutes, until the ice cream reaches a soft-serve consistency. The ice cream should be thick and creamy!
4. Mix in the Cherries:
During the last 5 minutes of churning, add the chopped cherries to your ice cream. This will ensure they are evenly distributed throughout your cherry vanilla masterpiece!
5. Freeze the Ice Cream:
Transfer the churned ice cream to a freezer-safe container. Use a spatula to gently fold the cherries, creating even more lovely swirls. Cover and freeze for at least 4 hours or until it is nice and firm.
6. Serve and Enjoy:
When you’re ready to enjoy your homemade cherry vanilla ice cream, let it sit at room temperature for about 5 minutes to soften slightly for easier scooping. Then, scoop into bowls or cones, and dig in!
Enjoy your creamy homemade cherry vanilla ice cream packed with beautiful cherry swirls and fresh flavor in every bite!
FAQ for Easy Homemade Cherry Vanilla Ice Cream
Can I Use Low-Fat Dairy Products for This Recipe?
Yes, you can substitute with lower-fat options, like half-and-half instead of heavy cream or 2% milk instead of whole milk. However, keep in mind that the ice cream may not be as creamy and rich as it would be with full-fat dairy.
What If I Don’t Have an Ice Cream Maker?
No problem! You can make ice cream without a machine by pouring the mixture into a shallow dish and freezing it. Stir every 30 minutes for about 2-3 hours until it reaches your desired consistency. It won’t be as homogenous but will still be delicious!
How Do I Store Leftover Ice Cream?
Place any leftover ice cream in an airtight container in the freezer. It can last up to 2 weeks, but for optimal texture, try to enjoy it fresh within a week! Just let it soften a bit at room temperature before scooping.
Can I Add Other Mix-Ins?
Absolutely! Feel free to get creative. Adding chocolate chips, crushed nuts, or other fruits during the last few minutes of churning can make for a delicious twist. Just be careful not to overwhelm the base with too many mix-ins!