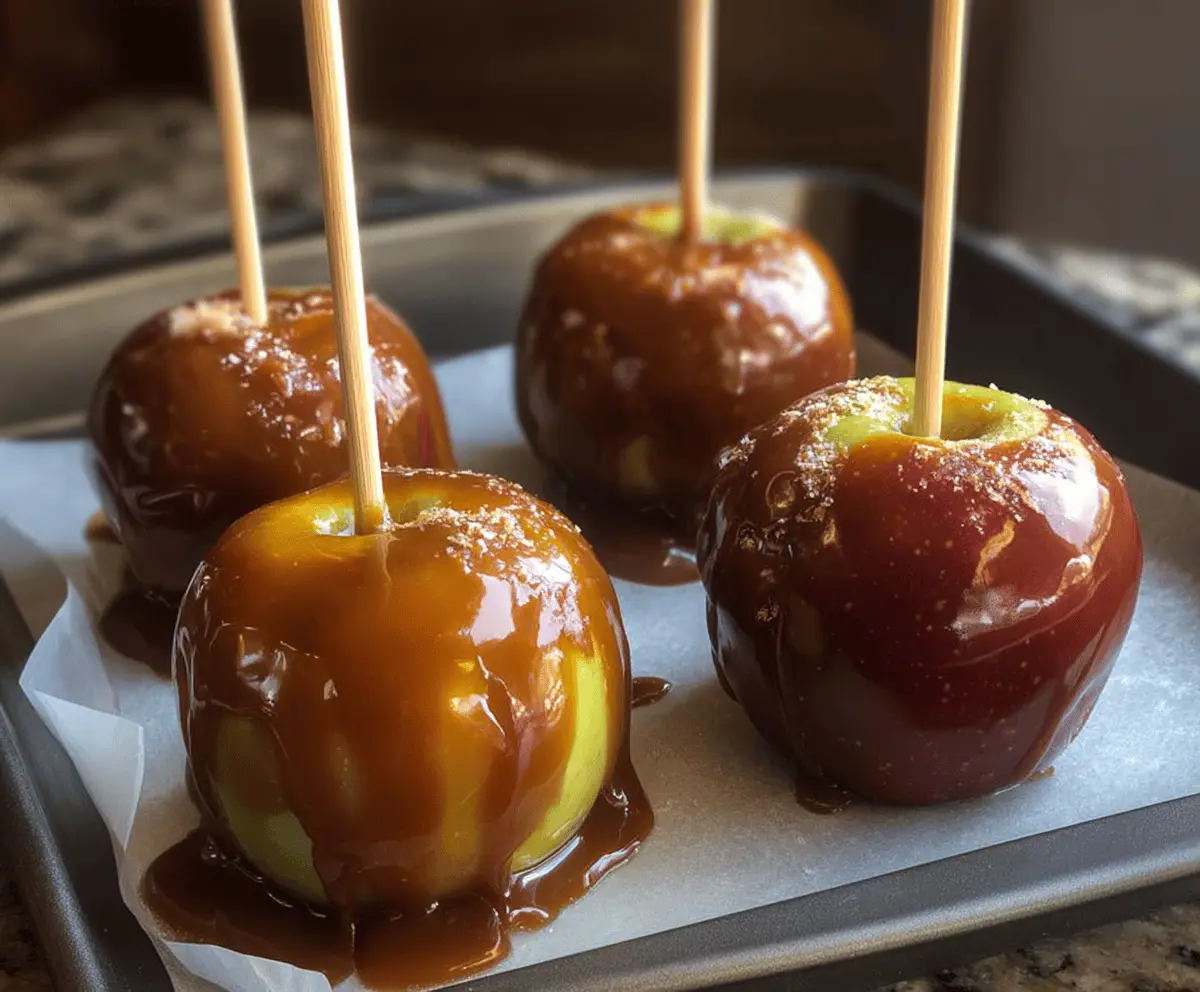
These gluten-free caramel apples are a fun and tasty treat! Crisp apples are coated in rich, gooey caramel, making them a sweet delight. They’re perfect for fall or any time you’re craving something special!
Honestly, who can resist the combo of crunchy apples and sticky caramel? Plus, they’re super easy to make. Just grab some apples, dip them in melted caramel, and enjoy this sticky goodness!
Key Ingredients & Substitutions
Apples: Using tart apples like Granny Smith gives a nice balance to the sweetness of the caramel. You can also try Fuji or Honeycrisp for a sweeter twist!
Brown Sugar: Both light and dark brown sugar work here, but dark adds a deeper flavor. If you’re out of brown sugar, use white sugar mixed with molasses (1 cup sugar + 1 tablespoon molasses) as a substitute.
Sweetened Condensed Milk: Make sure it’s labeled gluten-free. If you prefer a dairy-free option, look for coconut-based condensed milk. It will add a unique flavor!
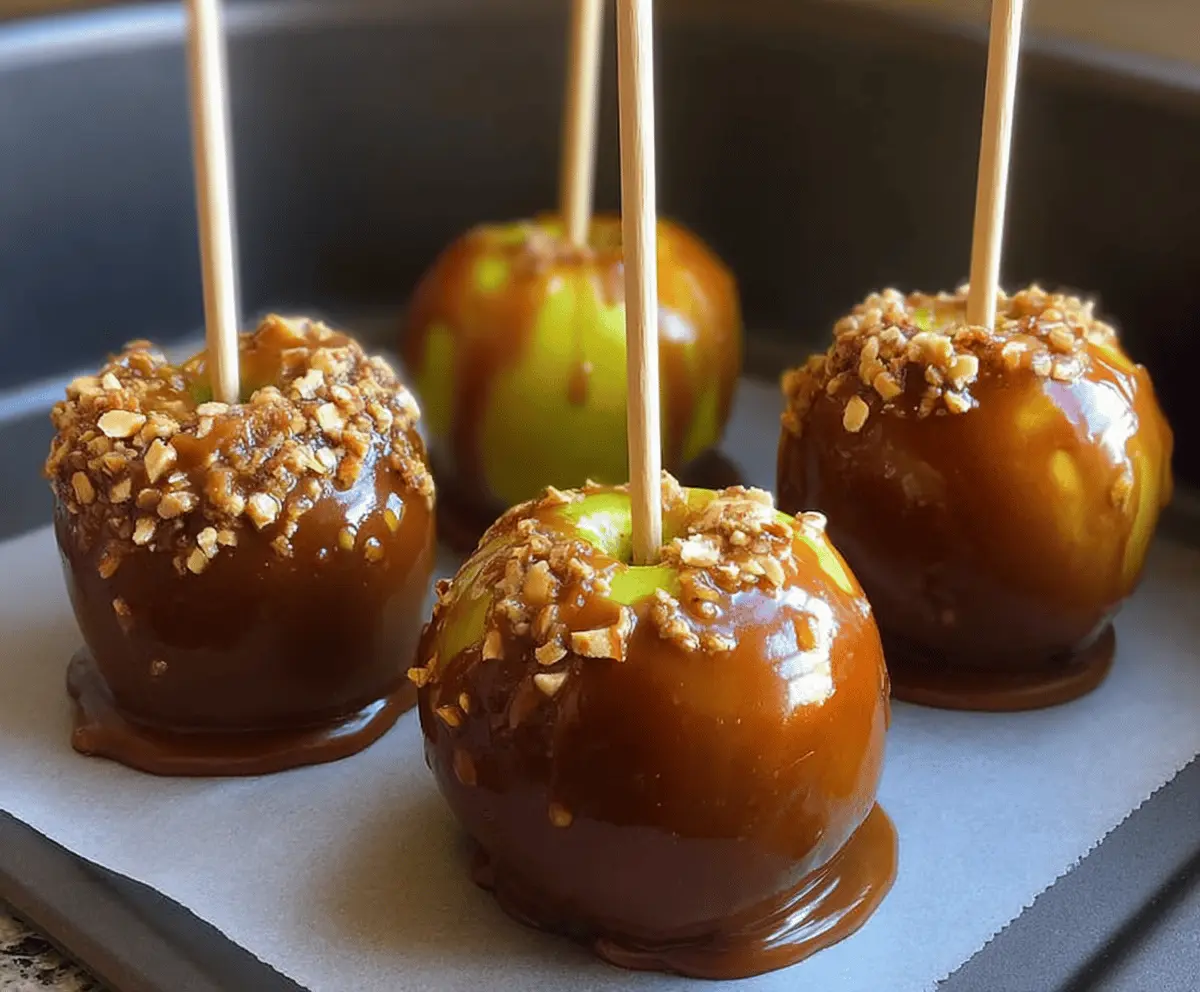
Nuts: Chopped peanuts or pecans can add a fun crunch. For nut allergies, consider using crushed gluten-free cookies for a little added texture instead.
How Do I Get the Caramel Perfectly Sticky?
The key to achieving that perfect sticky caramel is to monitor the cooking temperature closely. A candy thermometer is super helpful here. Here are a few tips:
- Cook the caramel over medium heat, stirring constantly to avoid burning.
- Wait until the mixture reaches 245°F. A precise temperature ensures that the caramel will harden properly when set.
- Once off the heat, work quickly to dip each apple while the caramel is still warm and pliable.
Don’t worry if it starts to thicken—I find that a quick reheat over low flame helps keep it dip-ready!
Gluten Free Caramel Apples
Ingredients You’ll Need:
- 4 medium tart apples (Granny Smith or similar)
- 1 cup packed brown sugar (light or dark)
- 4 tablespoons unsalted butter
- 1/2 cup sweetened condensed milk (ensure gluten free)
- 1/4 cup light corn syrup
- 1/2 teaspoon vanilla extract
- 1/4 teaspoon sea salt
- 1/2 cup chopped nuts (optional, ensure gluten free)
- Wooden sticks or skewers
How Much Time Will You Need?
This recipe takes about 15 minutes of prep time, plus an additional hour for the caramel to cool and harden on the apples. Just a little time and you’ll have delicious treats ready to enjoy!
Step-by-Step Instructions:
1. Prepare the Apples:
Start by washing and thoroughly drying your apples. Removing any wax or residue helps the caramel stick better. Take off the stems and carefully insert a wooden stick into the top of each apple, ensuring it’s secure.
2. Set Up Your Workspace:
Line a baking sheet with parchment paper or a silicone mat. This makes clean-up super easy and prevents the apples from sticking as they cool.
3. Make the Caramel:
In a medium heavy-bottomed saucepan, mix together the brown sugar, butter, sweetened condensed milk, and corn syrup. Over medium heat, constantly stir until the mixture comes to a gentle boil. It’s important to keep stirring to avoid burning.
4. Cook to Perfection:
Continue boiling the caramel, stirring frequently, until it reaches 245°F on a candy thermometer. This is the soft-ball stage, and it ensures that your caramel will be thick and firm when it cools.
5. Add Flavor:
Once you’ve reached the desired temperature, take the pan off the heat. Stir in the vanilla extract and sea salt to give the caramel a delicious flavor boost.
6. Coat the Apples:
Work quickly! Dip each apple into the hot caramel, turning it to coat evenly. If you love some extra crunch, now is the time to roll or sprinkle chopped nuts over the caramel.
7. Cool the Apples:
Place the caramel-coated apples on your lined baking sheet. Let them cool and set for at least 1 hour. This gives the caramel time to harden properly.
8. Enjoy Your Treats:
Once the caramel is set, you can enjoy your delightful gluten-free caramel apples! Keep any leftovers in the refrigerator for up to 3 days, though they may not last that long because they’re so tasty!
These caramel apples are a classic treat that everyone will love, and they’re gluten-free too! Enjoy making this sweet and fun dessert!
Can I Use Different Types of Apples?
Absolutely! While Granny Smith apples are ideal for their tartness, you can also use Fuji or Honeycrisp for a sweeter version. Just make sure the apples are firm to hold up to dipping!
How Do I Store Leftover Caramel Apples?
Store any uneaten caramel apples in the refrigerator, wrapped in plastic wrap or in an airtight container, for up to 3 days. Keep in mind that the caramel may lose some stickiness over time but will still be delicious!
What If My Caramel Is Too Thick?
If your caramel thickens too quickly or becomes too hard to dip, simply reheat it gently over low heat. Stir continuously until it loosens up enough for dipping again!
Can I Make These Caramel Apples Dairy-Free?
Yes! You can substitute the unsalted butter with dairy-free margarine or coconut oil, and use a dairy-free sweetened condensed milk alternative. Just check the labels to ensure all ingredients are gluten-free as well!