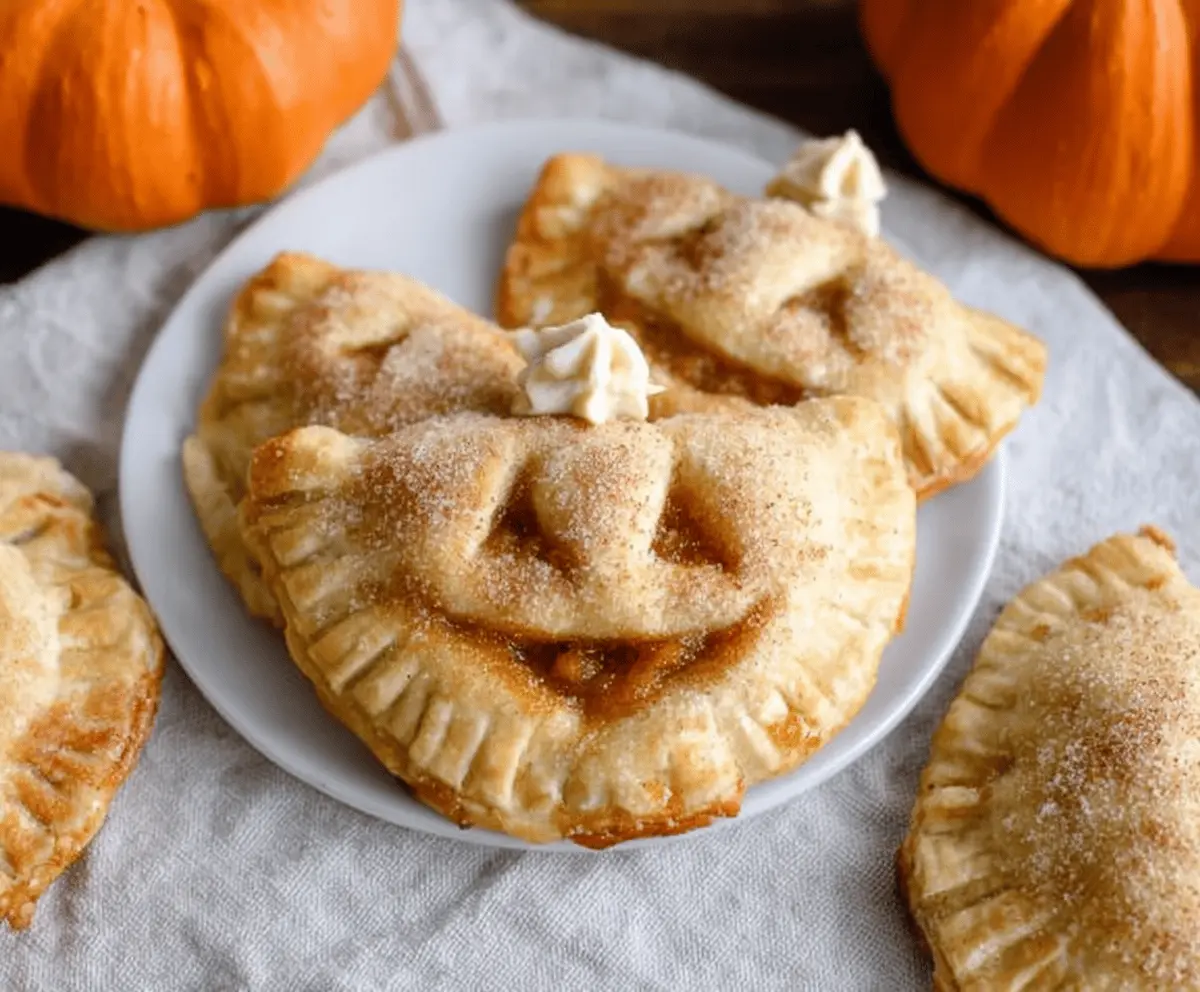
These Mini Pumpkin Hand Pies are like little autumn hugs! With a flaky crust and sweet pumpkin filling, they’re perfect for snacking or dessert. Plus, they’re easy to hold!
When I make these, I can’t resist having a few fresh out of the oven. They smell like fall! 🎃 Pair them with a scoop of ice cream and you’re in for a treat!
Key Ingredients & Substitutions
Pie Crust: I like using refrigerated pie crusts for convenience. If you prefer homemade, go for a simple pie dough. For a gluten-free option, try almond or oat flour crusts!
Pumpkin Puree: Canned pumpkin makes this recipe quick and easy. If you have fresh pumpkin, roast it, then puree it. Just make sure it’s smooth without added spices or sugar.
Brown Sugar: This adds richness to the filling. You can substitute it with white sugar mixed with a little molasses if you run out.
Spices: Ground spices like cinnamon, nutmeg, ginger, and cloves bring warmth. Feel free to play around with the amounts depending on your spice preference. Pumpkin pie spice works well too!
Egg for Wash: The egg wash gives a lovely shine to the crust. If you want a vegan alternative, use non-dairy milk or simply omit it.
How Do You Seal Mini Hand Pies Without Them Leaking?
Sealing the hand pies properly is key to keeping the filling inside during baking. Here’s how to get a good seal:
- After adding the filling, brush the edges with egg wash to help them stick together.
- Press down firmly to squeeze out any air that might cause leakage.
- Use a fork to crimp the edges; this not only seals but also gives a nice decorative touch.
- Cut small slits or shapes in the top to allow steam to escape, which helps avoid bursting.
With these tips, your pies should bake beautifully without any mess! Enjoy the lovely pumpkin flavor in each bite.
Mini Pumpkin Hand Pies
Ingredients You’ll Need:
- 1 package (14 oz) refrigerated pie crusts (2 crusts)
- 1 cup canned pumpkin puree
- 1/2 cup brown sugar, packed
- 1/4 cup granulated sugar
- 1 teaspoon ground cinnamon
- 1/2 teaspoon ground nutmeg
- 1/4 teaspoon ground ginger
- 1/4 teaspoon ground cloves
- 1 tablespoon cornstarch
- 1/2 teaspoon vanilla extract
- 1 egg (for egg wash)
- 1 tablespoon water (for egg wash)
- Sanding sugar or granulated sugar for topping
- Mini pumpkin stems or cinnamon sticks for decoration (optional)
Time Needed:
You’ll need about 15 minutes to prepare the ingredients and assemble the pies. Then, let them bake for 20-25 minutes. Don’t forget to let them cool for a few minutes before diving in! So, expect about 40-45 minutes total from start to finish.
Step-by-Step Instructions:
1. Preheat and Prepare:
First, preheat your oven to 375°F (190°C). While it’s heating up, line a baking sheet with parchment paper to make clean-up easier and prevent sticking.
2. Make the Pumpkin Filling:
In a medium bowl, combine the pumpkin puree, brown sugar, granulated sugar, cinnamon, nutmeg, ginger, cloves, cornstarch, and vanilla extract. Mix well until everything is smooth and blended nicely.
3. Prepare the Pie Crusts:
Unroll the refrigerated pie crusts on a clean surface and use a pumpkin-shaped cookie cutter (or any shape you prefer) to cut out an equal number of shapes. You’ll need two cutouts for each hand pie.
4. Assemble the Hand Pies:
Place half of the cutouts onto the prepared baking sheet. For each cutout, spoon about 1 to 2 teaspoons of the pumpkin filling into the center, but remember to leave enough space around the edges for sealing. This step is crucial!
5. Seal the Edges:
In a small bowl, beat the egg with water to create an egg wash. Brush the egg wash around the edges of each cutout to help the top crust stick. Then place the remaining cutouts on top of the filled ones. Use a fork to press around the edges, making sure they’re sealed tightly.
6. Create Ventilation Slits:
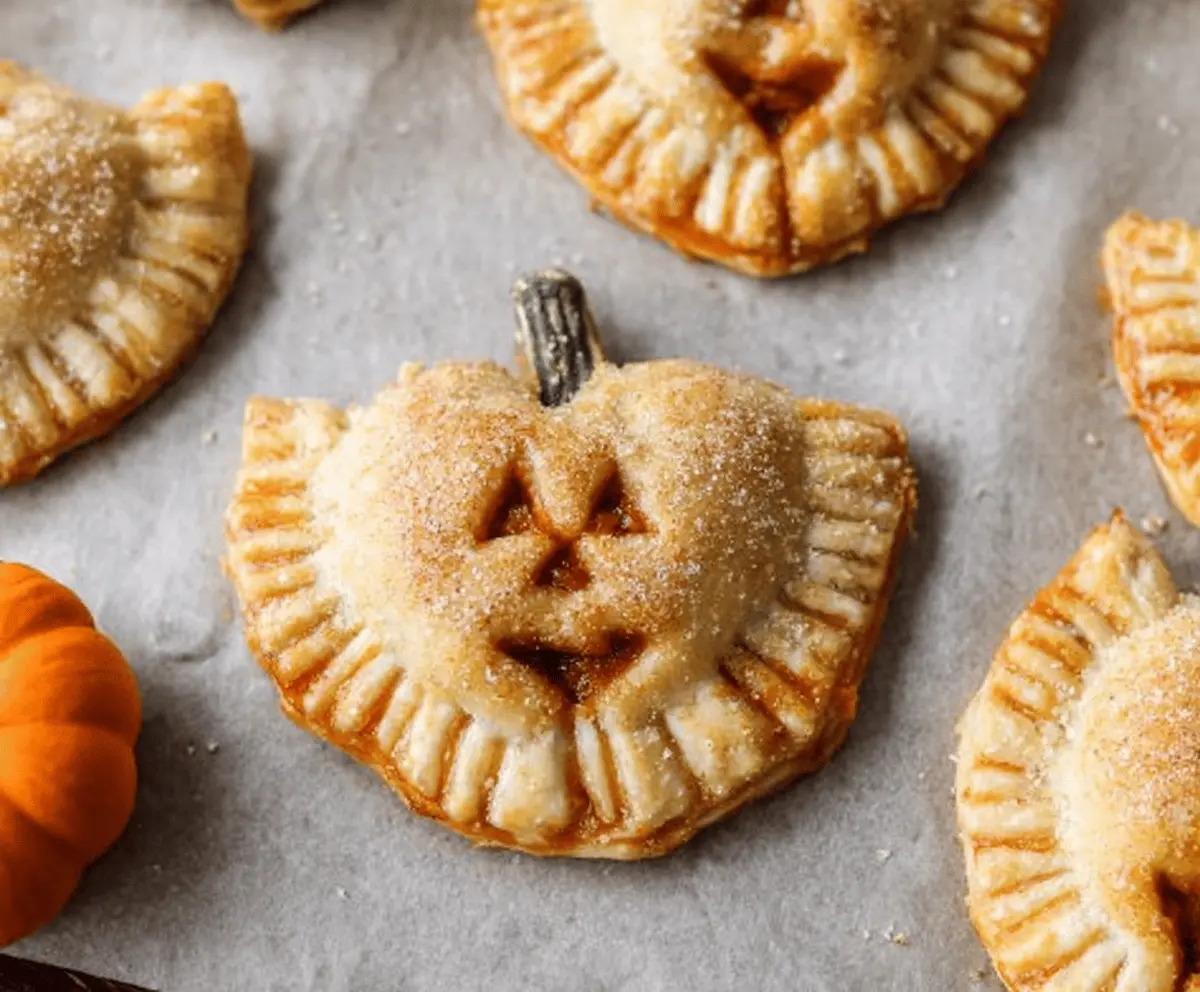
Use a small knife to cut out jack-o-lantern faces or simple venting slits on the top of each hand pie. This will let steam escape while they bake!
7. Add the Finishing Touches:
Brush the tops of the hand pies with egg wash and sprinkle with sanding sugar for some sparkle. If you like, you can also insert a tiny pumpkin stem or a cinnamon stick at the top to resemble a pumpkin stem.
8. Bake and Enjoy:
Place the baking sheet in the preheated oven and bake for 20-25 minutes, or until the crusts are golden brown and the filling is bubbly. Remove from the oven and let them cool for 5-10 minutes on the baking sheet before transferring them to a wire rack to cool completely.
9. Serving:
These mini pumpkin hand pies are delightful when served warm or at room temperature. Enjoy them as a lovely autumn treat any time of day!
These hand pies are perfect for capturing the essence of fall, with their adorable pumpkin shapes and delicious spiced filling wrapped in flaky crust. Happy baking!
Can I Use Fresh Pumpkin Instead of Canned?
Absolutely! If using fresh pumpkin, make sure to roast it, then puree it until smooth. Just avoid adding any additional spices or sugars during the roasting process, as the recipe already includes that.
How Do I Store The Leftover Mini Pumpkin Hand Pies?
Store any leftovers in an airtight container at room temperature for up to 2 days. If you want them to last longer, refrigerate them for up to a week. They can also be frozen for up to 3 months; just make sure to wrap them well to prevent freezer burn.
Can I Make These Hand Pies Vegan?
Yes! You can substitute the egg in the egg wash with a plant-based milk or simply use water for a similar effect. For the filling, ensure your pumpkin puree and sugars are vegan, and you’re all set!
What’s the Best Way to Reheat the Hand Pies?
To reheat, place them in an oven at 350°F (175°C) for about 10 minutes, or until warmed through. This helps maintain the crust’s flakiness. You can also use a microwave, but the crust may lose some crispiness.