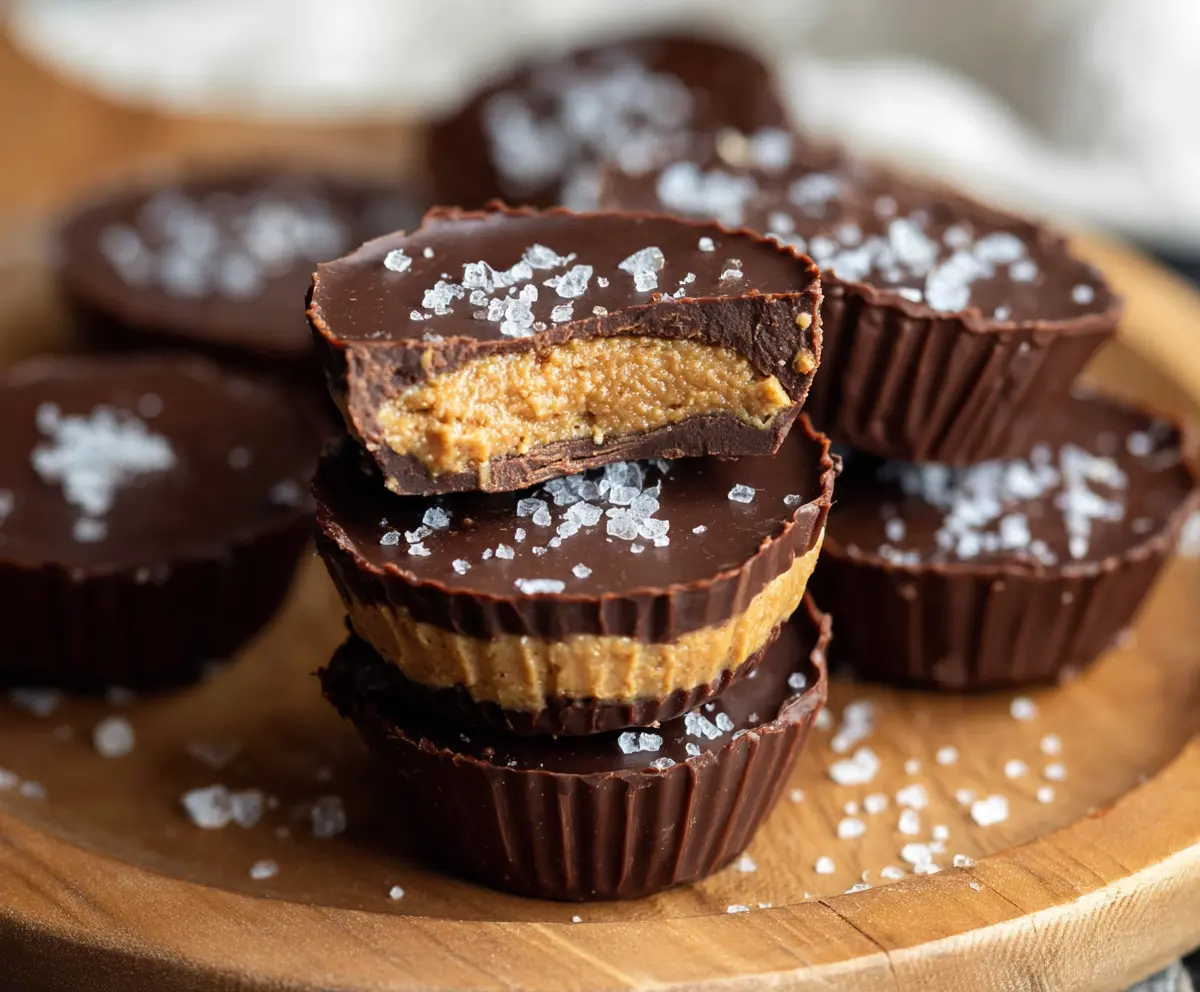
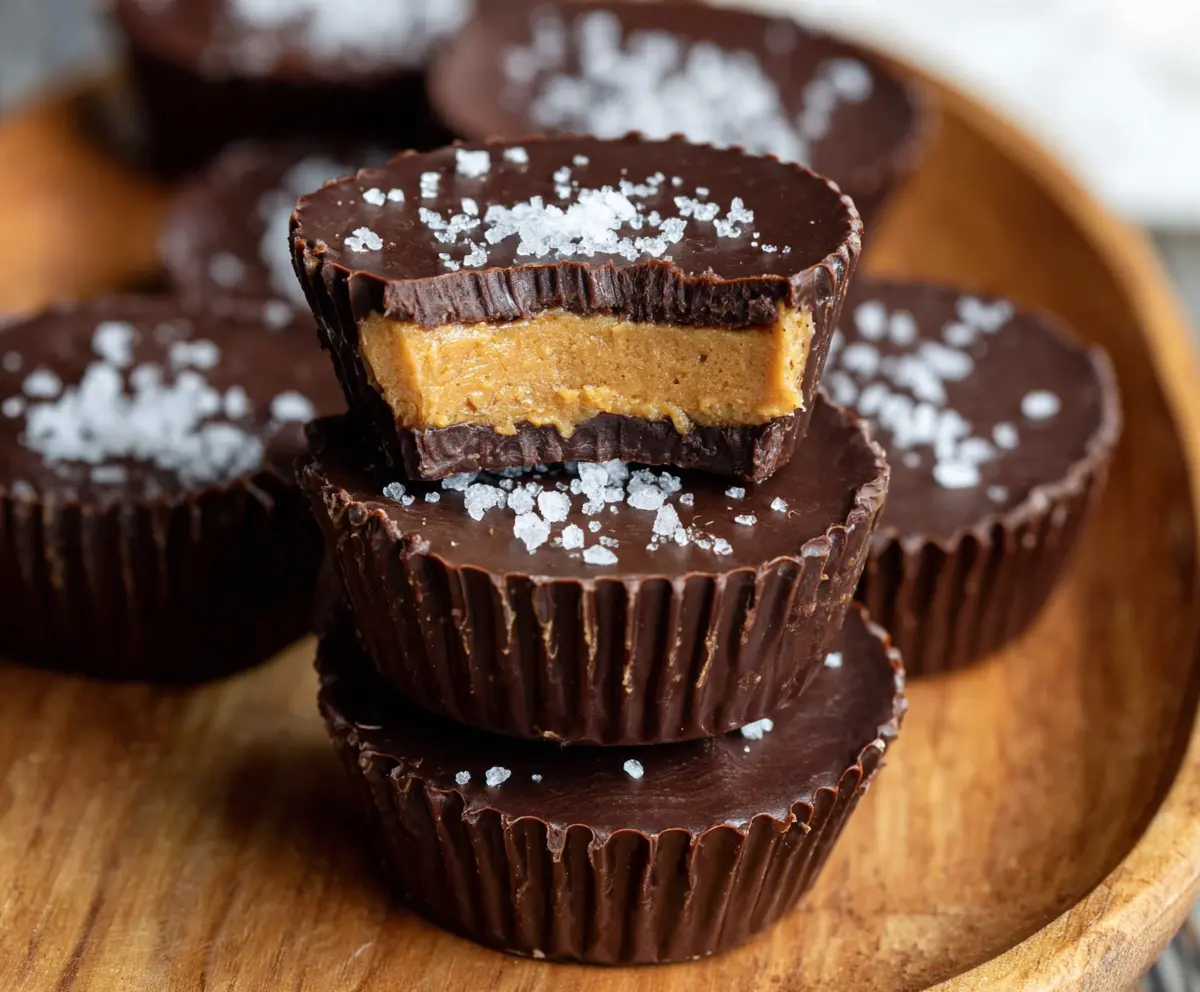
These Protein Peanut Butter Cups are a tasty treat that won’t break your diet! With creamy peanut butter surrounded by a rich chocolate coating, they are both fun and satisfying.
Honestly, who can resist chocolate and peanut butter? I love packing these for a quick snack when I need a boost. They are so easy to make and even easier to munch on! 😋
Ingredients & Substitutions
Natural Peanut Butter: I recommend creamy peanut butter for a smooth texture, but chunky is great if you like extra crunch! If you’re allergic to nuts, sunflower seed butter is a fantastic alternative.
Protein Powder: Use any protein powder that suits your taste, like whey, casein, or plant-based. Unflavored is best for a neutral flavor, but vanilla can add a nice sweetness.
Honey or Maple Syrup: Both sweeteners work well here. If you’re vegan, stick with maple syrup. Agave syrup is another good choice—it’s slightly less sweet.
Coconut Oil: This helps with melting the chocolate and gives a nice shine. If you don’t have it, vegetable or canola oil can work too, but the flavor might change slightly.
Dark Chocolate Chips: Aim for 70% cocoa or higher for a richer taste. If it’s not available, semi-sweet chocolate will also do, though it may be a bit sweeter than dark chocolate.
How Do I Melt Chocolate Smoothly?
Melted chocolate can be tricky, but following the right steps can lead to silky results. Here’s how you do it:
- Use a microwave-safe bowl. Combine chocolate chips and coconut oil.
- Microwave in short bursts of 20 seconds. This prevents burning.
- Stir well after each interval until it’s fully melted. It might look lumpy at first, but keep stirring!
- For a double boiler method, simmer water in a pot, place a heat-proof bowl on top, and stir until melted.
Using gentle heat and stirring regularly will give you a smooth chocolate perfect for your cups! This method also helps prevent seizing, which can ruin the chocolate.
How to Make Protein Peanut Butter Cups
Ingredients You’ll Need:
For the Filling:
- 1 cup natural peanut butter (creamy or chunky, unsweetened preferably)
- 1/4 cup vanilla or unflavored protein powder
- 2 tbsp honey or maple syrup (adjust to taste)
- 1 tbsp coconut oil (melted)
- 1/4 tsp sea salt (plus more for topping)
For the Chocolate Coating:
- 1 1/2 cups dark chocolate chips (70% cocoa or higher)
- 1 tbsp coconut oil (for chocolate melting)
How Much Time Will You Need?
This delicious recipe will take about 15 minutes of active preparation time, plus at least 30 minutes to chill in the freezer until set. Total time including setting would be around 45 minutes. But trust me, the wait is worth it for these indulgent yet healthy snacks!
Step-by-Step Instructions:
1. Prepare Your Muffin Tin:
Begin by lining a mini muffin tin with silicone or paper liners. This makes it easy to pop the cups out once they are set.
2. Make the Peanut Butter Filling:
In a medium bowl, mix the natural peanut butter, protein powder, honey (or maple syrup), melted coconut oil, and 1/4 tsp of sea salt. Stir well until everything is fully combined and smooth. Take a taste—if you like it sweeter, you can add a little more honey!
3. Melt the Chocolate:
In a microwave-safe bowl, combine the dark chocolate chips and 1 tablespoon of coconut oil. Microwave in 20-second intervals, stirring well after each interval, until the chocolate is fully melted and smooth. Be patient; this will give you a rich, glossy finish!
4. Create the Chocolate Base:
Spoon about 1 teaspoon of the melted chocolate into the bottom of each muffin liner to form a chocolate base. Use the back of a spoon to spread it evenly across the bottom. Now, pop the tray in the freezer for about 5-10 minutes to let the chocolate harden.
5. Add the Peanut Butter Layer:
Once the chocolate base is firm, take the muffin tin out of the freezer. Spoon about 1 tablespoon of the peanut butter filling onto the hardened chocolate base in each cup. Smooth the tops gently to make it nice and even.
6. Seal with More Chocolate:
Pour another teaspoon of melted chocolate over the peanut butter layer in each cup to fully cover it. This is what makes them nice and chocolatey all around! Don’t forget to sprinkle a pinch of sea salt on top for that delicious contrast.
7. Freeze Until Set:
Put the muffin tin back in the freezer and let the cups chill for at least 30 minutes, or until they are completely set and firm.
8. Enjoy Your Treats!
Once they’ve hardened, gently remove the protein peanut butter cups from the liners. Store them in an airtight container in the fridge or freezer—if you can resist eating them all at once! Enjoy these homemade goodies as a healthy snack anytime you want something sweet!
These cups are a delightful mix of rich chocolate and creamy peanut butter with the added goodness of protein—perfect for fuel any time of day!
Can I Use Natural Peanut Butter with Added Sugar?
It’s best to use unsweetened natural peanut butter for this recipe to control the sweetness. If you prefer the taste of sweetened peanut butter, just reduce the honey or maple syrup to balance the sugar content.
How Do I Store the Protein Peanut Butter Cups?
Store any leftovers in an airtight container in the fridge for up to 1 week, or in the freezer for up to 2 months. Just let them sit at room temperature for a few minutes before enjoying if they are frozen!
Can I Use Milk Chocolate Instead of Dark Chocolate?
Yes, you can use milk chocolate chips if you prefer a sweeter flavor. Just keep in mind that the nutritional profile will change, with more sugar and less cocoa content.
What if My Chocolate Has Seized While Melting?
If your chocolate seizes, try adding a teaspoon of coconut oil or vegetable oil and stir vigorously until smooth. Melt on very low heat, and be careful not to overheat it, as chocolate can easily scorch!