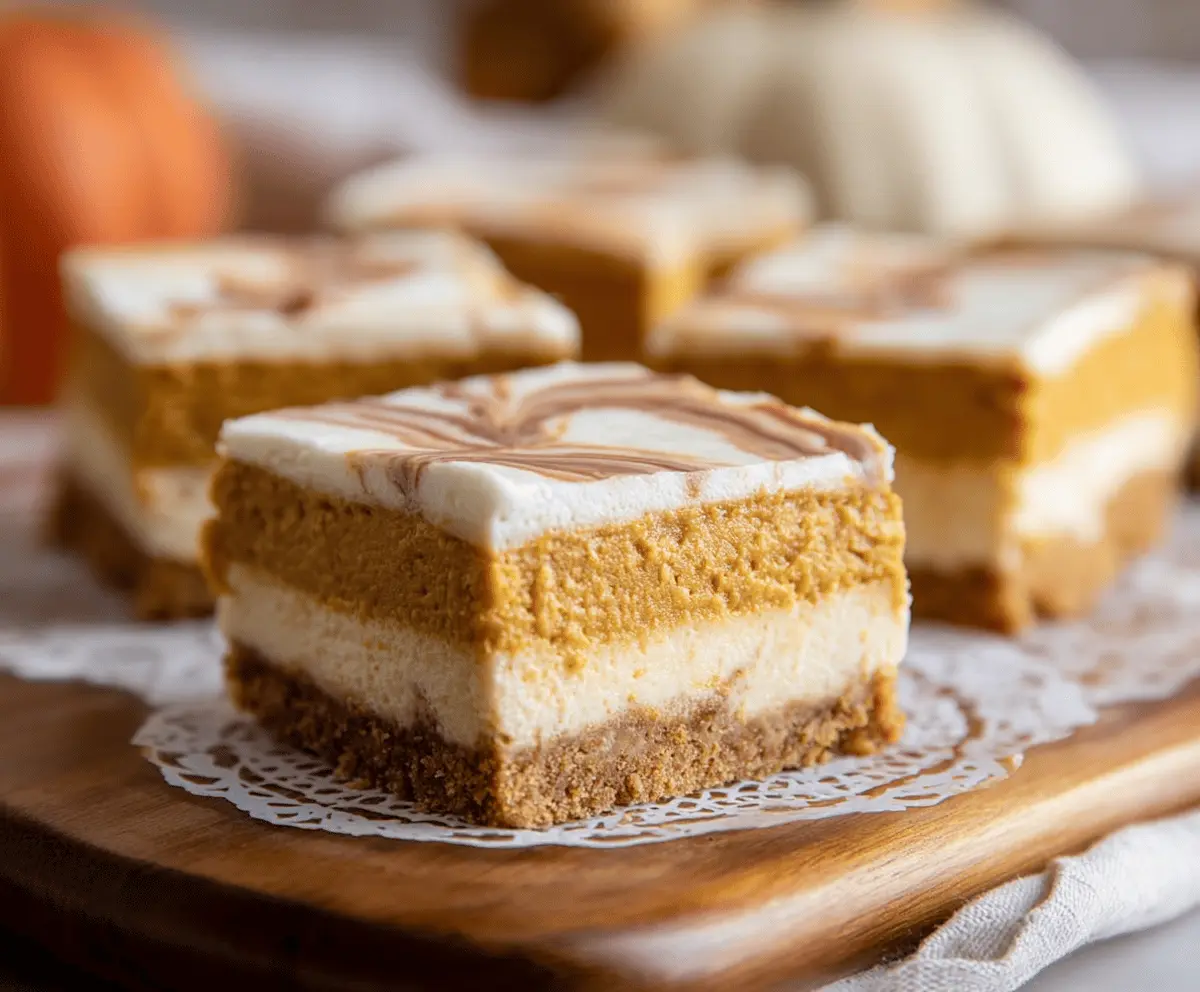
These Pumpkin Pie Cheesecake Bars combine two favorites: creamy cheesecake and spiced pumpkin pie all in one! They are perfect for fall gatherings or just a cozy night in.
The best part? They’re easy to cut into squares, making them great for sharing—or for sneaking a little more than you should! I always keep a few for late-night snacking! 😋
Key Ingredients & Substitutions
Graham Cracker Crumbs: These form the base of your bars. If you don’t have graham crackers, you can use digestive biscuits or vanilla wafers for a similar crunchy crust.
Canned Pumpkin Puree: Make sure to use pure pumpkin puree, not pumpkin pie filling. If fresh pumpkin is available, roast and purée it instead! Both give a great flavor.
Cream Cheese: Softened cream cheese is crucial for the cheesecake layer. If you want a lighter version, you can use Neufchâtel cheese, which has less fat but similar texture.
Pumpkin Pie Spice: You can easily make your own blend using cinnamon, nutmeg, ginger, and cloves if you don’t have it on hand. Just mix 1 tsp cinnamon, 1/2 tsp nutmeg, and 1/4 tsp of ginger and cloves.
How Do I Get My Cheesecake Bars Just Right?
Getting the perfect texture for your cheesecake bars is key! Follow these tips for success:
- Ensure cream cheese is fully softened before mixing; it blends easier and avoids lumps.
- Don’t overmix after adding eggs; this can lead to cracks. Mix just until combined.
- Monitor baking closely. The edges should be set, but the middle can still jiggle a bit—it will firm up as it cools.
- Allow cooling at room temperature first before chilling in the fridge. This helps prevent cracks from forming.
With these tips, your bars will be delicious and beautifully set! Perfect for sharing or enjoying all by yourself! 😊
Delicious Pumpkin Pie Cheesecake Bars
Ingredients You’ll Need:
For the Crust:
- 1 1/2 cups graham cracker crumbs
- 1/4 cup granulated sugar
- 1/2 cup unsalted butter, melted
- 1/2 tsp ground cinnamon
For the Pumpkin Cheesecake Layer:
- 16 oz (450g) cream cheese, softened
- 1 cup canned pumpkin puree
- 3/4 cup granulated sugar
- 2 large eggs
- 1 tsp vanilla extract
- 1 1/2 tsp pumpkin pie spice
For the Cream Cheese Topping:
- 8 oz (225g) cream cheese, softened
- 1/3 cup granulated sugar
- 1 tsp vanilla extract
- 1 cup heavy cream, whipped to stiff peaks
- 1 tbsp pumpkin pie spice (for swirling on top)
How Much Time Will You Need?
This tasty recipe takes about 20 minutes for prep and approximately 40-45 minutes to bake. After that, it needs a good chill in the fridge for at least 4 hours (or overnight for best results). Overall, you’ll be looking at about 5 hours and 15 minutes before you can dive into these delicious bars!
Step-by-Step Instructions:
1. Prepping the Oven and Baking Pan:
First, preheat your oven to 325°F (163°C). Grab a 9×9 inch square baking pan and line it with parchment paper, leaving some paper hanging over the edges. This makes it super easy to remove the bars later!
2. Making the Crust:
In a medium bowl, mix together the graham cracker crumbs, sugar, melted butter, and cinnamon until well combined. Press this mixture firmly into the bottom of your prepared baking pan to form a nice crust. Bake this in the preheated oven for about 10 minutes or until it’s set. After baking, let it cool slightly.
3. Preparing the Pumpkin Cheesecake Layer:
In a large mixing bowl, beat the softened cream cheese until it’s smooth and creamy. Add in the pumpkin puree, sugar, eggs, vanilla extract, and pumpkin pie spice. Beat everything together until it’s well combined and smooth. This is where the magic starts!
4. Adding the Cheesecake Layer:
Pour the pumpkin cheesecake batter over the crust you just made, then spread it evenly across the surface with a spatula.
5. Baking the Cheesecake Bars:
Place the pan back in the oven and bake for 40-45 minutes. You’ll know it’s done when the edges are set and the center still has a slight jiggle when you shake it gently. After baking, remove from the oven and allow it to cool to room temperature.
6. Making the Cream Cheese Topping:
While the pumpkin layer is cooling, let’s prepare the cream cheese topping! In a mixing bowl, beat the softened cream cheese with sugar and vanilla until smooth. Gently fold in the whipped cream until fully incorporated, creating a light and fluffy topping.
7. Spreading the Topping:
Once the pumpkin cheesecake layer has cooled, spread the cream cheese topping evenly over the top.
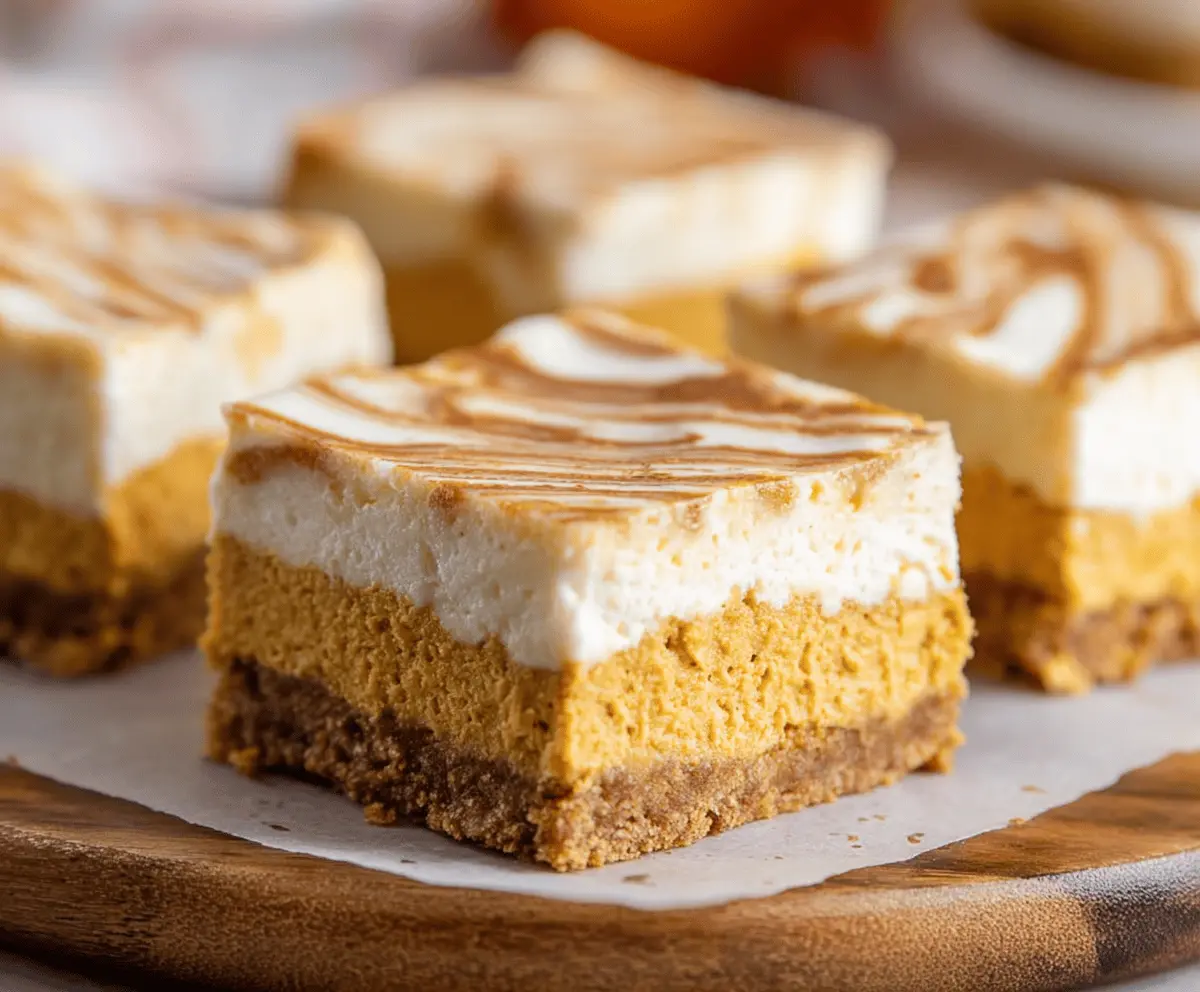
8. Creating the Marbled Effect:
For some added flair, sprinkle the pumpkin pie spice on top of the cream cheese layer. Then use a knife or skewer to lightly swirl it through the topping, creating a beautiful marbled effect!
9. Chilling the Bars:
Cover the pan with plastic wrap or foil and refrigerate for at least 4 hours, or ideally overnight, until everything is set and chilled through.
10. Serving the Bars:
When you’re ready to serve, lift the bars out of the pan using the parchment overhang and cut them into squares. These creamy, spiced bars are the perfect fall treat—enjoy them chilled!
With their delightful blend of pumpkin and cheesecake flavors, these Pumpkin Pie Cheesecake Bars are sure to be a hit at any gathering!
Can I Use a Different Type of Crust?
Absolutely! If you don’t have graham crackers, you can substitute with crushed digestive biscuits or vanilla wafer cookies for a tasty variation.
How Do I Prevent Cracks in My Cheesecake Bars?
To help prevent cracks, make sure to mix the batter gently after adding the eggs. Also, avoid overbaking; the center should still jiggle slightly when you take it out of the oven. Cooling it slowly at room temperature before chilling in the fridge also helps!
Can I Make These Bars Dairy-Free?
Yes! You can substitute dairy ingredients with plant-based alternatives. Use dairy-free cream cheese and heavy cream made from coconut or soy. Check the labels to ensure they are suitable for your dietary needs.
What’s the Best Way to Store Leftovers?
Store any leftover bars in an airtight container in the refrigerator for up to 4 days. If you want to keep them longer, you can freeze them for up to 2 months! Just make sure to wrap them well to prevent freezer burn.