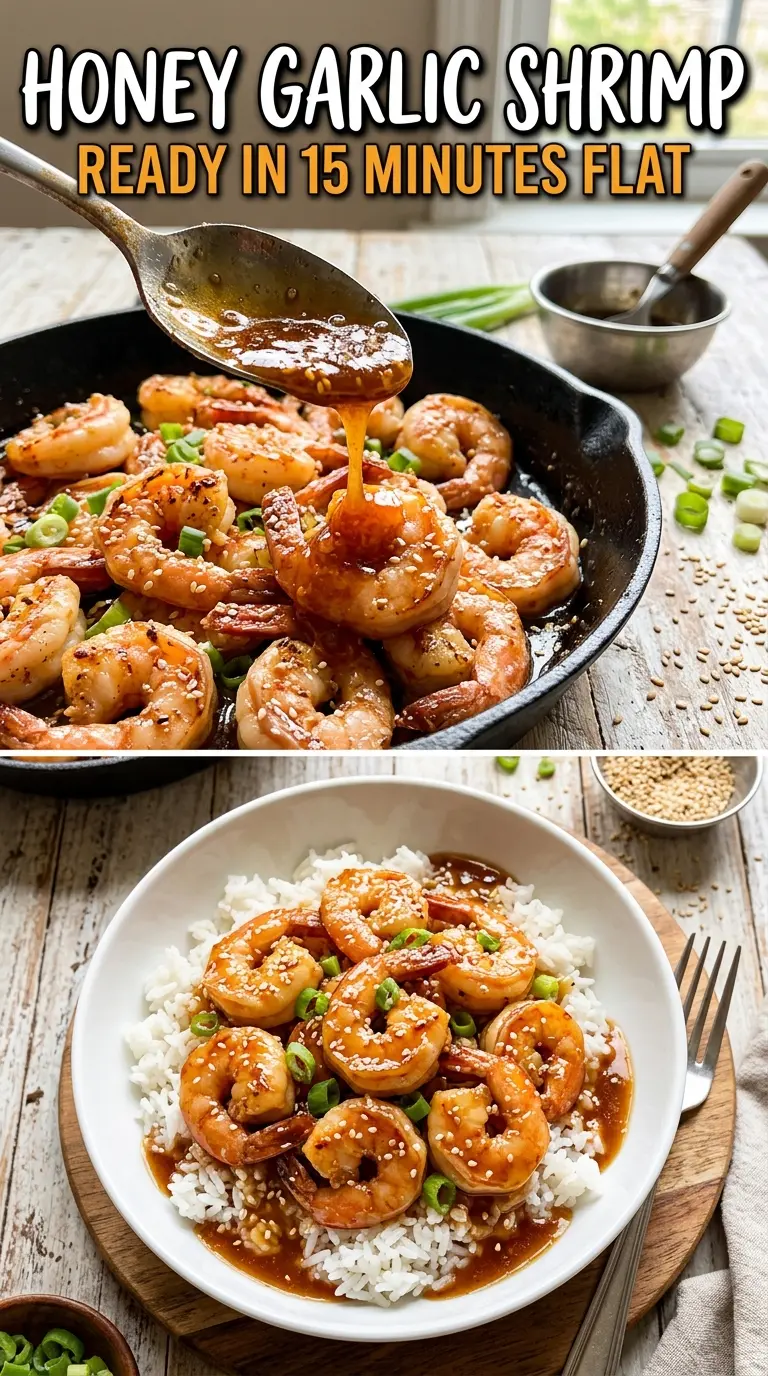
Plump shrimp, a sticky honey garlic glaze, and just enough heat to keep each bite interesting make this the kind of dinner that disappears fast. The sauce clings to the shrimp instead of sliding off the pan, and the edges pick up a little caramelization that gives the whole dish a deeper, almost buttery finish. Served over rice, it hits that sweet-salty-spicy balance that makes a simple skillet meal feel complete.
The trick is keeping the shrimp dry before they hit the pan and pulling them as soon as they turn opaque. Shrimp cook in a hurry, and if they stay on the heat while the sauce reduces, they turn tight and rubbery. The glaze works because honey, soy sauce, and lemon juice simmer just long enough to thicken without turning into candy or burning the garlic.
Below, I’ll walk you through the small details that keep the sauce glossy, how to know exactly when the shrimp are done, and a few useful swaps if you want to serve this over broccoli, make it gluten-free, or dial the heat up or down.
The glaze thickened in just a couple minutes and coated every shrimp without turning sticky or burnt. I served it with rice and my husband asked if I could put it on the weekly menu.
Save this honey garlic shrimp for the nights when you want a fast skillet dinner with a glossy, sticky glaze and almost no cleanup.
The Difference Between Glossy Shrimp and a Watery Pan
Most shrimp recipes lose their appeal because the pan is crowded or the shrimp go in damp. Shrimp release a little moisture as they cook, and if that moisture has nowhere to go, the sauce never gets a chance to concentrate. You end up with pale sauce and soft shrimp instead of the tight, lacquered coating you want.
Drying the shrimp first changes everything. It helps the outside sear for a minute before the sauce goes in, which gives you better flavor and keeps the final glaze from thinning out. Cooking the shrimp first and finishing them in the sauce is the other key move; that way they stop cooking the moment they’re coated, not after they’ve spent another few minutes getting tough.
- Large shrimp — Bigger shrimp hold up better against the quick sear and give you more room to build color before they overcook. Medium shrimp work, but you’ll need to shave a little time off the pan.
- Honey — This is what gives the sauce its body and shine. There isn’t a true substitute that behaves the same way, though maple syrup will work in a pinch with a deeper, less floral finish.
- Low-sodium soy sauce — It keeps the glaze savory without making it harsh or overly salty as it reduces. Regular soy sauce works too, but taste before adding extra salt.
- Fresh lemon juice — It brightens the glaze and keeps the honey from tasting flat. Bottled lemon juice works if that’s what you have, but fresh gives the cleanest finish.
- Red pepper flakes — They don’t make the dish spicy-hot so much as they keep the sweetness from feeling one-note. If you want a milder skillet, cut the amount in half; if you want more heat, add a pinch at the end.
What Each Ingredient Is Actually Doing in This Recipe
- Primary ingredient (the star) — Quality matters most. Choose the best you can find.
- Cooking medium (oil, butter, or broth) — This carries flavors and prevents dryness.
- Seasonings (salt, pepper, spices, herbs) — Layer flavors so nothing overpowers. Build depth gradually.
- Aromatics (garlic, onion, herbs) — Cook with fat to bloom flavors. Become the foundation.
- Supporting ingredients — Complement the main ingredient without overpowering it.
- Sauce or liquid (if applicable) — Brings flavors together. Balance richness with acid.
- Acid (lemon, vinegar, wine, or other) — Brightens and prevents flat-tasting results.
- Final finish (garnish, glaze, or sauce) — Prevents one-dimensional taste and adds visual appeal.
Building the Glaze Without Overcooking the Shrimp
Drying and Seasoning the Shrimp
Pat the shrimp until the surface feels dry, then season lightly with salt and black pepper. That dryness matters because wet shrimp steam, and steaming is the fastest way to lose browning and concentrate less flavor in the pan. Keep the seasoning light since the soy sauce brings salt later. If the shrimp look gray and glossy before they hit the skillet, they’re still too wet.
Getting the First Sear
Heat the olive oil until it shimmers, then add the shrimp in a single layer. They should sizzle immediately, not sit quietly in the oil. Cook just until the bottoms turn pink and the edges curl, then flip them once; if they’re curling into tight little O-shapes, they’ve gone too far. Pull them out as soon as they’re opaque on both sides, because they finish in the sauce.
Making the Sauce in the Same Pan
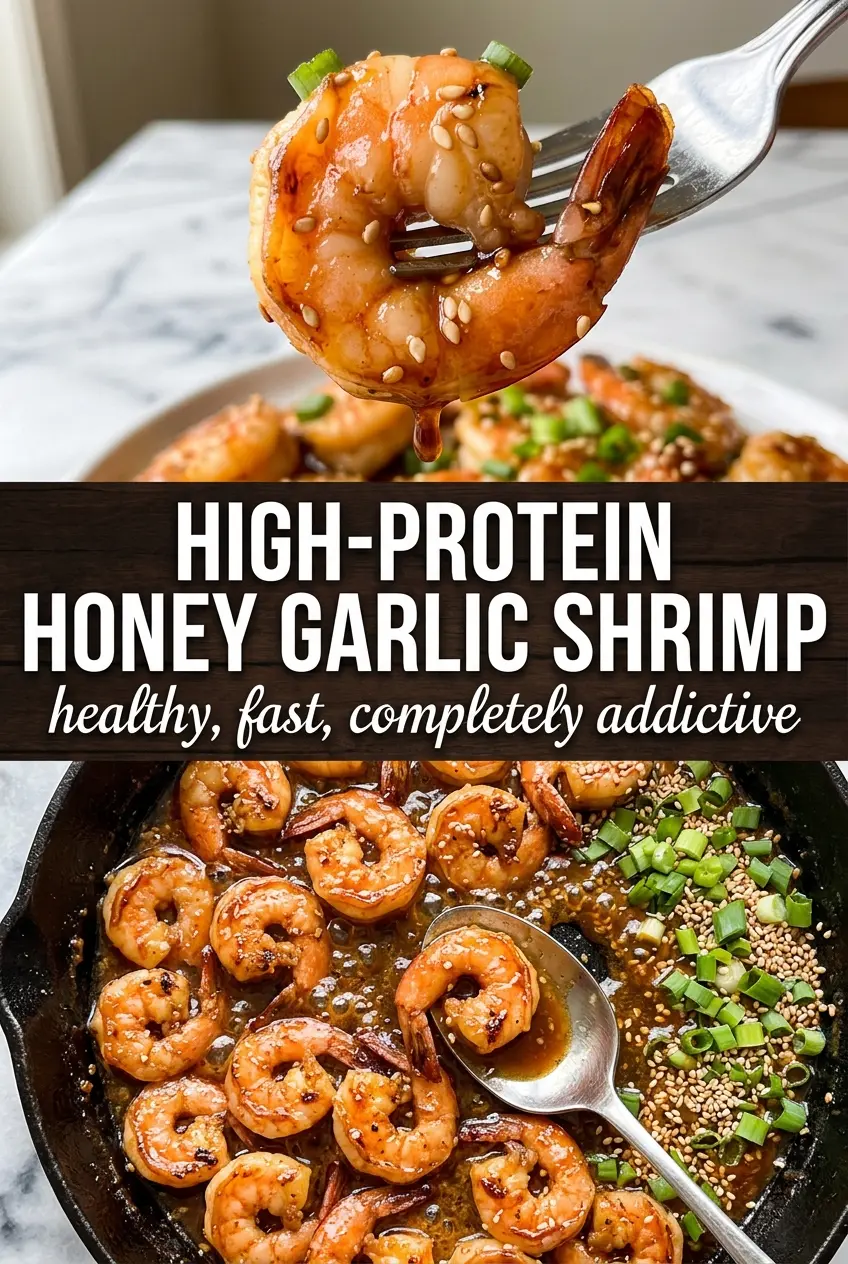
Add the garlic to the same skillet and stir for about 30 seconds, just until it smells fragrant. If it browns, the glaze will taste bitter, so keep the heat moderate and move fast. Stir in the honey, soy sauce, lemon juice, and red pepper flakes, then let the sauce bubble gently until it looks a little thicker and leaves a trail when you drag a spoon through it. That usually takes only a minute or two.
Coating and Serving Right Away
Return the shrimp to the pan and toss just until they’re evenly coated and glossy. You’re not trying to cook them again; you’re giving the glaze a chance to cling to every piece. The sauce will thicken a touch more as it sits, so serve it immediately over hot rice or steamed broccoli. Garnish at the end so the sesame seeds stay crisp and the green onions keep their fresh bite.
How to Adapt This for Different Dinners and Diets
Gluten-Free Version
Swap the soy sauce for tamari or coconut aminos. Tamari keeps the same savory depth, while coconut aminos taste a little sweeter and softer, so you may want a small splash more lemon juice to keep the glaze balanced.
Lower-Sugar Bowl
Cut the honey back to 2 tablespoons and add an extra teaspoon of lemon juice. The sauce will still coat the shrimp, but it will taste a little sharper and less sticky, so it works best over rice or broccoli where the sauce can spread out a bit.
Make It a Bigger Meal
Add snap peas, broccoli florets, or bell peppers after the garlic goes in and cook them briefly before the sauce. That turns the skillet into a full dinner without changing the flavor of the glaze, though you may need an extra minute of simmering to bring everything back to glossy.
Storage and Reheating
- Refrigerator: Store leftovers in an airtight container for up to 3 days. The shrimp will firm up a little, and the sauce will thicken in the fridge.
- Freezer: Shrimp can be frozen, but the texture softens after thawing, so I don’t recommend freezing the finished dish if you can avoid it.
- Reheating: Warm gently in a skillet over low heat with a splash of water to loosen the glaze. High heat makes shrimp rubbery fast, and it can push the honey sauce from glossy to sticky.
Questions I Get Asked About This Recipe
High-Protein Honey Garlic Shrimp
Ingredients
Equipment
Method
- Pat the shrimp dry with paper towels and season lightly with salt and black pepper.
- Heat olive oil in a large skillet over medium-high heat until shimmering, about 2 minutes.
- Add shrimp in a single layer and cook for 1–2 minutes per side until pink and opaque, then remove and set aside.
- In the same pan, add minced garlic and cook for 30 seconds until fragrant.
- Add honey, low-sodium soy sauce, fresh lemon juice, and red pepper flakes, then stir to combine.
- Simmer the sauce for 1–2 minutes until slightly thickened, scraping up any browned bits.
- Return the shrimp to the pan and toss to coat so every piece is glossy with sauce.
- Serve immediately over cooked rice (or steamed broccoli), garnished with sesame seeds and sliced green onions.