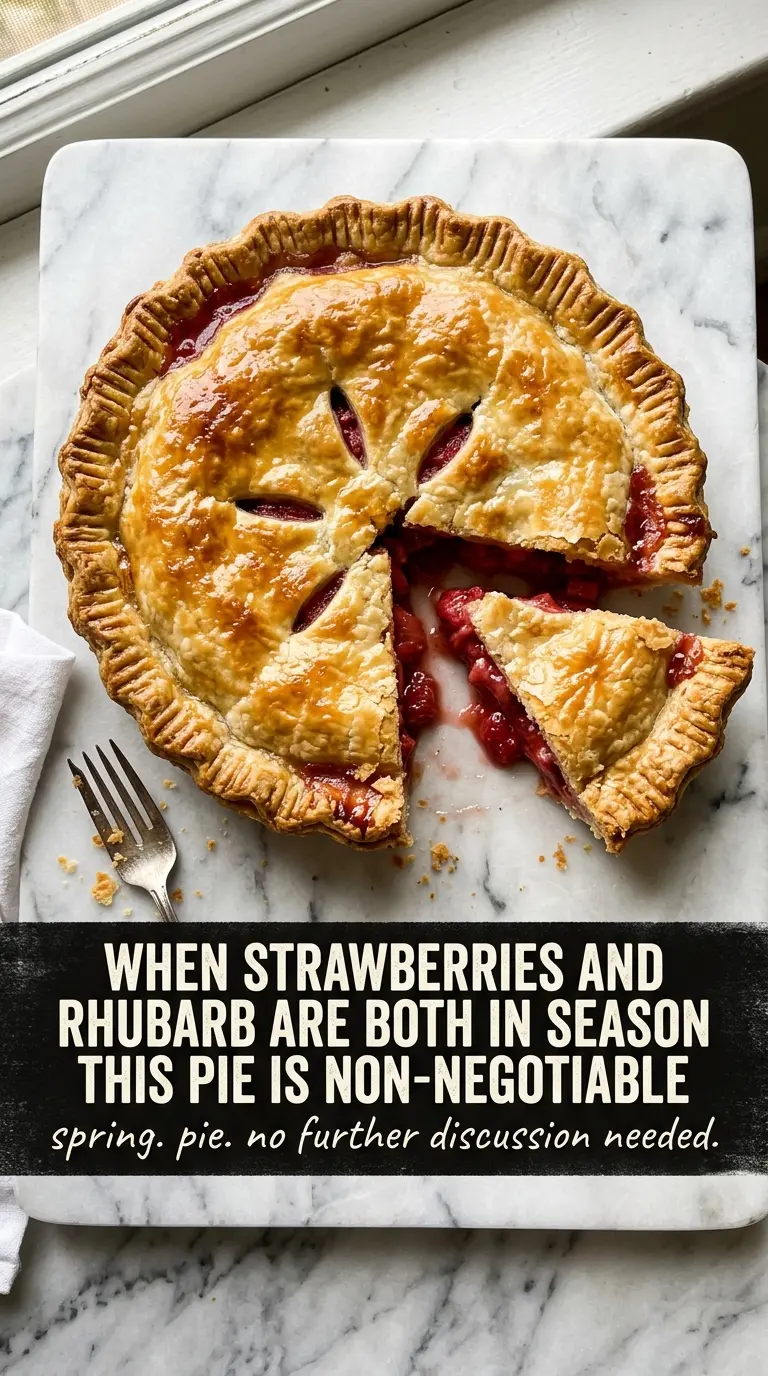
Strawberry rhubarb pie earns its place by getting the balance right: bright berries, tart rhubarb, and a filling that slices cleanly instead of spilling across the plate. When it’s done well, the crust turns deeply golden and flaky while the fruit bubbles up through the vents with that glossy red-and-pink finish people expect from a classic pie.
The trick is in the filling. Rhubarb brings sharpness and structure, strawberries bring perfume and sweetness, and cornstarch thickens the juices without turning them gummy. Letting the fruit sit with the sugar before it goes into the crust gives you a little head start on the sauce that forms in the oven, and it also tells you whether the fruit is juicy enough to need a longer bake.
Below, I’ve included the small details that matter most: how to keep the bottom crust from turning soggy, what the vents are really doing, and how to know when the pie is baked all the way through. If you’ve had strawberry rhubarb pie turn loose or watery before, this version keeps that under control.
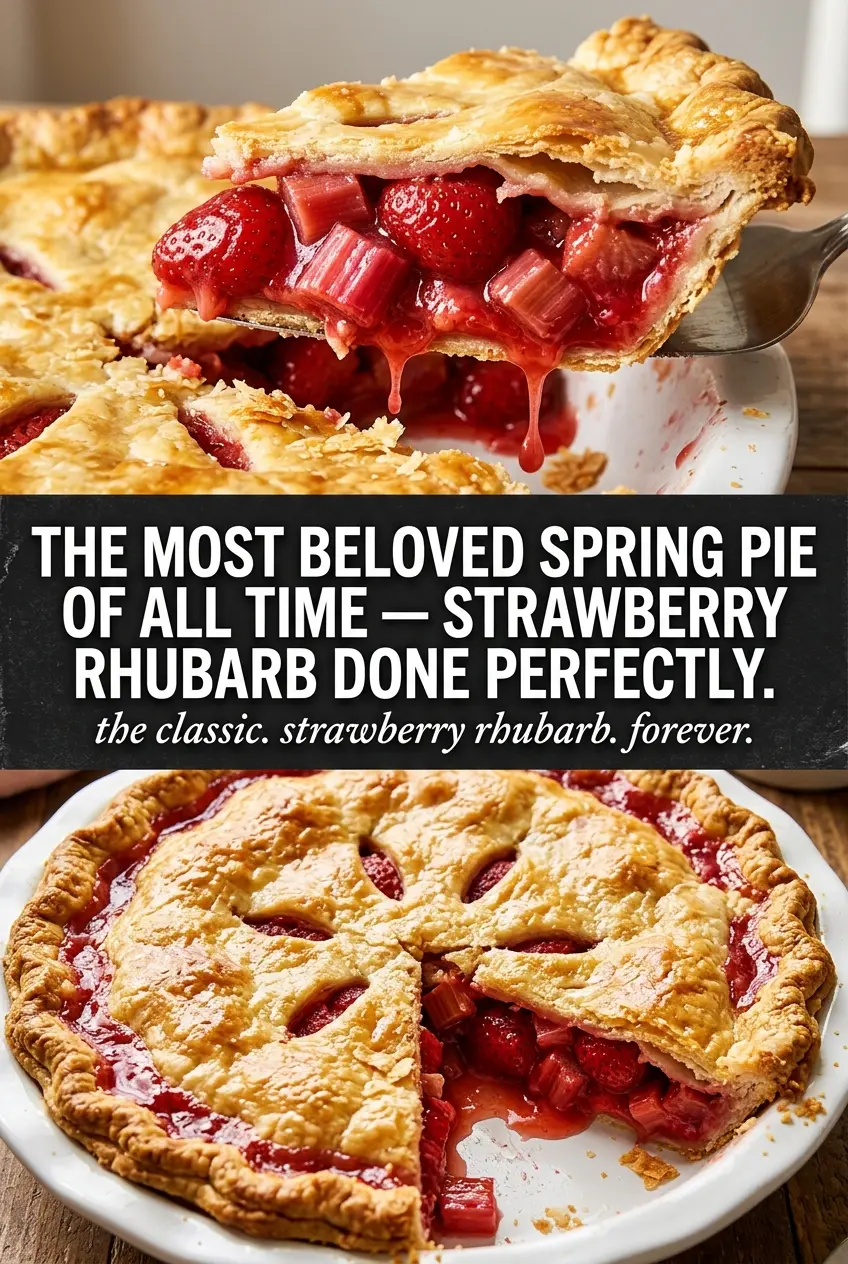
The filling set up beautifully after the full cooling time, and the strawberry flavor stayed bright instead of getting lost under the rhubarb. I cut the first slice after four hours and it held together like a bakery pie.
Save this strawberry rhubarb pie for the kind of slice that cuts cleanly and still tastes bright the next day.
The Reason Strawberry Rhubarb Pies Turn Runny Before the First Slice
The filling usually fails for one of two reasons: not enough thickener, or not enough heat long enough to activate it. Strawberries and rhubarb both release a lot of juice, and if the pie comes out before the center is bubbling through the vents, the cornstarch never fully sets. That’s when you get a pretty pie that runs across the plate.
The other mistake is cutting it too soon. A strawberry rhubarb pie can look finished on top while the center is still loose underneath, and the only real fix is patience. Four hours of cooling isn’t a suggestion here; it’s the part that turns hot fruit soup into a sliceable pie.
- Decorative vents — Those openings are not just for looks. They give steam a path out and let you see the filling actively bubbling, which is the best sign that the cornstarch has done its job.
- Cornstarch — This is the thickener that keeps the filling glossy and sliceable. Flour won’t give you the same clean set here, and tapioca changes the texture more than most people want in this pie.
- Butter on top of the filling — A few small pieces melt into the fruit and round out the tart edges. It doesn’t thicken anything, but it does add a smoother, richer finish.
- Egg wash and sugar — The egg gives the crust a deep sheen, and the sugar adds that crisp, sparkly top crust you notice before you even cut the pie.
What Each Ingredient Is Actually Doing in This Pie
- Fresh rhubarb — Rhubarb gives the pie its tart edge and its structure. Fresh stalks hold their shape better than frozen, but if you use frozen, thaw and drain them first so you don’t flood the filling.
- Fresh strawberries — Strawberries bring sweetness and that red, jammy flavor that softens rhubarb’s bite. Use ripe berries with good aroma; bland strawberries make the whole pie taste flatter than it should.
- Sugar — The sugar does more than sweeten. It pulls out juice from the fruit so the cornstarch can thicken it into a syrupy filling.
- Pie crusts — A sturdy double crust keeps the juicy filling contained and gives you enough structure to cut clean wedges. Store-bought is fine if it bakes up cold and flaky, but homemade crust gives you the best texture on the bottom.
- Vanilla — Vanilla doesn’t make this taste like dessert sauce. It smooths the sharp fruit edges and makes the berries taste fuller.
Building the Filling and Baking It Until the Center Bubbles
Mixing the Fruit So the Juices Work for You
Combine the fruit, sugar, cornstarch, salt, and vanilla in a large bowl, then let it sit for about 10 minutes. The fruit will start to glisten as the sugar draws out liquid, and that’s exactly what you want. If the bowl looks dry, the fruit may need a minute more; if it looks overly watery, that’s normal and means the thickener has work to do in the oven, not on the counter.
Assembling the Crust Without Trapping Steam
Line the pie plate with the bottom crust and pour in the fruit mixture, then dot the top with butter. Add the second crust, trim the edges, and crimp them well enough to seal but not so tightly that the edge turns dense. Cut vents with purpose; a few clear openings are better than a bunch of tiny slits that close up while baking.
Baking in Two Temperatures
Start the pie at 400°F for 20 minutes to set the crust fast and give the filling a strong initial boil. Then drop the heat to 350°F and keep baking until the top is deeply golden and the filling is bubbling through the vents, usually another 35 to 40 minutes. If the edge starts browning too fast, cover it with foil, but don’t pull the pie early just because the crust looks done.
The Cooling Time That Sets the Slice
Let the pie cool completely for at least 4 hours before cutting. Hot filling always looks looser than it will later, and slicing too soon breaks the starch structure before it sets. Once it’s fully cooled, the filling should hold together in neat wedges with just enough softness to feel juicy instead of watery.
How to Adapt This Pie for Different Pans, Diets, and Leftovers
Gluten-Free Crust
Use a gluten-free pie crust that bakes up sturdy, not soft. The filling itself is naturally gluten-free, so the main thing you lose is the wheaty flavor of a traditional crust, not the structure of the pie.
Frozen Rhubarb or Strawberries
Frozen fruit works when fresh isn’t available, but thaw it first and drain off excess liquid. If you skip that step, the filling usually turns looser and needs extra cooling time to firm up.
Lattice Top Instead of a Full Crust
A lattice top lets more steam escape and makes it easier to judge when the filling is bubbling properly. You’ll get a little less shielding on the fruit, so the top can brown faster, but the texture stays bright and the pie looks beautiful.
Storage and Reheating
- Refrigerator: Store covered for up to 4 days. The crust softens a little over time, but the filling stays nicely set.
- Freezer: Freeze baked pie slices or the whole pie tightly wrapped for up to 2 months. Thaw in the refrigerator so condensation doesn’t make the crust soggy.
- Reheating: Warm slices in a 300°F oven until heated through. The microwave works in a pinch, but it softens the crust fast and can make the filling look loose again.
Answers to the Questions Worth Asking
Strawberry Rhubarb Pie
Ingredients
Equipment
Method
- Preheat oven to 400°F and line a 9-inch pie plate with bottom crust.
- Combine rhubarb, strawberries, sugar, cornstarch, salt, and vanilla extract in a large bowl.
- Let the fruit mixture sit for 10 minutes to thicken slightly.
- Pour the fruit mixture into the bottom crust and dot with butter.
- Top with the second crust, trim excess, and crimp the edges to seal.
- Cut decorative vents in the top crust so steam can escape.
- Brush the top with beaten egg and sprinkle with sugar.
- Bake 20 minutes at 400°F until the crust starts setting and edges look lightly colored.
- Reduce oven to 350°F and bake 35-40 minutes more until the crust is golden and the filling is bubbling through vents.
- Cool completely for at least 4 hours before slicing so the filling fully sets.