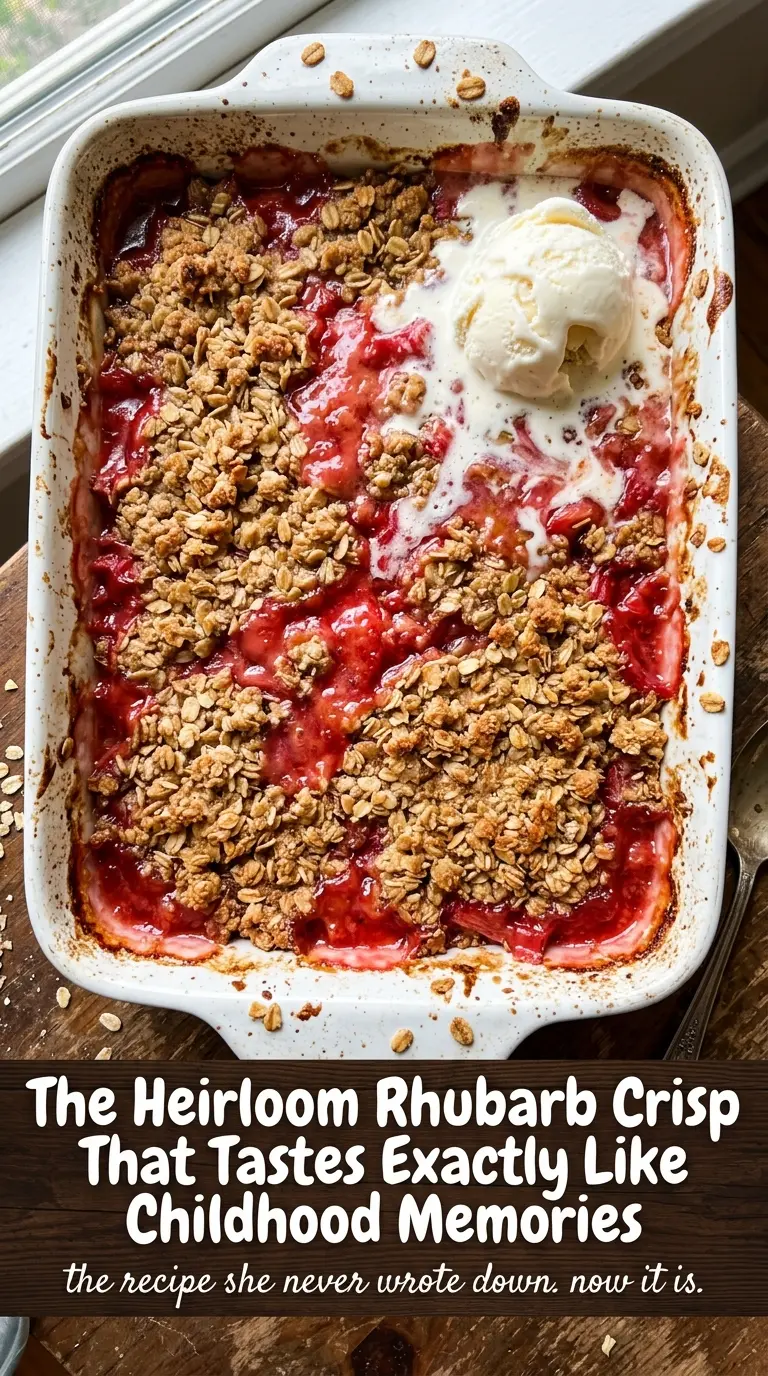
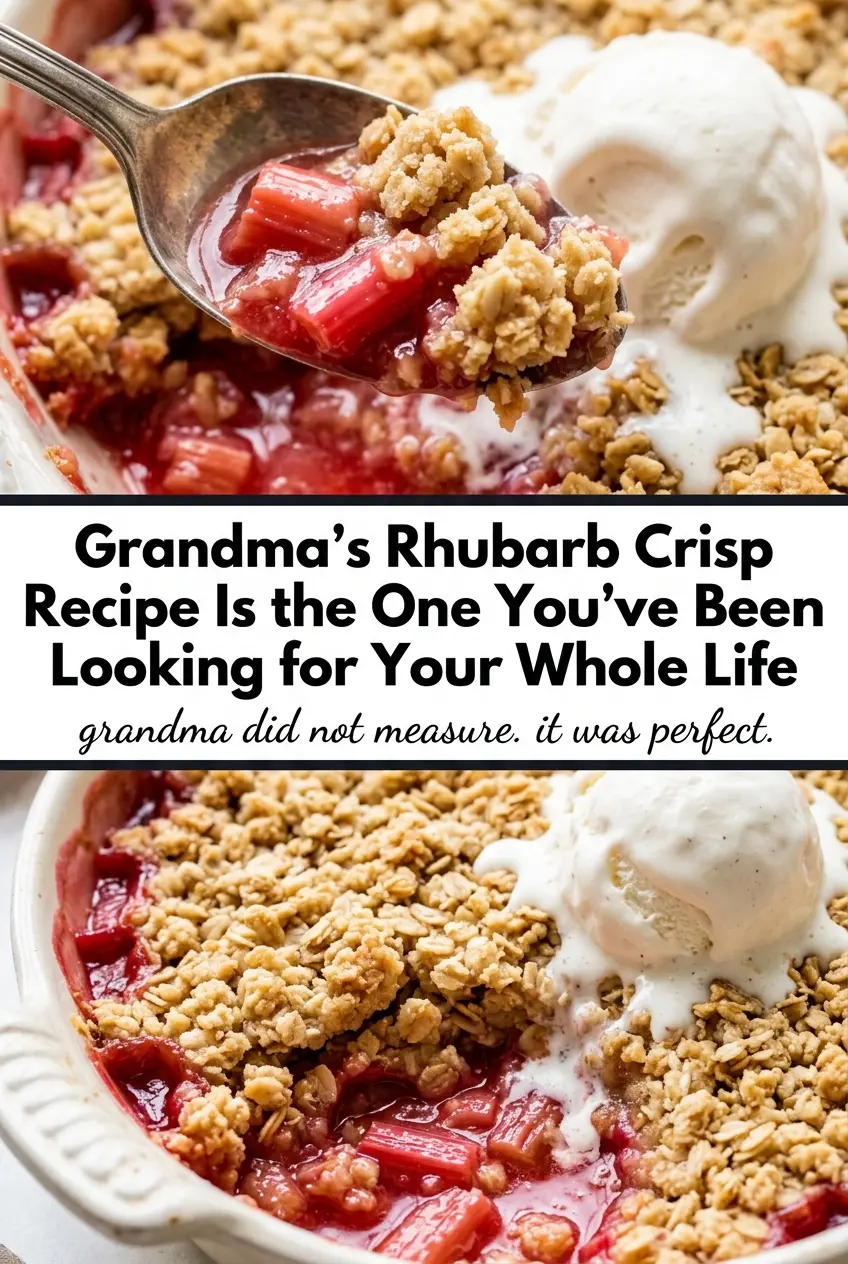
Tender rhubarb tucked under a thick, buttery oat topping is the kind of dessert that disappears fast, especially when the filling bakes into a sweet-tart syrup and the top turns crisp at the edges. This rhubarb crisp keeps the old-fashioned comfort people remember, but it also gives you the structure you need so the fruit softens without turning watery and the topping stays crumbly instead of pasty.
The trick is in the balance. Rhubarb brings a sharp, clean bite, and the sugar pulls out enough juice to make a proper sauce as it bakes. A little flour in both the filling and topping helps everything set up, while softened butter worked in with a fork gives you those clumpy, golden crumbs that brown beautifully in the oven.
Below, I’ve included the small details that matter most, from keeping the topping sandy and crisp to knowing exactly when the filling has baked long enough. If you’ve ever had a fruit crisp come out runny or soggy, this version fixes both problems.
The filling set up instead of turning soupy, and the oat topping stayed crisp even after it sat on the counter for a bit. My mom said it tasted just like the rhubarb crisp she used to make.
Save Grandma’s Rhubarb Crisp for the nights when you want tart rhubarb, a buttery oat crust, and warm filling under vanilla ice cream.
The Secret to Keeping Rhubarb Crisp From Turning Watery
Rhubarb gives off a lot of juice as it bakes, and that’s where a lot of crisps go wrong. If you pile the fruit straight into the dish without enough thickener, you get a loose puddle under the topping instead of a spoonable filling. The flour in this recipe catches those juices early, then thickens them as the dish heats so the fruit settles into a glossy syrup instead of flooding the pan.
The other thing that matters is the topping-to-fruit ratio. This isn’t a thin sprinkle of crumbs; it’s a thick layer that insulates the fruit and browns slowly enough to crisp without burning. If the butter is melted instead of softened, the topping turns greasy and dense. You want clumps that hold together when pressed, then break apart into rough crags in the oven.
- Rhubarb — Fresh stalks give you the cleanest tart flavor and the best texture. Trim away any leaves completely, and cut the stalks into even 1/2-inch pieces so they cook at the same rate.
- Flour in the filling — This is what keeps the juices from running all over the pan. Cornstarch can work in a pinch, but flour gives the filling a softer, more old-fashioned set that fits this dessert.
- Old-fashioned oats — Quick oats soften too much and lose that hearty, rustic bite. Old-fashioned oats stay chewy in the center and crisp at the edges.
- Softened butter — This is one place where the texture of the butter matters. It should press easily with a finger but not look oily. That’s what creates the crumbly topping instead of a paste.
What Each Ingredient Is Actually Doing to Keep Rhubarb Crispy
- Rhubarb cut into pieces (not too small) — Medium pieces stay firmer than very small ones. They also look more appealing in the final dish.
- Sugar coating (light, not heavy) — A light coating of sugar sweetens without making the rhubarb weep liquid. Too much sugar draws out moisture.
- Flash freezing (if using) — Briefly freezing the rhubarb helps it hold its shape. Thawing just before use keeps it firm.
- Oil or fat coating (light) — A light coating of oil helps repel moisture and keeps the rhubarb from getting watery. Too much oil makes it greasy.
- Dry preparation surface — Pat the rhubarb dry and work on a dry surface. Any moisture helps the rhubarb weep liquid.
- Minimal contact with liquid (until serving) — Keep the rhubarb separate from any sauce or wet ingredients until the last moment. Sitting in liquid makes it soft.
- Cool serving temperature — Cold rhubarb stays firmer than room temperature. Serving straight from the fridge helps it stay crisp.
- Assembling just before serving — Put the crispy rhubarb on top or mix it in at the last moment. Sitting with other ingredients softens it.
Building the Filling and Topping in the Right Order
Coating the Rhubarb
Toss the rhubarb with the sugar and flour until every piece looks lightly dusted, then spread it into the greased baking dish in an even layer. That coating needs to happen before the fruit sits in the pan so the sugar starts drawing out juice right away and the flour has a chance to disperse instead of clumping. If you see dry flour pockets, keep tossing; those pockets turn pasty in the oven.
Making Crumbly, Not Paste-Like, Topping
Mix the flour, brown sugar, oats, cinnamon, and softened butter with a fork until the mixture forms coarse crumbs with some pea-size clumps. Stop before it looks smooth. If you overwork it, the butter melts into the dry ingredients and you lose the crisp, craggy top that makes a good rhubarb crisp worth serving warm.
Baking Until the Filling Bubbles
Spread the topping evenly over the fruit, then bake at 350°F until the surface is deeply golden and you can see the filling bubbling through the edges and around the center. Those bubbles matter more than the clock. If the top looks done but the filling isn’t actively bubbling, the flour hasn’t thickened the juices yet and the center will come out loose.
Letting It Set Before Serving
Give the crisp 10 minutes to cool after it comes out of the oven. That short rest lets the syrup tighten enough to hold a spoonful without running everywhere. Serve it warm, not piping hot, so the filling stays thick and the vanilla ice cream melts into it instead of disappearing on contact.
How to Adjust Grandma’s Rhubarb Crisp Without Losing the Texture
Make it with strawberries
Fold in up to 2 cups of sliced strawberries with the rhubarb for a sweeter, softer filling. The berries add perfume and a little extra juice, so the crisp tastes rounder, but you’ll still want the full amount of flour in the filling to keep it from getting runny.
Make it gluten-free
Use a cup-for-cup gluten-free flour blend in both the filling and topping, then check that your oats are certified gluten-free. The texture stays close to the original, though the topping may bake up a little more delicate and sandy than the classic version.
Use less sugar for a sharper finish
Drop the filling sugar to 1 cup if you like the rhubarb to stay noticeably tart. The dessert will taste brighter and less jammy, but the filling will also be a little less syrupy, so let it cool before serving to help it set properly.
Storage and Reheating
- Refrigerator: Store covered for up to 4 days. The topping softens a little in the fridge, but the flavor holds up well.
- Freezer: Freeze baked portions tightly wrapped for up to 2 months. The topping won’t stay perfectly crisp after thawing, but the filling freezes well.
- Reheating: Warm in a 325°F oven until heated through and the topping crisps back up, about 15 to 20 minutes. The microwave makes the topping soggy, so skip it if you want that crumbly texture back.
Questions I Get Asked About This Recipe
Grandma's Rhubarb Crisp
Ingredients
Equipment
Method
- Preheat the oven to 350°F and grease a 9x13-inch baking dish. This prevents sticking so you can scoop tidy portions.
- Combine rhubarb, sugar, and flour, tossing until the rhubarb is evenly coated. Spread the mixture in the prepared dish for an even bubbling layer.
- Mix flour, brown sugar, oats, softened butter, and cinnamon with a fork until crumbly. Leave pea-size crumbs so the topping browns into a crisp top.
- Spread the crumb topping evenly over the rhubarb mixture. Cover all the filling so it crisps uniformly as it bakes.
- Bake for 40-45 minutes at 350°F until the topping is golden brown and the filling is bubbling. Look for a crisp, set top with active syrup bubbling around the edges.
- Let the crisp cool for 10 minutes before serving warm. The syrup thickens slightly for a scoopable, spoon-friendly texture.