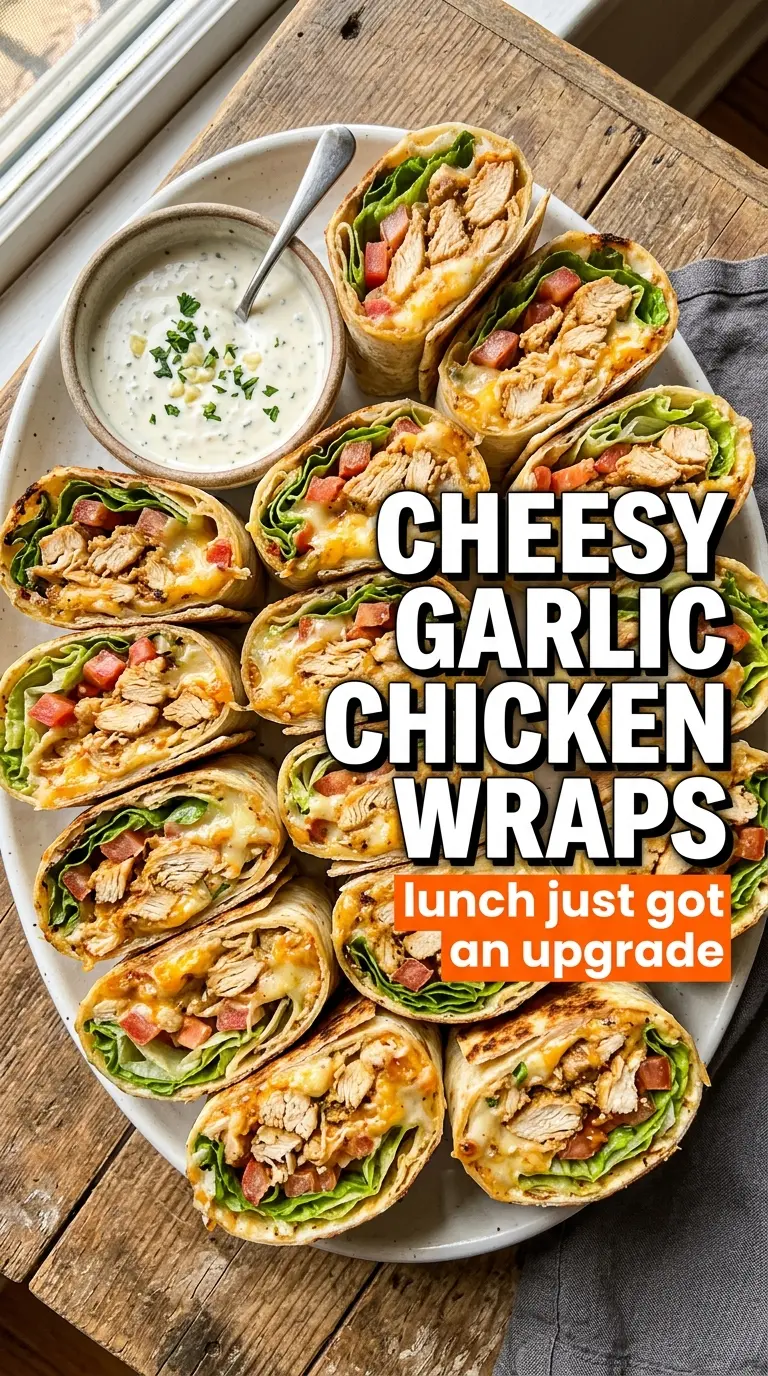
Golden, toasted tortillas wrapped around garlic butter chicken and melted mozzarella make these cheesy garlic chicken wraps the kind of lunch or quick dinner that disappears fast. The outside turns crisp and lightly blistered, while the inside stays creamy from the dressing and stretchy from the cheese. Every bite gets a little crunch from romaine and a fresh pop from cherry tomatoes, which keeps the whole wrap from feeling heavy.
What makes this version work is the order. The chicken gets cooked first so it can pick up color, then it gets tossed in garlic butter off to the side so the garlic stays fragrant instead of bitter. Mozzarella melts cleanly and gives you that pull when you cut the wrap, but it needs the chicken to cool for a minute before assembly or it can steam the tortilla and make everything soggy. Toasting the wrap seam-side down at the end locks it together and gives you that crisp finish that makes this recipe worth repeating.
Below, I’ve included the timing trick that keeps the tortillas from cracking, plus a few swaps that make these wraps work for different diets and whatever’s in your fridge.
The garlic butter really made these. I was worried the wraps would get soggy, but toasting them seam-side down gave the tortillas a nice crunch and the cheese melted perfectly without leaking out.
Love the melty mozzarella and garlic butter combo? Save these cheesy garlic chicken wraps for the next time you want a crisp, handheld dinner with almost no cleanup.
The Trick to Keeping the Wrap Crisp Instead of Soggy
The biggest mistake with wraps like this is building them while the chicken is still piping hot. That trapped steam softens the tortilla fast, and once the lettuce starts wilting, the whole thing loses its bite. Let the garlic butter chicken cool just enough that it’s still warm but not steamy before you layer it in.
The second piece is toast time. You’re not trying to cook the wrap through again; you’re setting the seam, melting the mozzarella, and browning the tortilla. Medium heat is the sweet spot. Too high and the outside burns before the cheese loosens. Too low and you never get that golden crust that holds the wrap together.
What Each Ingredient Is Actually Doing in These Wraps
- Flour tortillas — Large 10-inch tortillas are the right size here because they can hold the filling without tearing when you roll and toast them. Smaller tortillas tend to split once the cheese melts and the filling shifts. If yours are stiff, warm them for a few seconds first so they fold cleanly.
- Chicken breasts — Cutting the chicken into strips helps it cook quickly and stay juicy. Thin pieces pick up more of the garlic butter than a whole breast would, and they’re easier to bite through in a wrap. Chicken thighs can work too, but they’ll make the filling a little richer and less lean.
- Butter and garlic — This is the flavor base, and it’s worth doing separately from the chicken. Butter carries the garlic and coats the chicken so every bite tastes seasoned, not just the outside edges. Don’t let the garlic brown; one minute is enough for it to smell sweet and strong without turning bitter.
- Mozzarella — Mozzarella gives you that stretch and mild creaminess without overpowering the garlic chicken. Pre-shredded works fine, but freshly shredded melts a little smoother because it doesn’t contain the same anti-caking coating. If you want a sharper finish, swap in a little provolone with it.
- Romaine and tomatoes — These should go in at the end for crunch and brightness. Romaine stays crisp better than softer lettuces, and cherry tomatoes add enough juiciness to balance the rich cheese and butter. Pat the tomatoes dry after cutting so they don’t leak into the tortilla.
- Ranch or Caesar dressing — This is the creamy layer that keeps the wrap from eating dry. Ranch gives you a cooler, tangier finish; Caesar leans saltier and a little more savory. Use just enough to coat the tortilla, not enough to pool at the bottom.
Building the Wrap So It Stays Together in the Pan
Searing the Chicken First
Season the chicken strips with salt and pepper, then cook them in butter over medium-high heat until they’re golden and cooked through. You want color on the outside and no pink in the center, but don’t overcook them into dryness because they’ll get one more round in the skillet later. If the pan starts smoking hard, the heat is too high and the butter will scorch before the chicken finishes.
Turning Butter Into Garlic Chicken
Once the chicken is cooked, drop the heat and cook the garlic in the remaining butter just until it smells fragrant. Stir the chicken back through and add the parsley at the end so it stays bright. If the garlic gets too dark, the whole filling turns harsh, so keep it moving and pull the pan off the burner as soon as it blooms.
Rolling and Toasting
Warm the tortillas until they’re soft and flexible, then spread the dressing in a thin layer before adding the cheese, chicken, lettuce, and tomatoes. Roll them tightly, tucking the sides in as you go so the filling doesn’t spill out during toasting. Place them seam-side down in a skillet over medium heat and press lightly until the tortilla turns deeply golden and the cheese inside starts to melt. If you rush this on high heat, the outside browns before the seam seals.
Make It Spicier With Pepper Jack
Swap half or all of the mozzarella for pepper jack if you want a little heat. It melts nicely and gives the wrap more bite, but it will cover some of the garlic butter flavor, so I usually keep a little mozzarella in the mix for stretch.
Dairy-Free Version
Use a dairy-free butter and a meltable plant-based cheese, then toast the wrap a little longer to help it set. The flavor will still work, but the cheese won’t stretch quite the same way, so keep the filling a touch lighter to prevent leaks.
Gluten-Free Swap
Use sturdy gluten-free tortillas that are labeled for wrapping, not just soft tacos. Warm them gently before filling, because they crack more easily than flour tortillas. They’ll crisp up nicely in the skillet, but they need a lighter hand when rolling.
Storage and Reheating
- Refrigerator: Store the filling separately for up to 3 days, or assembled wraps for 1 day if you don’t mind the lettuce softening.
- Freezer: The cooked chicken freezes well, but the fully assembled wraps don’t. Freeze the chicken in a sealed container, then build fresh wraps after thawing.
- Reheating: Reheat the chicken gently in a skillet or microwave just until warm, then assemble and toast the wrap fresh. If you reheat a finished wrap too long, the tortilla turns chewy and the lettuce goes limp.
Answers to the Questions Worth Asking

Cheesy Garlic Chicken Wraps
Ingredients
Equipment
Method
- Season the chicken strips with salt and pepper, then cook them in 2 tablespoons butter in a skillet over medium-high heat for 5-6 minutes until golden and cooked through to 165°F, stirring so they brown evenly.
- Transfer the cooked chicken to a plate while you keep the skillet over the same burner heat level.
- In the remaining 2 tablespoons butter, cook the minced garlic for 1 minute until fragrant, stirring constantly so it doesn’t brown.
- Toss the cooked chicken strips in the garlic butter and stir in the chopped parsley to coat.
- Warm the tortillas until pliable so they roll without cracking.
- Spread ranch dressing over each tortilla in an even layer.
- Layer shredded mozzarella, garlic chicken strips, romaine, and cherry tomatoes over the dressed tortillas.
- Roll tightly and toast seam-side down in a skillet over medium heat for 2 minutes per side until golden and the cheese is melted, pressing lightly to seal.
- Slice the wraps diagonally and serve immediately so the cheese stays stretchy.