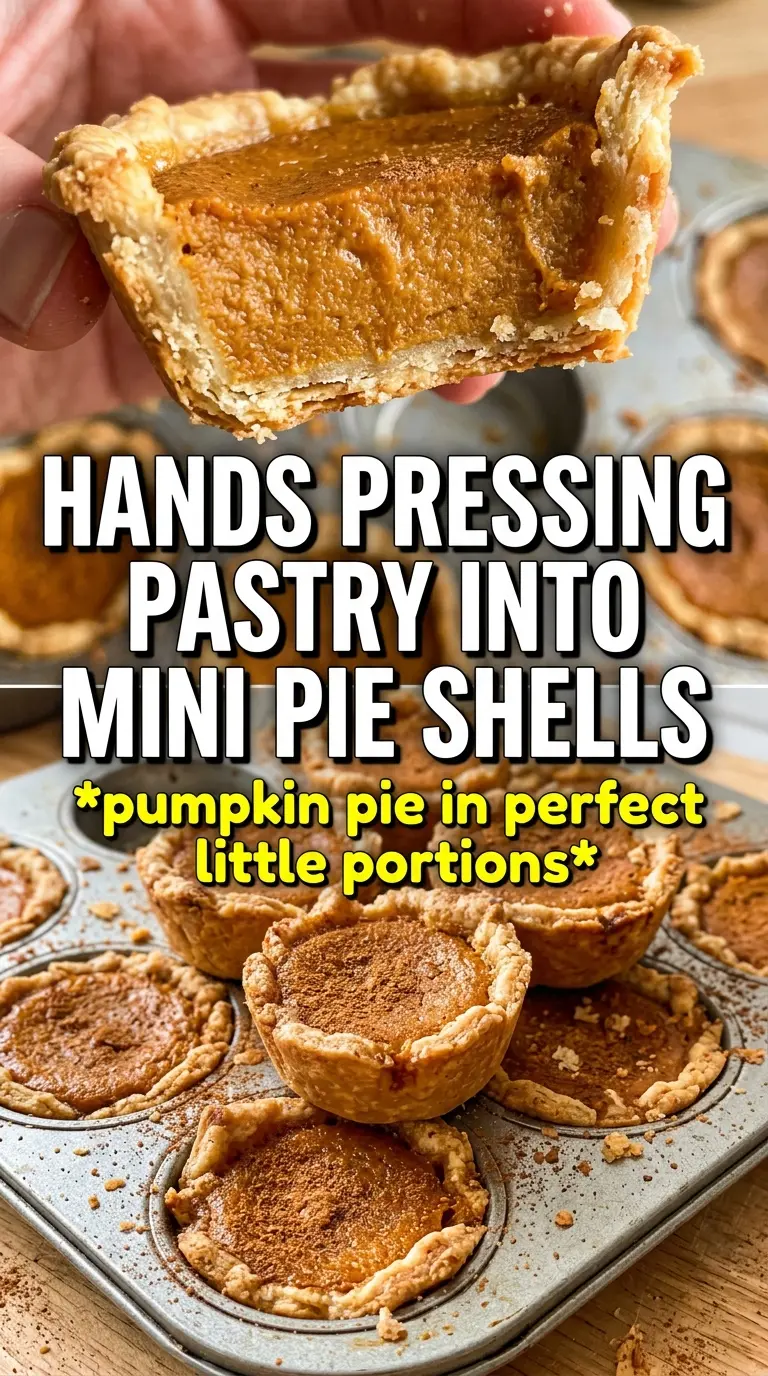
Mini pumpkin pies deliver everything people want from the full-size version in a smaller, neater bite: crisp pastry edges, a smooth spiced custard, and a finish of whipped cream that makes each one feel complete. The best part is how cleanly they serve. No slicing, no messy wedges, just little hand-held desserts with a soft pumpkin center and a golden crust that stays sturdy enough to pick up.
This version keeps the filling simple and balanced so the pumpkin flavor stays front and center. Pumpkin puree, eggs, and evaporated milk or cream set into a tender custard, while brown sugar gives the filling a deeper, rounder sweetness than white sugar would. Baking them in a mini muffin tin helps the crust cook through before the filling overbakes, which is the main thing that makes these taste bakery-good instead of flat or gummy.
Below you’ll find the small details that matter: how to keep the crusts from shrinking, how to know when the centers are set, and how to make them ahead without losing that fresh-baked texture.
The filling set up beautifully and the little crusts stayed crisp even after chilling. I topped them with a small dollop of whipped cream and they disappeared fast.
Keep these mini pumpkin pies handy for a make-ahead dessert with crisp crusts, smooth custard, and a cinnamon cream finish.
The Trick to Keeping Mini Pie Crusts From Puffing Up
The filling is easy. The crust is where these can go sideways. If the dough shrinks, puffs, or slides off the side of the cup, the pies lose that tidy little shape and the filling can spill over before it sets. A greased mini muffin tin helps, but the real key is pressing the dough firmly into the corners and keeping the circles a little wider than the cup so they sit in place without stretching back.
These bake best when the crust gets a head start from the thin pastry shell and the filling stays just shy of fully firm in the oven. Pull them when the center still has the slightest wobble; carryover heat finishes the job as they cool. If you wait until they look completely set in the oven, they usually end up dry on top and cracked in the middle.
- Press the crust all the way to the top edge — that extra height helps hold the filling and keeps the edges from collapsing.
- Don’t stretch the dough — stretched dough shrinks back harder, especially in a mini muffin tin.
- Watch the center, not the clock — the filling should jiggle like set custard, not slosh like batter.
What Each Ingredient Is Actually Doing in These Pies
- Refrigerated pie crusts — This is the shortcut that makes the whole recipe practical. Store-bought dough bakes up evenly in mini tins, and it’s sturdy enough to hold the soft filling. If you use homemade crust, keep it cold and roll it a touch thinner than you would for a full pie.
- Pumpkin puree — Use plain pumpkin puree, not pumpkin pie filling. The canned filling already has sugar and spices mixed in, and it throws off the balance here. Plain puree lets you control the sweetness and keep the texture smooth.
- Evaporated milk or heavy cream — Evaporated milk gives a classic pumpkin pie finish that sets neatly and tastes rich without being heavy. Heavy cream makes the filling a little silkier and richer. Either works; just don’t swap in regular milk unless you want a thinner, less plush custard.
- Brown sugar and spices — Brown sugar adds a deeper caramel note that fits pumpkin better than plain white sugar. The spice blend is warm but restrained, so the filling tastes spiced instead of dusty. If your pumpkin pie spice is old, the pies will taste flat, so check that first.
- Eggs — They’re what turn the mixture from pumpkin soup into custard. Whisk them until fully blended, but don’t beat in a lot of air, or the tops can puff and crack more than they should.
Using Heavy Cream Instead of Evaporated Milk
Heavy cream makes the filling richer and a little more velvety. It also gives you a slightly softer set, so watch the bake time closely and pull the pies as soon as the centers barely wobble.
Making Them Gluten-Free
Use a gluten-free pie crust that’s meant for rolling and baking, not a crumb crust. The texture won’t be exactly the same as standard pastry, but the filling sets the same way and the mini format helps the crust stay intact.
Making the Filling Ahead
You can whisk the filling a day ahead and keep it covered in the refrigerator. Give it a good stir before filling the crusts, since the pumpkin can settle a little, and don’t leave it out too long or the eggs start to thicken the mixture unevenly.
Storage and Reheating
- Refrigerator: Store covered for up to 4 days. The crust softens a bit after the first day, but the filling stays smooth.
- Freezer: They freeze well without the whipped cream. Freeze on a tray until solid, then transfer to a container. Thaw in the refrigerator overnight.
- Reheating: Eat them chilled or let them sit at room temperature for 15 to 20 minutes. If you warm them, use a low oven for a few minutes. Microwave heat makes the custard rubbery and can turn the crust soggy fast.
Answers to the Questions Worth Asking

Mini Pumpkin Pies
Ingredients
Equipment
Method
- Preheat your oven to 375F, then lightly grease a mini muffin tin and press 3.5-inch pie crust circles into the cups (keep pastry snug against the sides) — the tin should look coated and the dough should sit evenly.
- Fill each pastry cup about 3/4 full with pumpkin filling, then bake 18-22 minutes at 375F until the filling is just set and the crust is golden — the center should no longer look loose or glossy.
- Cool the mini pumpkin pies completely at room temperature, then refrigerate for 1 hour — the custard should feel firm when gently pressed.
- Top each mini pie with whipped cream and dust with cinnamon right before serving — finish with a fresh, lightly speckled cinnamon surface.