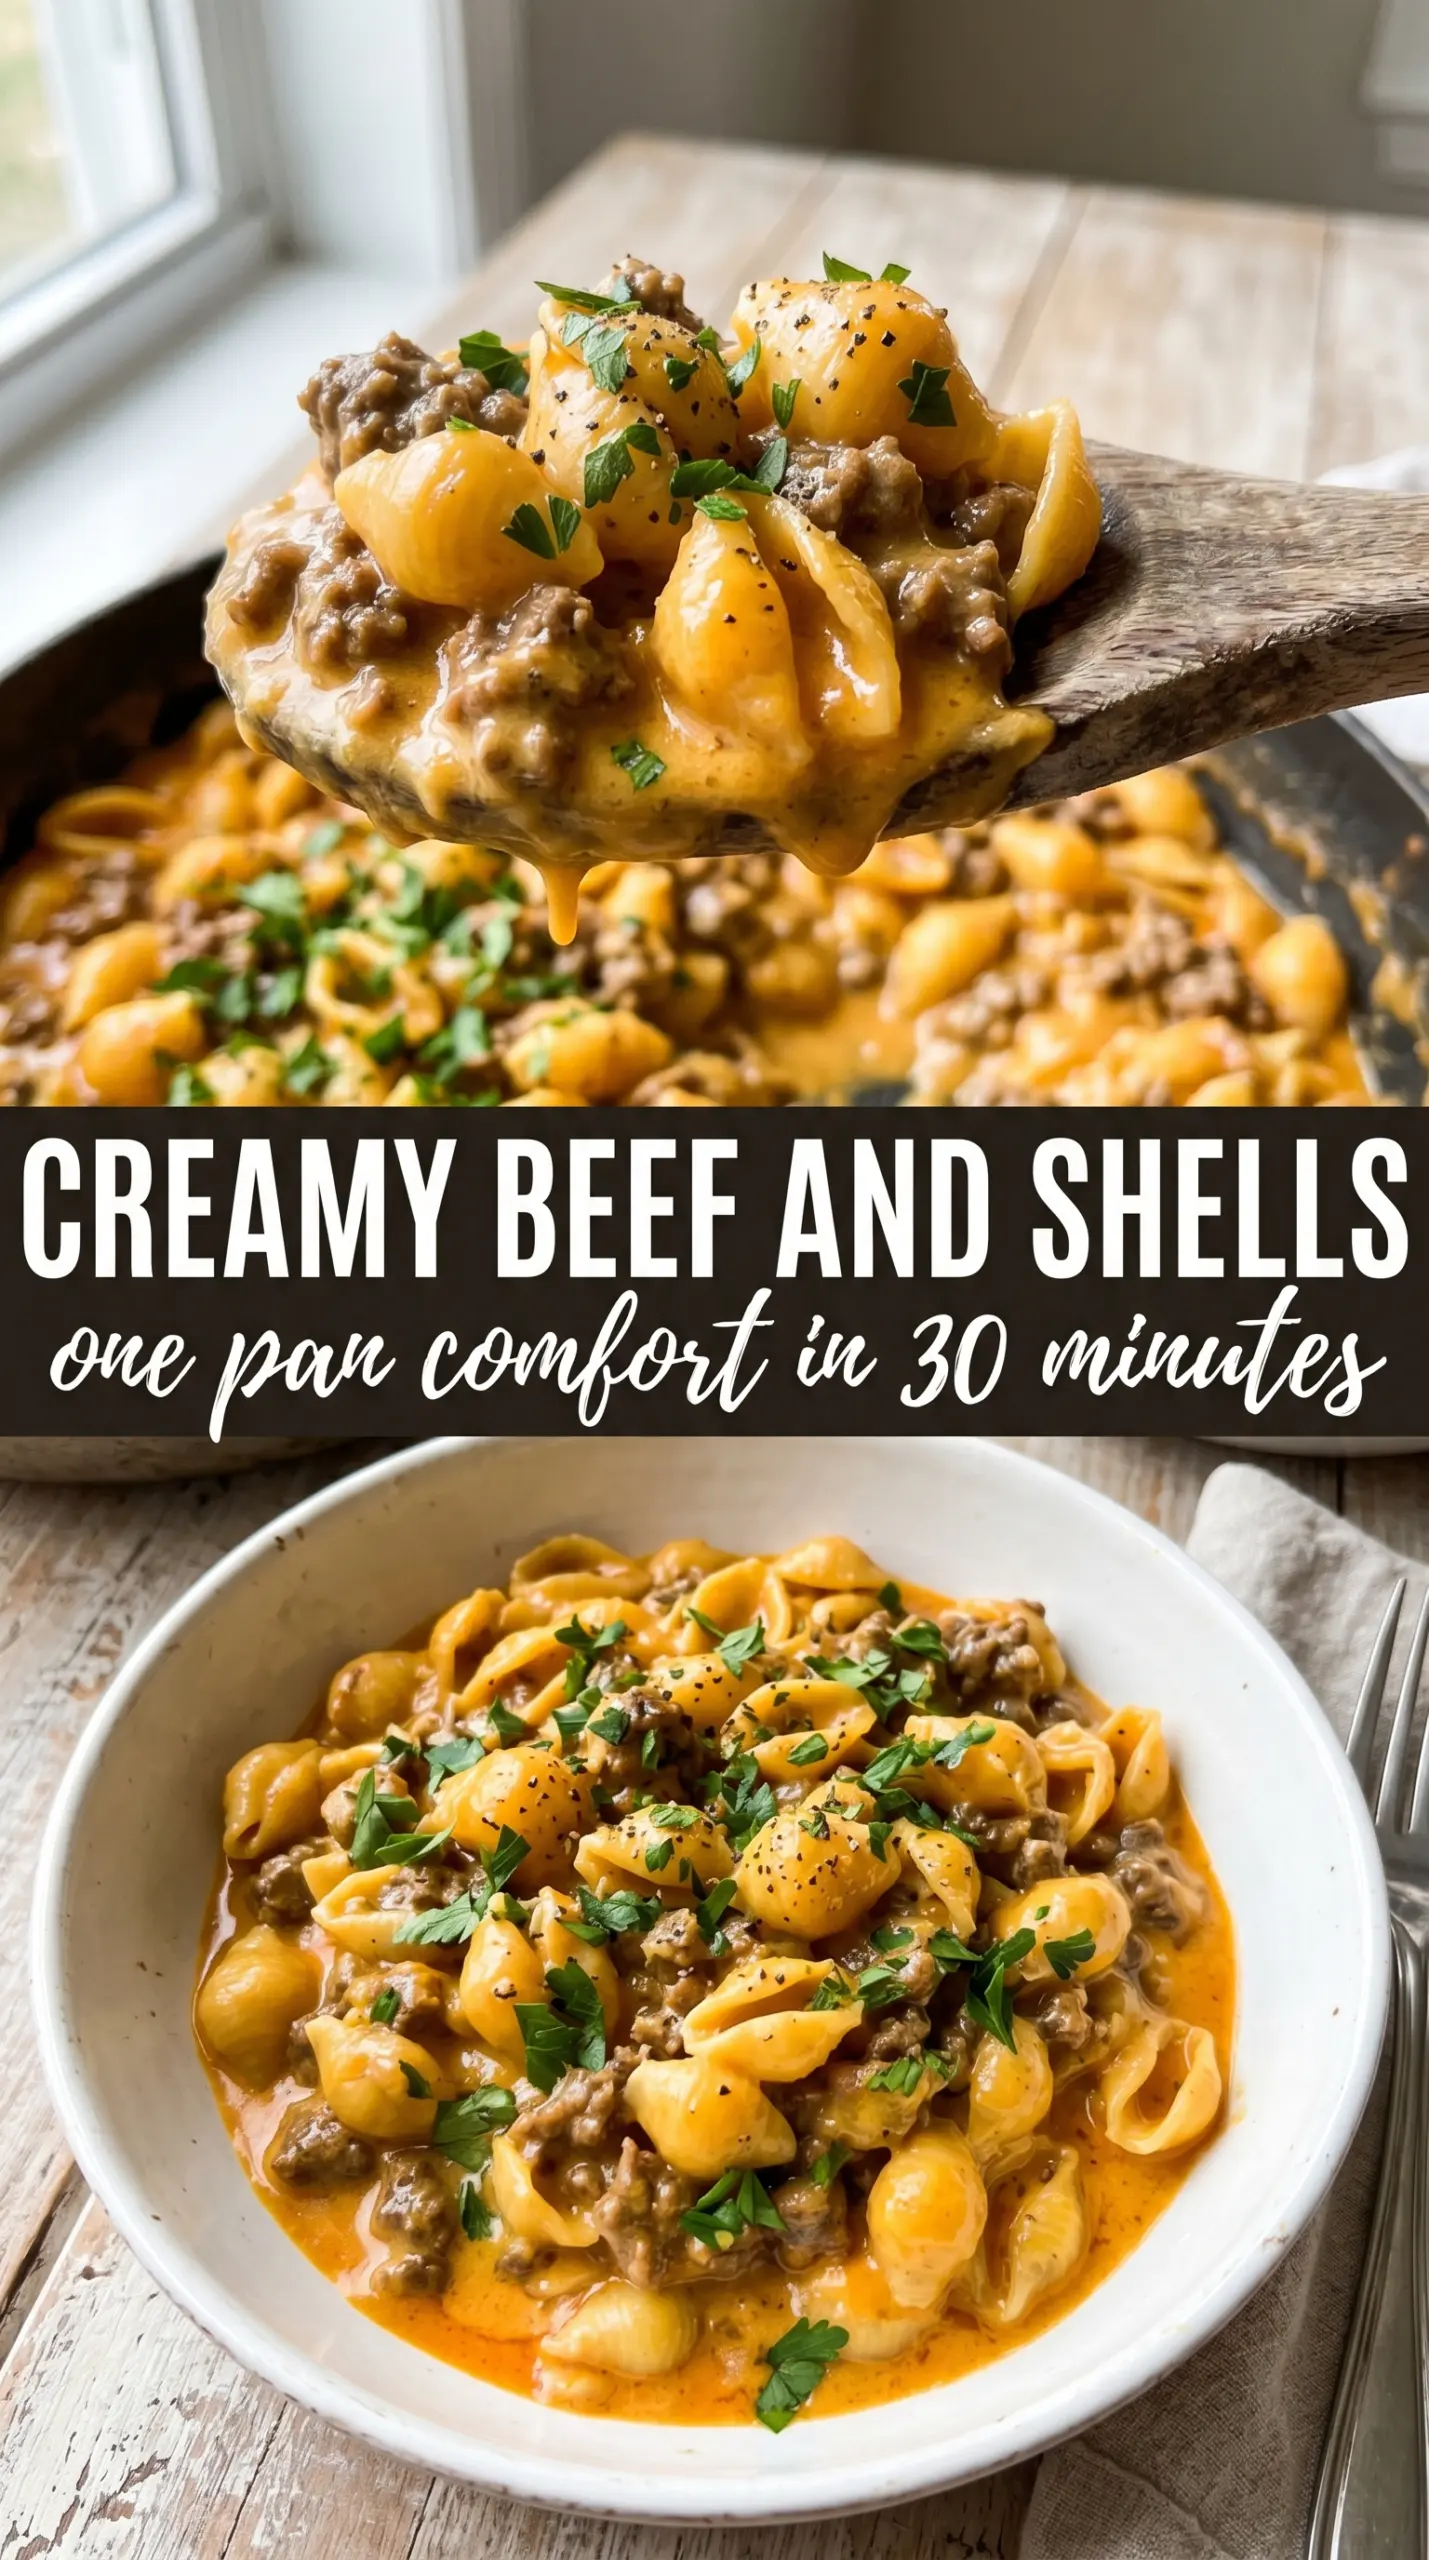
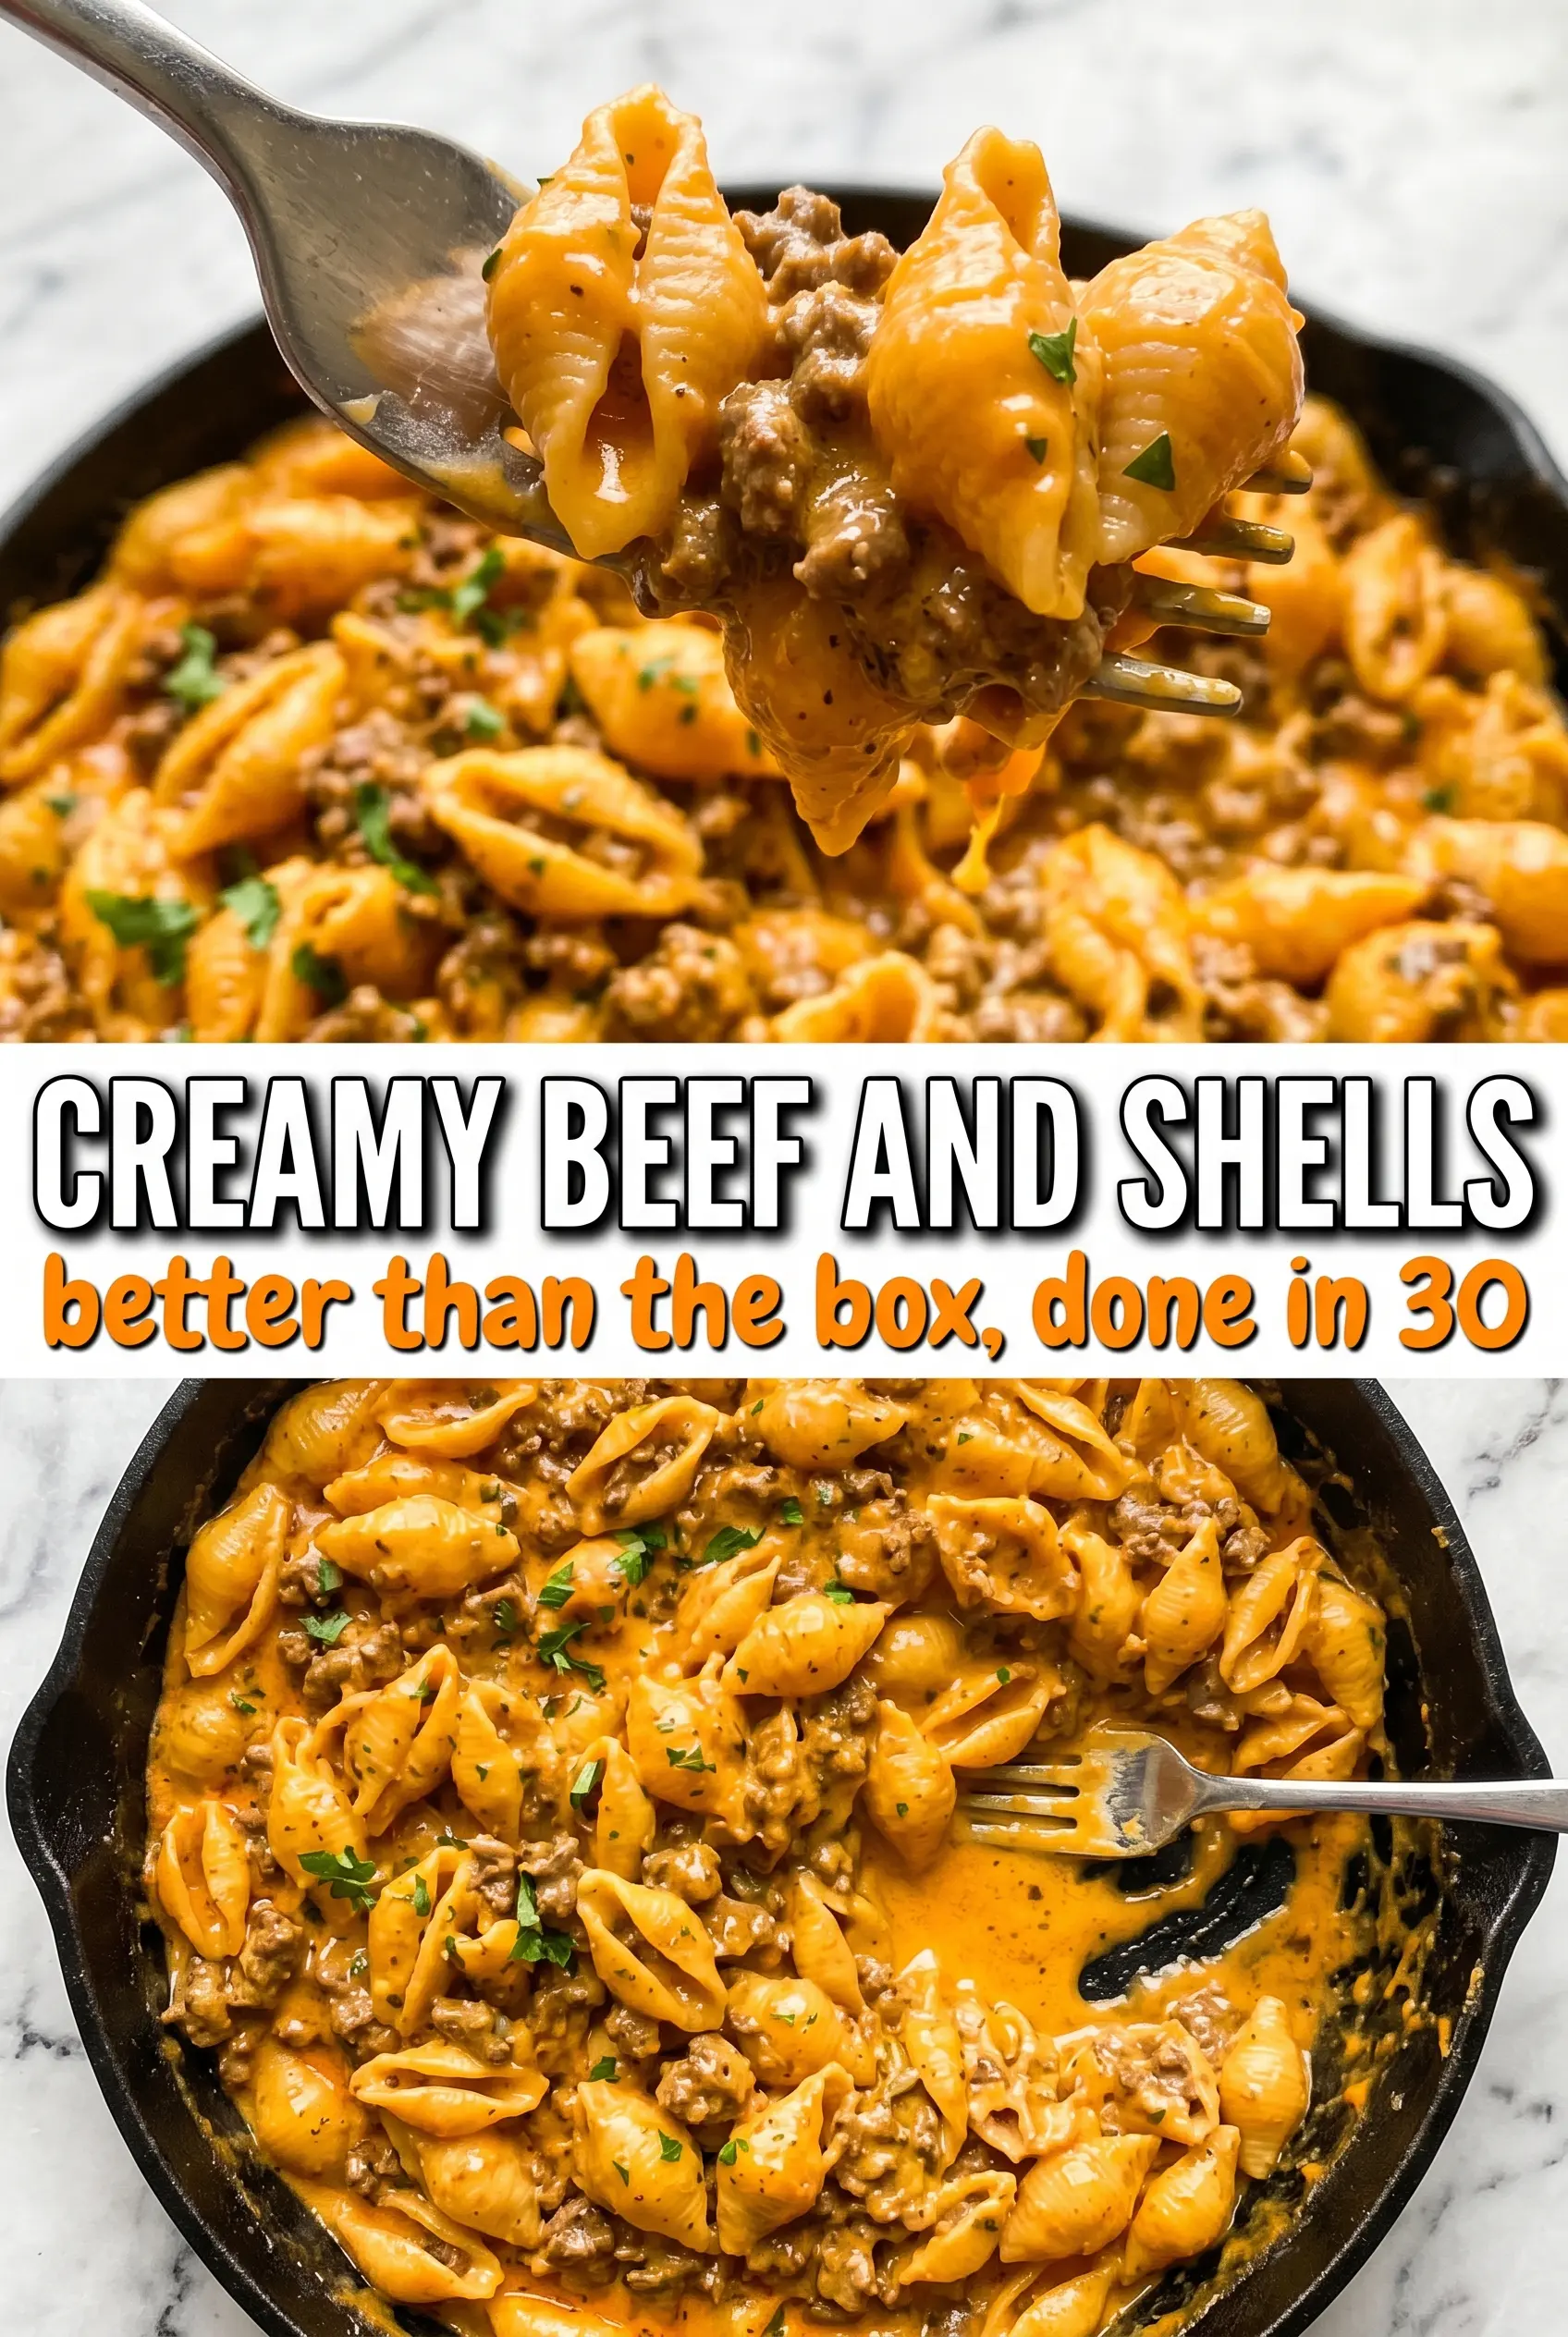
Jumbo shells, beefy tomato sauce, and a silky cheddar finish make this the kind of skillet dinner that disappears fast. The pasta catches the sauce inside every curve, so each bite lands with a little bit of beef, a little bit of cream, and enough cheese to make it feel fully finished without turning heavy. It’s the sort of one-pan meal that tastes like it took more effort than it did.
What makes this version work is the order. The shells cook right in the broth and tomatoes, which lets them pick up flavor instead of tasting like plain pasta tossed in sauce at the end. The cream goes in only after the pasta is tender, and the cheddar gets stirred in off the heat so it melts smooth instead of turning grainy. That keeps the sauce glossy and keeps the beef from getting lost in it.
Below, I’ve included the one timing detail that keeps the sauce from getting too thick, plus a few useful swaps for making this with what you have on hand.
The shells cooked right in the sauce and came out tender but not mushy, and the cheddar melted into everything without separating. My husband went back for seconds before I even sat down.
Save this creamy beef and shells skillet for the nights when you want a rich, cheesy pasta dinner with almost no cleanup.
The Key Move That Keeps the Sauce Creamy Instead of Starchy
The biggest mistake with pasta cooked straight in a skillet is letting it boil hard for too long. That’s how the liquid disappears before the shells are tender and the sauce turns tight, almost pasty. A covered simmer gives the pasta time to cook while the starch thickens the broth gently, which is what gives this dish its body.
The other place people get tripped up is the cheese. If the pan is still screaming hot when the cheddar goes in, it can clump or turn oily instead of melting into the sauce. Pulling the skillet off the heat first gives the cheese enough warmth to melt smoothly without breaking.
- Ground beef — A regular 80/20 package gives you enough flavor without needing extra oil. If you use very lean beef, keep an eye on the pan so the onion doesn’t scorch once the meat is drained.
- Medium shell pasta — The shape matters here. Shells trap the sauce better than long noodles and stay substantial after simmering in the liquid.
- Rotel and diced tomatoes — The combination gives you tomato flavor plus a little heat and acidity. If you only have plain diced tomatoes, add a pinch of red pepper flakes and a splash of extra broth for balance.
- Heavy cream — This is what turns the sauce from brothy to silky. Half-and-half works in a pinch, but the sauce will be thinner and less rich.
- Sharp cheddar — Freshly shredded cheese melts cleaner than the pre-bagged kind, which often contains starches that can make the sauce grainy.
What Each Ingredient Is Actually Doing in This Recipe
- Primary ingredient (the star) — Quality matters most. Choose the best you can find.
- Cooking medium (oil, butter, or broth) — This carries flavors and prevents dryness.
- Seasonings (salt, pepper, spices, herbs) — Layer flavors so nothing overpowers. Build depth gradually.
- Aromatics (garlic, onion, herbs) — Cook with fat to bloom flavors. Become the foundation.
- Supporting ingredients — Complement the main ingredient without overpowering it.
- Sauce or liquid (if applicable) — Brings flavors together. Balance richness with acid.
- Acid (lemon, vinegar, wine, or other) — Brightens and prevents flat-tasting results.
- Final finish (garnish, glaze, or sauce) — Prevents one-dimensional taste and adds visual appeal.
What Happens in the Pan, in the Right Order
Building the Beef Base
Brown the beef in a deep skillet over medium-high heat until it loses its pink color and starts to take on a little color at the edges. That browning gives the sauce depth, so don’t rush it by stirring constantly. Once it’s done, drain off excess fat if the pan looks greasy; too much fat can keep the sauce from clinging to the shells later.
Softening the Onion and Garlic
Add the onion and cook it just until it turns translucent and softens, about three minutes. If it stays crunchy, it will stick out in the finished dish instead of melting into the sauce. Add the garlic at the end of this stage and cook only until fragrant, because garlic burns fast and turns bitter once the pan gets dry.
Letting the Shells Cook in the Sauce
Stir in the uncooked shells, broth, tomatoes, Rotel, seasoning, paprika, salt, and pepper. Bring everything to a boil, then drop the heat to medium-low and cover the skillet. The sauce should bubble gently, not furiously; if it boils too hard, the liquid evaporates before the pasta softens and you’ll end up adding more broth than you planned.
Finishing with Cream and Cheddar
When the shells are tender and most of the liquid is absorbed, stir in the cream and let the sauce simmer uncovered for a couple of minutes. You’re looking for a sauce that loosens slightly, then thickens enough to coat the back of a spoon. Take the pan off the heat before adding the cheddar and stir until it melts into a smooth, orange sauce with no visible shreds left behind.
How to Adapt This Skillet When You Need to Work With What’s in the Kitchen
Make It a Little Spicier
Use the full can of Rotel and add a pinch of crushed red pepper with the paprika. That keeps the heat integrated into the sauce instead of sitting on top of it. For even more kick, finish with a few dashes of hot sauce after the cheese melts.
Dairy-Free Version
Use unsweetened plain coconut cream or an unsweetened oat-based cooking cream instead of heavy cream, then skip the cheddar or use a melting dairy-free shreds blend. The sauce won’t taste exactly the same, but it will still be rich and spoonable if you keep the heat low.
Swap the Beef for Turkey
Ground turkey works well if you want a lighter skillet dinner, but it needs the onion, paprika, and cheese to carry more of the flavor. Add a small drizzle of oil when browning if the pan looks dry, because turkey can cook up lean and a little flat without it.
Make the Sauce Thicker
Let it simmer uncovered for an extra minute or two before adding the cheese, but don’t crank up the heat. The sauce thickens from evaporation and starch, not from a hard boil, and going too far will leave the shells dry before the cheddar goes in.
Storage and Reheating
- Refrigerator: Store in an airtight container for up to 4 days. The sauce will tighten as it chills, and the pasta will soften a little more.
- Freezer: It freezes, but the cream sauce can turn a bit grainy after thawing. If you do freeze it, cool it completely first and reheat gently with a splash of broth or milk.
- Reheating: Warm it on the stove over low heat with a spoonful of broth, milk, or cream to loosen the sauce. The common mistake is blasting it in the microwave until the cheese separates; slow heat brings the sauce back together much better.
Questions I Get Asked About This Recipe
Creamy Beef and Shells
Ingredients
Equipment
Method
- Heat a large deep skillet over medium-high heat, add ground beef, and cook while breaking it apart until browned. Drain excess fat so the sauce stays creamy instead of greasy (visual cue: no pink remains).
- Add diced onion to the browned beef and cook for 3 minutes until softened. Add minced garlic and cook 1 more minute until fragrant (visual cue: garlic smells toasted, not burnt).
- Add uncooked shells, beef broth, diced tomatoes, Rotel, Italian seasoning, smoked paprika, salt, and black pepper, then stir to combine. Bring to a boil (visual cue: rapid bubbling across the surface).
- Reduce heat to medium-low, cover, and cook for 12–15 minutes until pasta is tender and most liquid is absorbed. Stir once halfway through if needed to prevent sticking (visual cue: shells are soft with a thick coating).
- Stir in heavy cream and simmer uncovered for 2–3 minutes until the sauce thickens. Keep it at a gentle simmer (visual cue: sauce clings to shells).
- Remove from heat and stir in shredded cheddar until fully melted, then serve immediately. (Visual cue: cheddar disappears into the sauce and creates a glossy, creamy finish.)