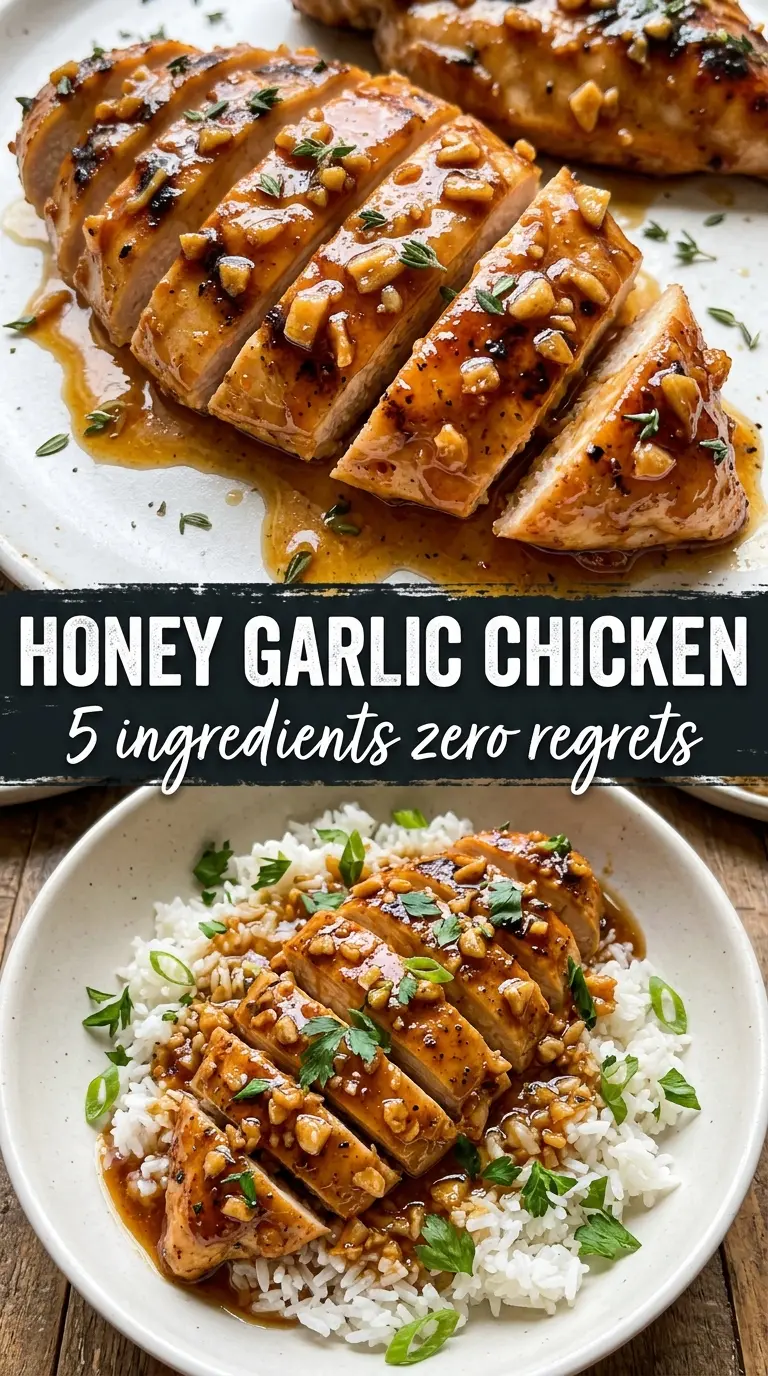
Caramelized chicken breasts coated in a sticky honey garlic glaze are the kind of dinner that disappears fast because every bite hits that sweet-salty balance with just enough edge from the garlic and vinegar. The sauce clings to the chicken instead of sliding off, and when it hits the hot pan it turns glossy, deep amber, and a little bit blistered in the best way.
This version works because the chicken gets a real sear before the sauce goes in, which gives you browned bits in the pan for the glaze to pick up. Honey brings the shine and body, soy sauce adds depth, and rice vinegar keeps the sweetness from turning flat. A small cornstarch slurry finishes the job by tightening the sauce into something sticky enough to coat every surface.
Below, I’m walking through the part that matters most: how to keep the sauce from burning, how to know when it’s thick enough, and what to change if you want to use thighs instead of breasts.
The glaze thickened right when you said it would, and it clung to the chicken instead of pooling watery in the pan. I added the green onions at the end and the whole skillet tasted like takeout, but better.
Sticky honey garlic chicken with that deep amber glaze is worth pinning for the nights when you want a fast skillet dinner that still feels special.
The Sear Is Doing More Work Than the Sauce
The biggest mistake with honey garlic chicken is rushing straight into the glaze before the chicken has color. Pale chicken in a sweet sauce tastes flat, while a properly browned surface gives the sauce something to grab onto and builds a deeper, more savory finish. That first 5 to 6 minutes per side matters more than any extra teaspoon of honey.
Keep the pan at medium-high heat for the sear, then lower your temperature once the sauce goes in. Honey can scorch fast, and once it starts to darken too far, the glaze turns bitter instead of sticky. You want a pan that stays lively, not smoking.
- Color first, sauce second — The chicken should leave the skillet with a deep golden crust before you move on. If it’s still pale, give it another minute.
- Don’t overcrowd the pan — Two breasts at a time is better than cramming all four in if your skillet runs small. Crowding traps steam and kills the sear.
- Use the browned bits — Those little stuck-on spots are flavor. The sauce loosens them as it simmers, which is why the same pan works better than washing it out.
What Each Ingredient Is Actually Doing in This Glaze
- Chicken breasts — Boneless, skinless breasts keep this quick and lean, but they need careful cooking so they stay juicy. If you want more forgiveness, use boneless thighs and add a couple extra minutes to the cook time.
- Honey — This is the gloss and the stickiness. No other sweetener behaves quite the same in the pan, so if you swap it, you lose that lacquered finish.
- Soy sauce — This brings the salt and the savory backbone. Low-sodium soy sauce works fine if that’s what you keep on hand, but the sauce may need a pinch more salt at the end.
- Butter — It rounds out the sauce and helps the garlic bloom without tasting sharp. You can use olive oil in a pinch, but the glaze won’t taste as plush.
- Rice vinegar — The small hit of acid keeps the sauce from becoming candy-sweet. If you don’t have it, apple cider vinegar works, but use a little less because it reads sharper.
- Cornstarch slurry — This is what turns the sauce from thin and glossy into a proper glaze. Stir it in smoothly and let it simmer; if it still looks loose, give it another minute instead of adding more starch right away.
Building the Glaze So It Stays Sticky, Not Burnt
Sear the Chicken Until It Releases Cleanly
Season the chicken, then lay it into hot oil and leave it alone long enough for a crust to form. If you move it too early, it tears and leaves you with patchy browning instead of an even sear. When the chicken lifts cleanly and the first side is deep golden, flip it and finish the other side. The center should reach 165°F, but don’t rely on the thermometer alone if the surface is still pale.
Cook the Garlic Briefly in Butter
Once the chicken comes out, the garlic needs only about a minute in the butter. It should smell fragrant and warm, not toasted or brown. If it darkens before the honey goes in, it will turn bitter in the finished sauce, so keep the heat under control and move straight into the liquid ingredients.
Thicken the Sauce Before the Chicken Goes Back
Add the honey, soy sauce, and rice vinegar, then stir in the cornstarch slurry and let the mixture simmer until it turns glossy and lightly thickened. You’re looking for a sauce that coats the spoon and leaves a clean trail for a second before closing back up. If it still pours like broth, it hasn’t reduced enough yet. Put the chicken back in only when the glaze has that sticky, syrupy look.
Coat and Finish in the Pan
Return the chicken and turn it through the sauce until every side is lacquered. Let it cook for another minute or two so the glaze grips the surface instead of sliding off. The pan should look shiny and almost syrupy, with garlic bits suspended throughout and a little pooling around the chicken.
How to Adapt This for Different Pans, Preferences, and Leftovers
Boneless Thighs Instead of Breasts
Thighs stay juicier and are a little harder to overcook, which makes them a smart swap if you want more forgiveness. Use the same sauce, but give the chicken a few extra minutes in the pan until it’s cooked through and the glaze clings tightly.
Gluten-Free Version
Swap the soy sauce for tamari or a certified gluten-free soy sauce and the dish keeps the same savory backbone. The texture of the glaze won’t change, so this is an easy adjustment that doesn’t cost you much at all.
Less Sweet, More Savory
Drop the honey slightly and add a touch more soy sauce or a splash of water to keep the sauce from becoming too sharp. You’ll lose a little shine and stickiness, but the chicken will taste more balanced if you prefer a sauce that leans savory.
Storage and Reheating
- Refrigerator: Store leftovers in an airtight container for up to 4 days. The glaze will thicken as it chills.
- Freezer: Freeze cooked chicken with sauce for up to 2 months. Thaw overnight in the fridge; the sauce may loosen a little after reheating, but it still holds up well.
- Reheating: Warm gently in a skillet over low heat with a splash of water to loosen the glaze. High heat can make the honey sauce seize and turn sticky in a bad way before the chicken is hot through.
Questions I Get Asked About This Recipe

Honey Garlic Chicken
Ingredients
Equipment
Method
- Season the chicken breasts with salt, pepper, and garlic powder. Heat olive oil in a large skillet over medium-high heat and sear until deep golden, 5-6 minutes per side, until the internal temperature reaches 165°F, then remove the chicken.
- In the same pan, melt the butter and cook the minced garlic for 1 minute until fragrant. Add honey, soy sauce, and rice vinegar, stirring until combined.
- Stir in the cornstarch slurry and simmer the sauce 2-3 minutes until it thickens into a sticky glaze with a glossy sheen.
- Return the chicken to the pan and turn to coat in the honey garlic glaze. Cook 1-2 more minutes, until the glaze clings and looks blistered and deeply amber.
- Top with sesame seeds and sliced green onions. Serve immediately over steamed rice so the sauce pools and coats each bite.