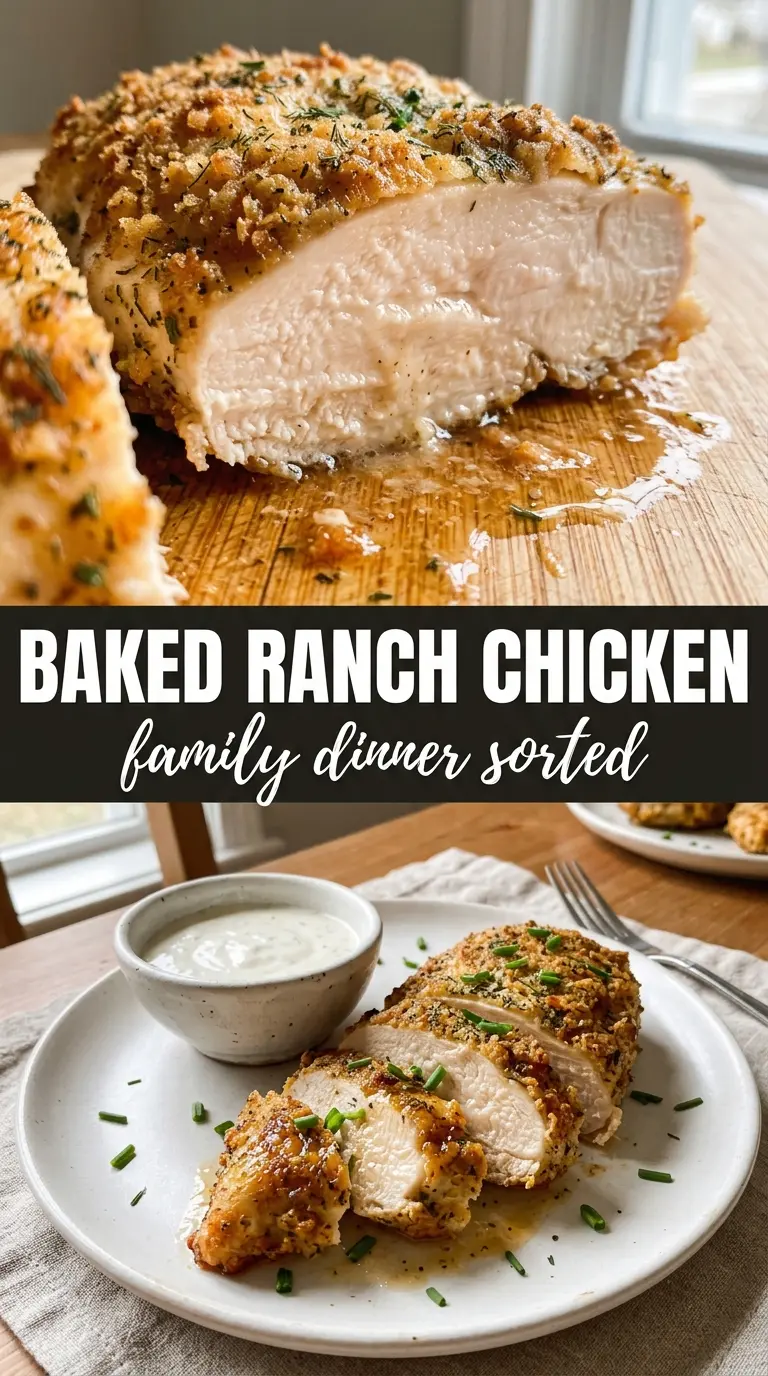
Baked ranch chicken earns its place in the weeknight rotation because the top turns crisp and bronzed while the chicken underneath stays juicy. The mayo base sounds rich, but it’s the reason the seasoning clings in a thick layer instead of sliding off in the oven. Parmesan and panko do the rest, giving you a crust that cracks a little when you cut into it and smells like garlic, herbs, and toasted cheese the second it comes out.
The part that matters most is building that topping in the right order. Mayo keeps the chicken moist and acts like glue, ranch seasoning brings the salt and herbs, and the Parmesan-panko mixture browns fast enough to give you real texture without drying out the meat. I’ve made versions with plain breadcrumbs, and they work, but panko gives a lighter, shatter-y finish that feels worth the extra box in the pantry.
Below you’ll find the small details that keep the crust crisp, the best swap if you’re out of mayo, and what to do when the chicken breasts are larger than average and need a few extra minutes in the oven.
The crust stayed crisp even after I let the chicken rest for a few minutes, and the ranch-Parmesan topping browned beautifully without turning greasy. My husband asked if I could put this in the regular dinner rotation.
Pin this baked ranch chicken for a crisp Parmesan crust, juicy chicken, and an easy 25-minute dinner you’ll want on repeat.
The trick to keeping the ranch crust crisp instead of soggy
Most baked chicken recipes lose their crunch because the topping gets too wet before it hits the oven. Here, the mayo and seasoning stay on the chicken, while the Parmesan-panko mixture sits on top and bakes into a separate crust. That layering matters. If you mix everything together into one paste, the panko never has a chance to toast properly and you end up with a soft coating instead of a crisp one.
The other detail that changes the result is oven heat. Four hundred degrees is hot enough to brown the cheese and breadcrumbs before the chicken has time to dry out. If your chicken breasts are especially thick, give them a quick pound to even them out so the centers finish at the same time as the crust.
- Chicken breasts — Uniform thickness is more important than size here. If one end is much thicker, it will lag behind the crust and you’ll overbake the thinner end while waiting for the center to reach temperature.
- Mayonnaise — This is the moisture barrier and the glue. Sour cream can work in a pinch, but it browns less evenly and doesn’t hold the topping quite as well. Use enough to coat the top in a thick, even layer.
- Ranch seasoning — The packet brings salt, herbs, and garlic in the exact balance that makes this taste like ranch chicken instead of just chicken with toppings. Homemade ranch seasoning works too if it’s fairly salty.
- Parmesan and panko — Freshly grated Parmesan melts and browns better than the shelf-stable kind, and panko stays crisp instead of turning dense. Regular breadcrumbs will work, but the crust won’t have the same light crunch.
What Each Ingredient Is Actually Doing in This Recipe
- Primary ingredient (the star) — Quality matters most. Choose the best you can find.
- Cooking medium (oil, butter, or broth) — This carries flavors and prevents dryness.
- Seasonings (salt, pepper, spices, herbs) — Layer flavors so nothing overpowers. Build depth gradually.
- Aromatics (garlic, onion, herbs) — Cook with fat to bloom flavors. Become the foundation.
- Supporting ingredients — Complement the main ingredient without overpowering it.
- Sauce or liquid (if applicable) — Brings flavors together. Balance richness with acid.
- Acid (lemon, vinegar, wine, or other) — Brightens and prevents flat-tasting results.
- Final finish (garnish, glaze, or sauce) — Prevents one-dimensional taste and adds visual appeal.
Build the topping before the chicken goes into the oven
Season the chicken first
Lay the chicken breasts in a greased baking dish and season them lightly with salt and pepper. Don’t overdo the salt, since the ranch packet and Parmesan already bring plenty. The seasoning underneath matters because the topping covers the surface; if the chicken is bland before it bakes, the finished dish stays one-note.
Mix the ranch layer until it looks smooth
Stir the mayonnaise and ranch seasoning together until the mixture is fully blended and speckled with herbs. Spread it over the top of each chicken breast in an even layer, covering the surface all the way to the edges. If the layer is patchy, the crust bakes unevenly and you get dry spots where the topping never really adheres.
Press on the crumb mixture, don’t just sprinkle it
Combine the Parmesan, panko, garlic powder, and smoked paprika, then press that mixture gently onto the mayo layer. Pressing matters because it helps the crumbs stick before the heat starts working on them. If you just scatter the topping over the chicken, a lot of it falls off when you move the pan.
Bake until the crust is deeply golden and the center is done
Bake at 400°F for 22 to 25 minutes, until the top is bronzed and the chicken reaches 165°F in the thickest part. The crust should look dry, crisp, and lightly blistered around the edges. If the top browns too quickly before the chicken is cooked through, lay a loose piece of foil over the dish for the last few minutes instead of dropping the temperature.
How to adapt this baked ranch chicken without losing the crust
Dairy-free version with the same crunchy top
Use a good dairy-free mayonnaise and swap the Parmesan for a dairy-free hard-style cheese alternative or extra panko seasoned with a little nutritional yeast. The crust won’t taste exactly the same, but it still browns well and holds onto the chicken.
Gluten-free crumb topping
Replace the panko with gluten-free breadcrumbs or crushed gluten-free crackers. You’ll still get a crisp top, though crackers brown a little faster, so start checking at the 20-minute mark.
For extra browning and a deeper Parmesan flavor
Add a tablespoon of melted butter to the crumb mixture before pressing it on top. That gives the crust a richer finish and a deeper bronze color, but it also makes the topping a little heavier, so don’t add more than that.
Using chicken thighs instead of breasts
Boneless skinless thighs work well and stay juicy, but they need a slightly longer bake time and usually won’t have the same neat, sliced look. Watch the temperature instead of the clock and pull them when the thickest part reaches 165°F.
Storage and Reheating
- Refrigerator: Store leftovers in an airtight container for up to 3 days. The crust softens a bit, but the flavor stays strong.
- Freezer: Freeze cooked chicken if you need to, though the topping won’t stay as crisp after thawing. Wrap tightly and freeze for up to 2 months.
- Reheating: Reheat in a 350°F oven or air fryer until warmed through. The microwave works in a pinch, but it turns the crust soft, so use it only if texture doesn’t matter.
Answers to the things people usually get wrong

Baked Ranch Chicken
Ingredients
Equipment
Method
- Preheat oven to 400°F and grease a baking dish until lightly coated for easy release. Set the dish on a stable rack so the chicken bakes evenly.
- Season chicken lightly with salt and pepper and place in the prepared dish. Arrange breasts spaced apart so heat circulates around each piece.
- Mix mayonnaise with ranch seasoning until combined, forming a thick ranch paste. The mixture should look smooth and evenly speckled with seasoning.
- Spread ranch mixture generously over the top of each chicken breast. Cover the surface so the crust can adhere and bake into a crackled layer.
- Combine Parmesan, panko, garlic powder, and smoked paprika, then press over the mayonnaise-coated chicken. Press firmly so crumbs cling and create a golden, crunchy top.
- Bake at 400°F for 22-25 minutes until the crust is golden and the chicken reaches 165°F. Look for a bronzed, crackled topping with crisp edges.
- Garnish with fresh chives or parsley and serve immediately. The bright herbs add a fresh pop right before eating.