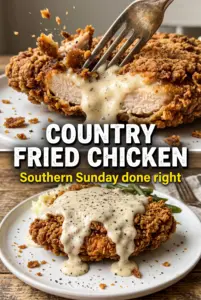
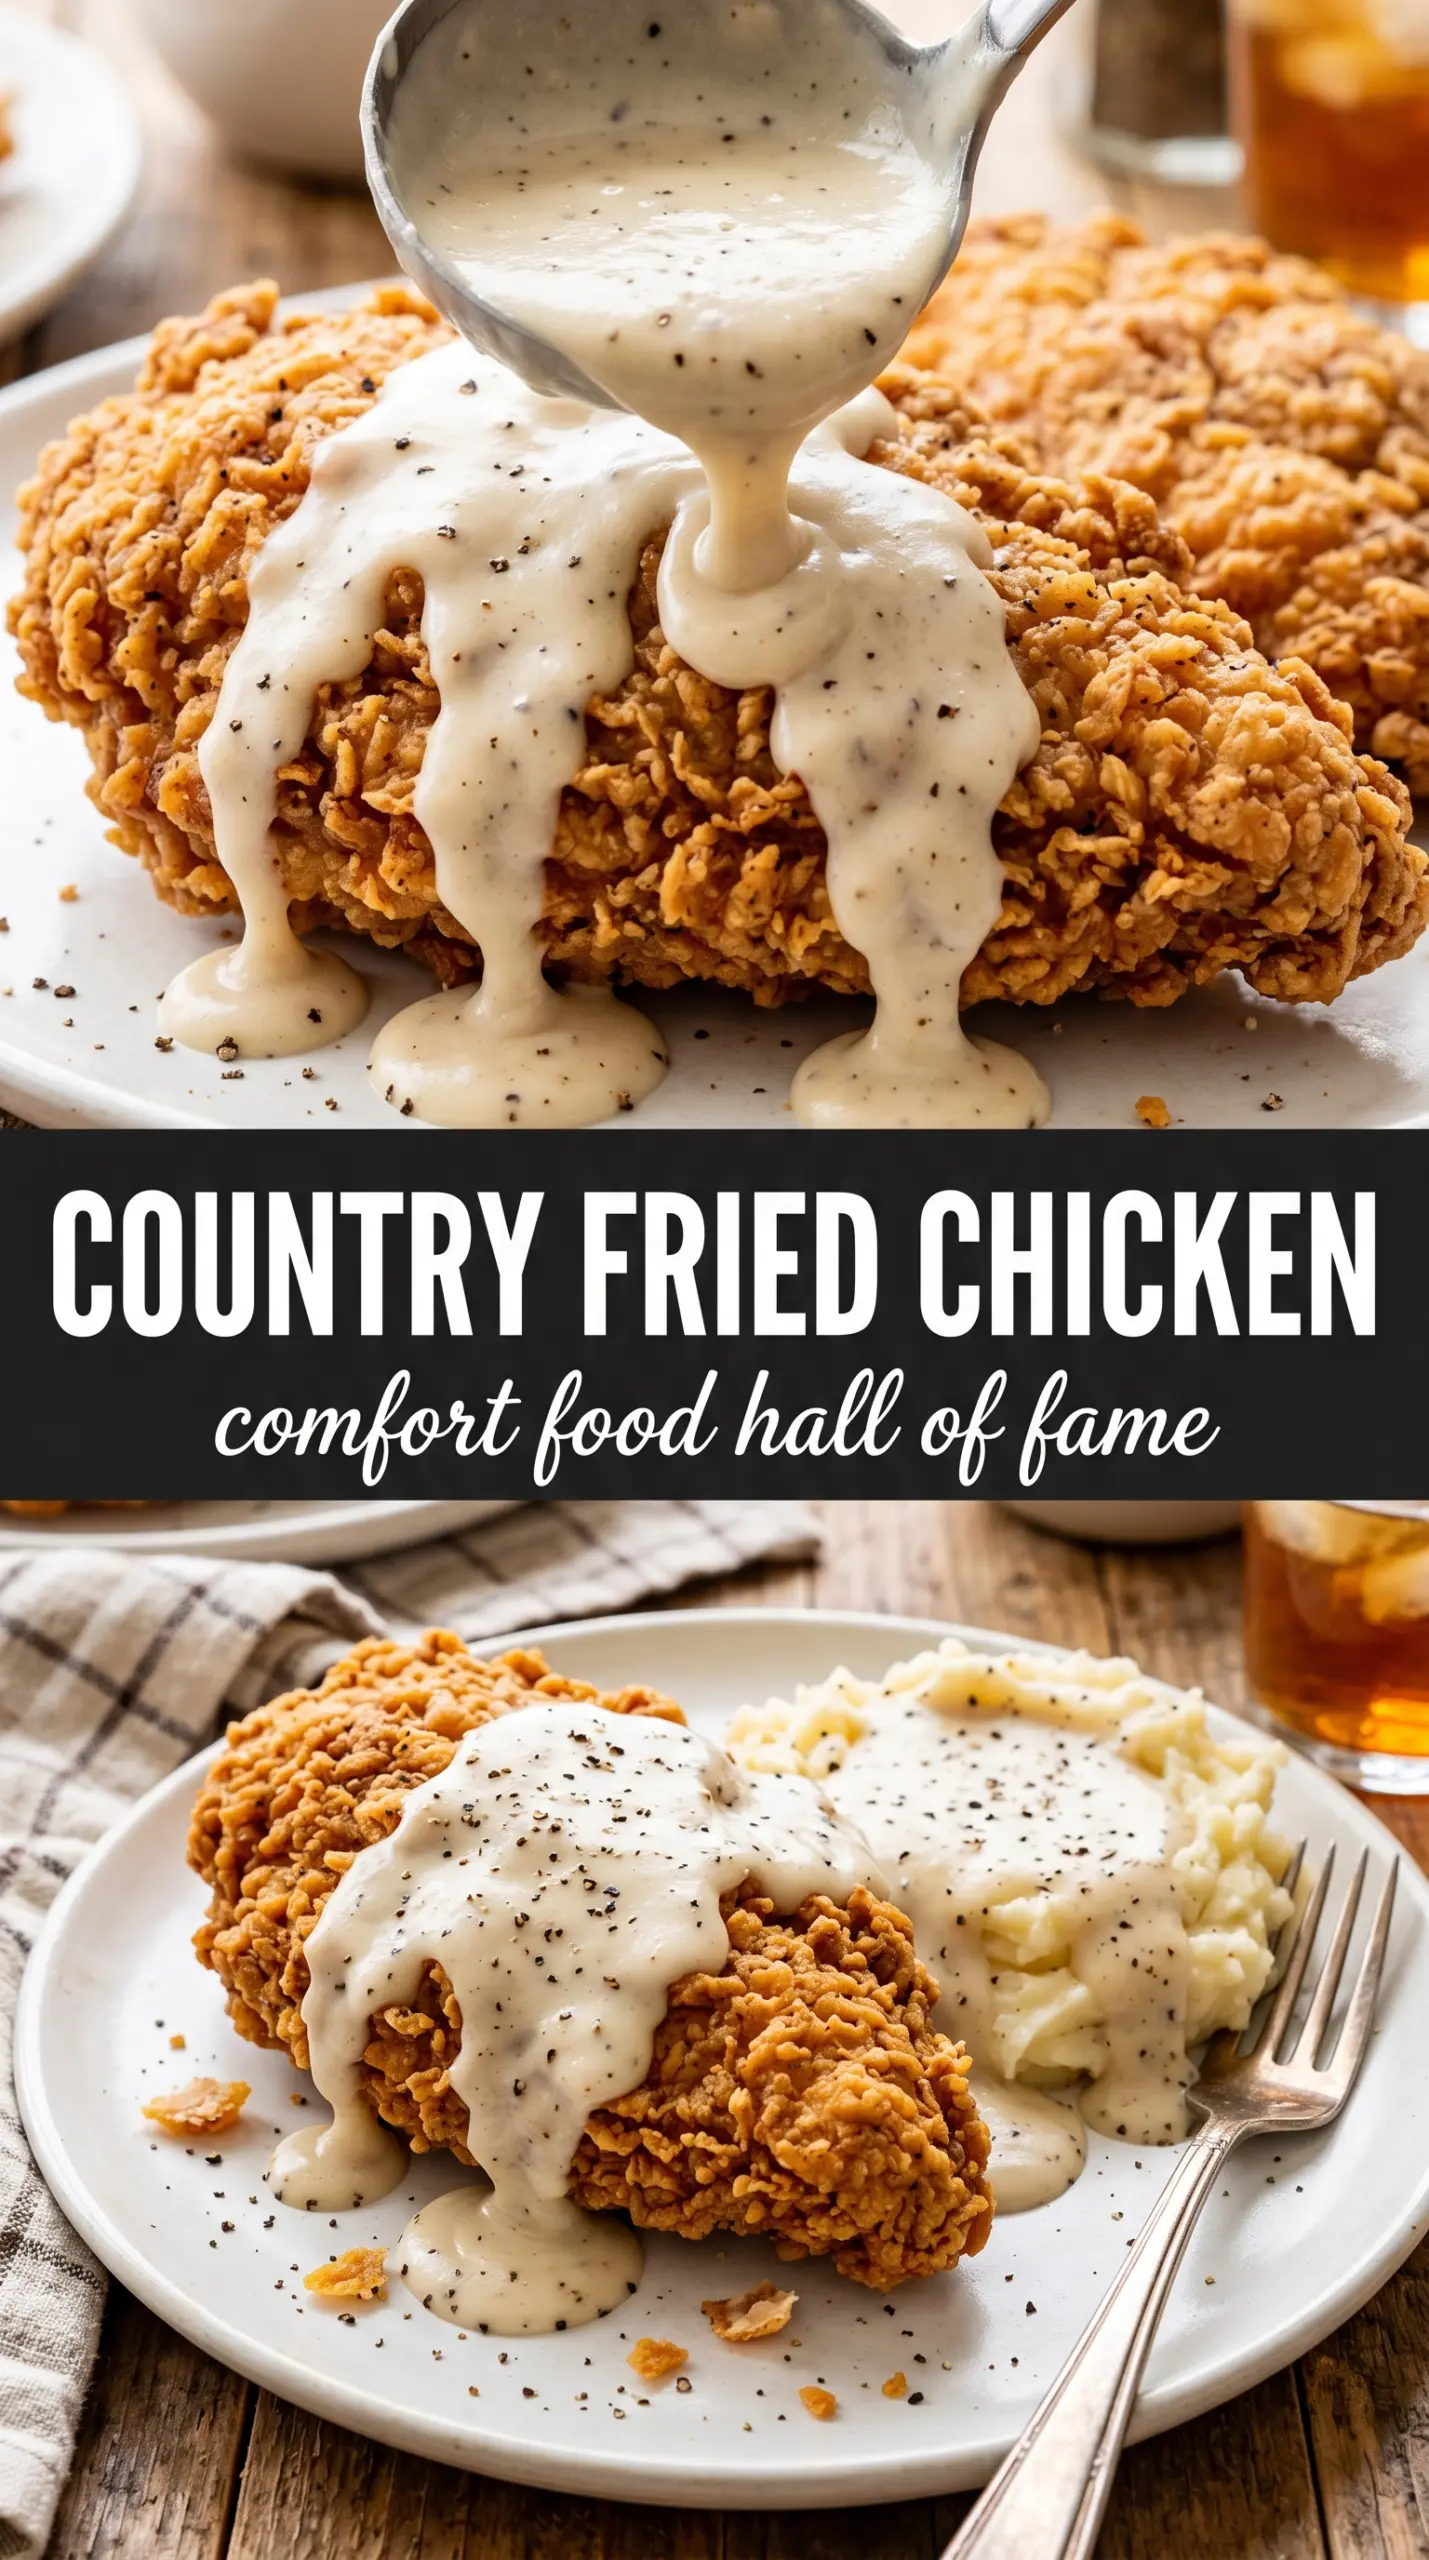
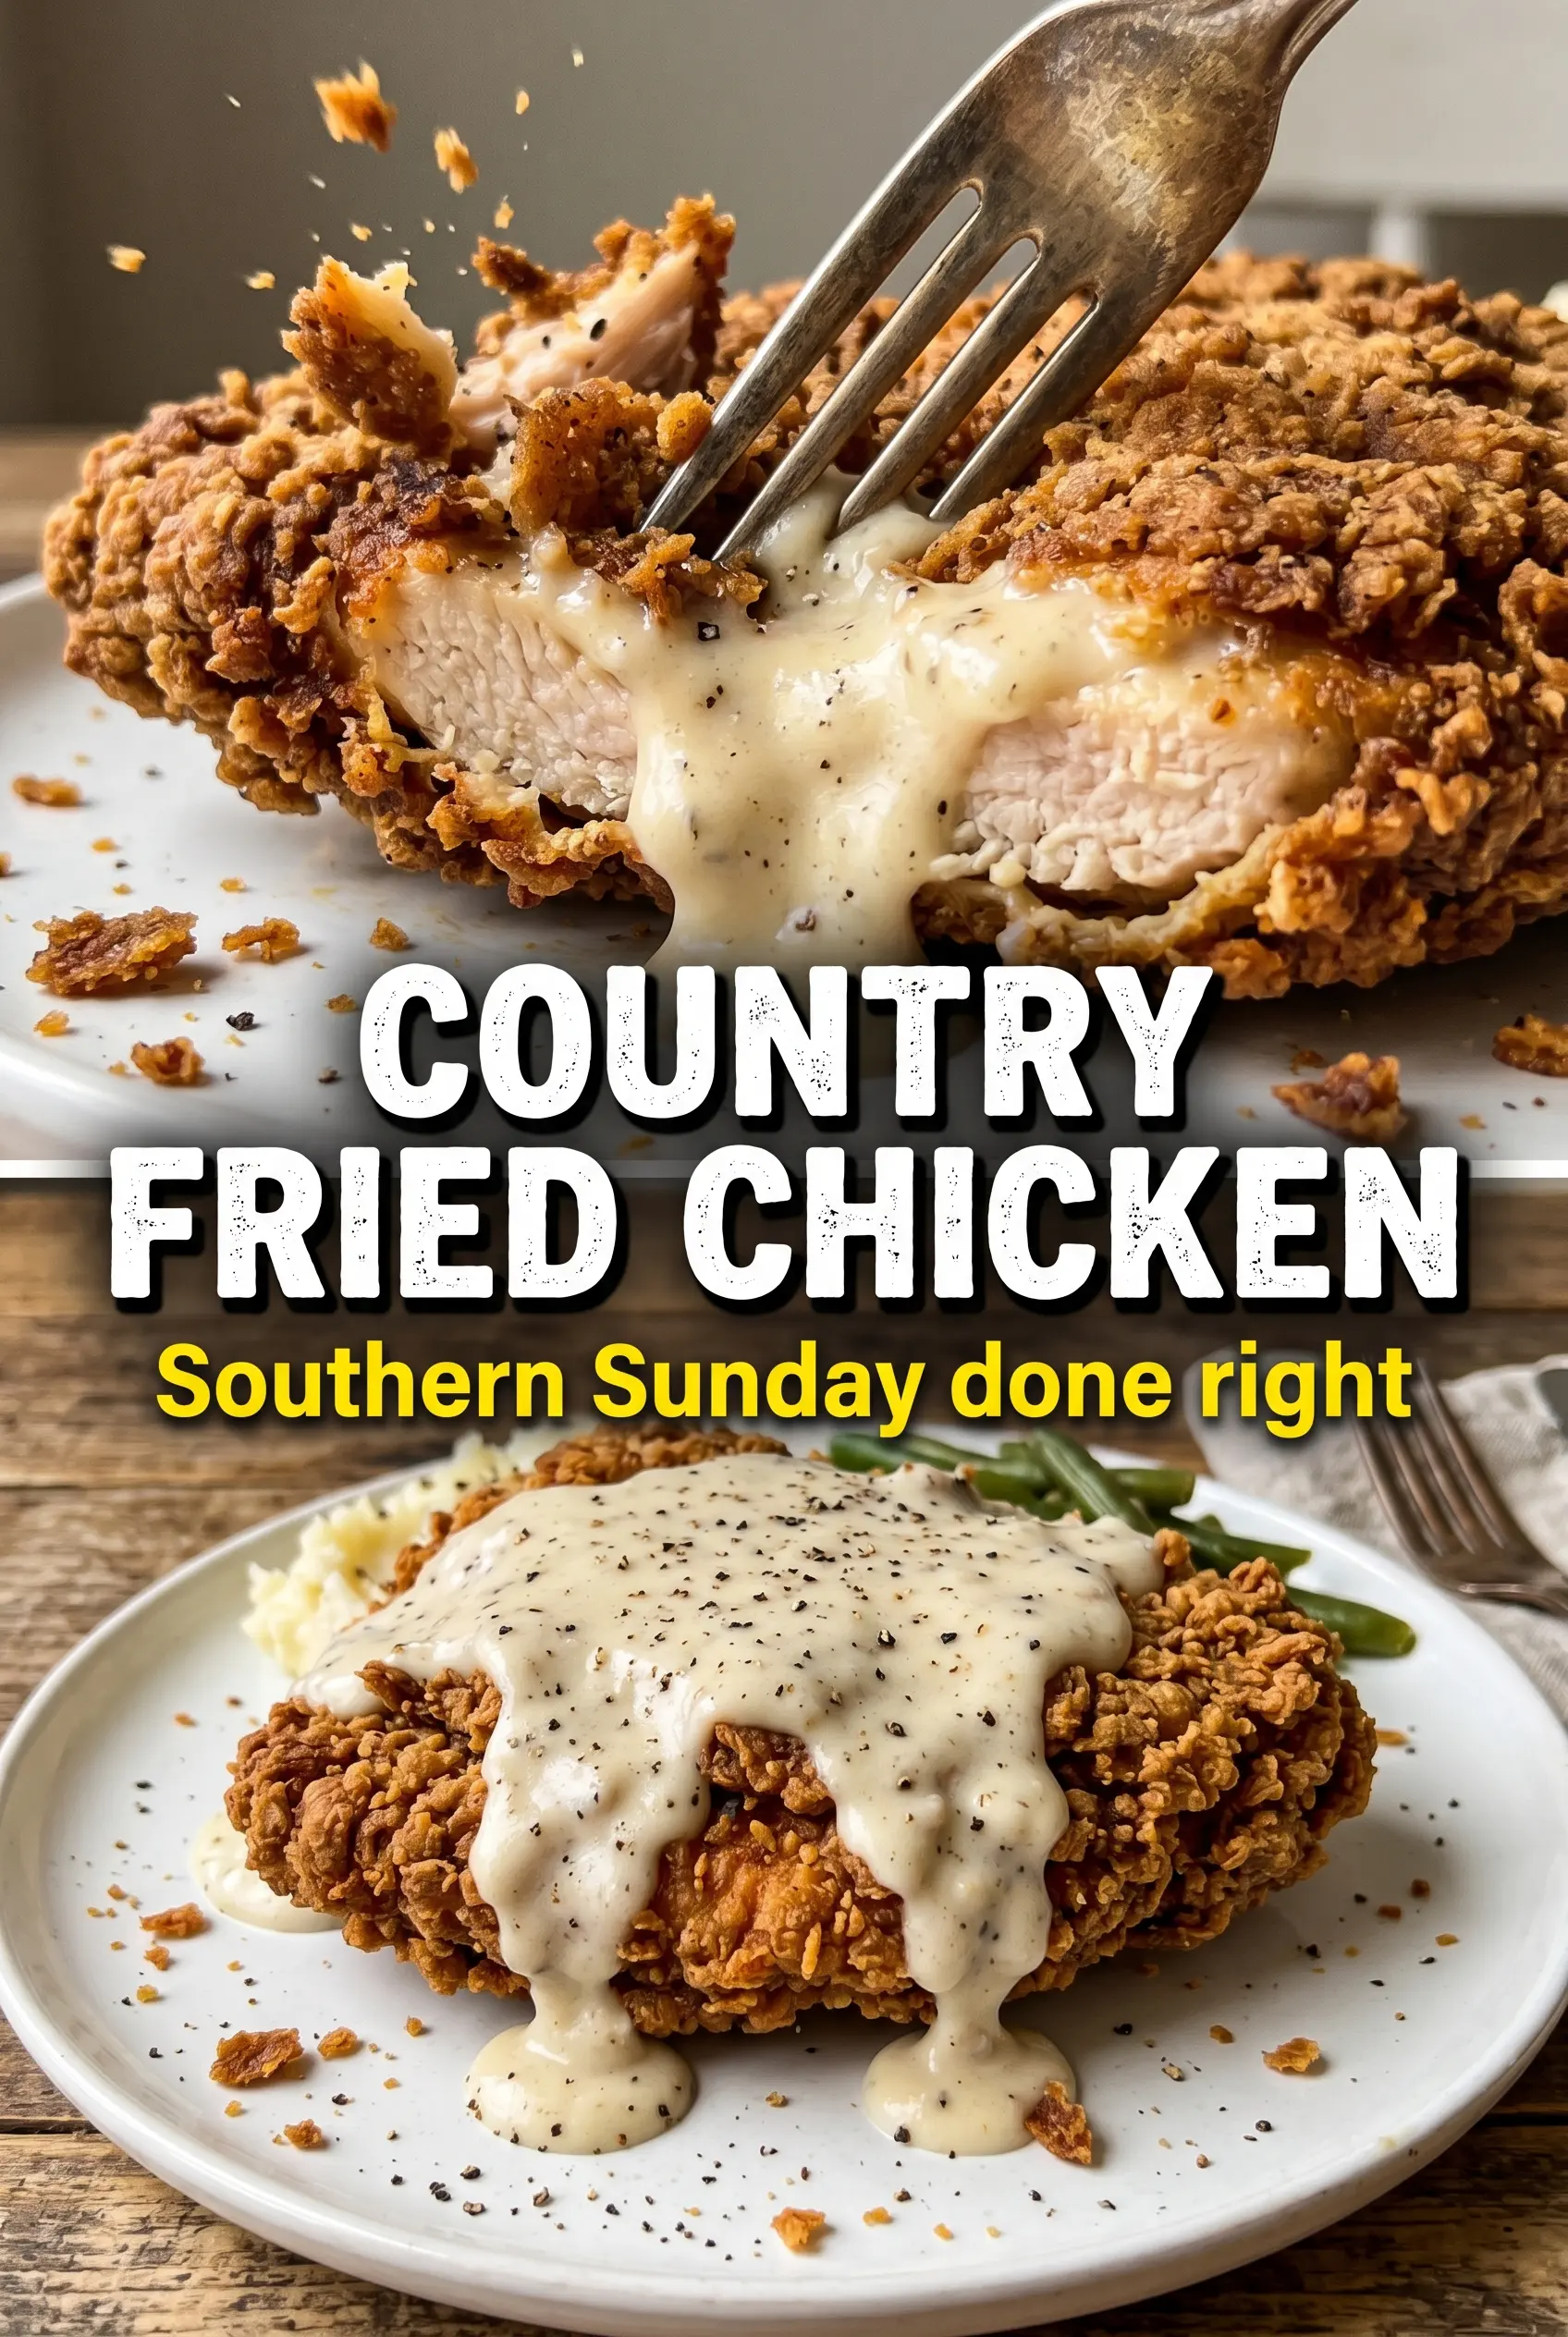
Country fried chicken lands on the plate with a crust that crackles when you cut into it and a juicy center that stays tender under all that seasoned coating. The best versions don’t taste greasy or bland; they taste like the chicken was built from the inside out, with a buttermilk soak pulling flavor deep into the meat and a heavy dredge clinging in rough, craggy layers.
The trick is in the coating and the fry. A hot, well-seasoned flour mix gives the crust its color and backbone, while a second dredge creates those little flakes and ridges that fry up extra crisp. I also like to keep the gravy tied to the chicken pan drippings, because that little bit of fond gives the white gravy a savory edge that plain milk gravy just doesn’t have.
Below, I’ll walk through the parts that matter most: how to get the breading to stick, how to keep the oil temperature steady, and how to serve it so the crust stays crunchy even with gravy on the plate.
The crust stayed crunchy even after I spooned gravy over it, and the chicken was cooked through with no dry spots. The double dredge made the coating thick and craggy, just like the kind I grew up eating.
Save this country fried chicken for the night you want a shatteringly crisp crust, juicy meat, and white gravy worth dragging every bite through.
The Dredge Is What Makes This Chicken Stand Up to Gravy
Country fried chicken lives or dies by the crust. If the flour layer is thin, it softens fast when the gravy hits the plate. If it’s packed on too lightly, the breading slides off in the pan. The double-dredge method solves both problems by building a thicker, rougher shell that fries into those crunchy ridges everyone wants.
Seasoning the flour matters just as much as the frying. The chicken itself only gets one shot at flavor inside that crust, so the garlic powder, onion powder, paprika, and cayenne need to be distributed evenly. The buttermilk also does more than tenderize; its slight tang helps the flour cling and gives the coating a little extra grip before it ever touches the oil.
What Each Ingredient Is Actually Doing in This Dish
- Bone-in chicken pieces — Bone-in thighs and breasts stay juicier than boneless pieces and hold up better under frying. Thighs are more forgiving, but breasts work fine if you pull them as soon as they hit 165°F.
- Buttermilk — This is the soak that seasons and tenderizes at the same time. If you don’t have buttermilk, stir 2 tablespoons of lemon juice or vinegar into 2 cups of milk and let it sit 10 minutes, but expect a thinner marinade and a slightly less tangy finish.
- Hot sauce — You won’t taste heat as much as you’ll taste depth. It wakes up the coating and helps the buttermilk mixture carry seasoning a little farther.
- Smoked paprika and cayenne — Paprika gives the crust color and a little warmth, while cayenne brings the heat. If you want a milder chicken, cut the cayenne in half instead of leaving it out completely, or the coating can taste flat.
- Vegetable oil — Use a neutral oil that can handle frying without adding its own flavor. The oil should come up to 350°F and stay there; if it drops too far, the crust turns heavy instead of crisp.
- Pan drippings — Those drippings are what give the gravy its savory backbone. If you’re short, add a spoonful of the fried coating bits left in the skillet, but don’t skip this layer of flavor if you can help it.
Keeping the Chicken Crispy From Dredge to Dinner
Letting the Buttermilk Soak Do Its Job
Give the chicken at least 30 minutes in the buttermilk mixture, and overnight if you want the seasoning to sink in a little farther. The surface should look fully coated and slightly thickened, not washed clean. If you rush this step, the flour won’t have the tacky base it needs to cling in a proper crust.
Pressing the Flour On, Not Just Dusting It
Lift each piece from the marinade and let the excess drip off for a few seconds before dredging. Then press the chicken firmly into the flour so the coating actually grips the damp surface. For extra crunch, dip it back into the buttermilk and flour again, but keep the layer even; thick patches can go doughy instead of crisp.
Frying at a Steady 350°F
Use enough oil for the chicken to fry, not sit in the pan. A cast iron skillet holds heat well, which keeps the temperature from swinging too wildly when the chicken goes in. If the oil is too cool, the crust absorbs grease; if it’s too hot, the outside darkens before the center finishes cooking.
Turning Once the Crust Sets
Leave the chicken alone for the first few minutes so the coating can set and release from the pan on its own. When it’s ready to turn, it’ll lift cleanly and show a deep golden color underneath. Move it to paper towels or a wire rack once it reaches 165°F, and serve it right away so the crust stays snappy.
Three Ways to Work This Recipe Around Real-Life Dinner Plans
Gluten-Free Country Fried Chicken
Swap the all-purpose flour for a good 1:1 gluten-free flour blend. The crust will still get crisp, but it may be a little more delicate, so let each piece rest a few minutes after dredging before it hits the oil. If your blend is very fine, add a tablespoon or two of cornstarch for extra crunch.
Milder Southern-Style Chicken
Cut the cayenne to 1/4 teaspoon and keep the smoked paprika in place. You’ll still get a well-seasoned crust, just without the back-of-the-throat heat. This is the version I use when I’m serving people who want flavor but not spice.
Dairy-Free Version
Use unsweetened dairy-free milk with 1 tablespoon lemon juice or vinegar stirred in for the soak. It won’t have the same body as buttermilk, but it still gives the coating something sticky to cling to and keeps the chicken tender enough for frying.
Storage and Reheating
- Refrigerator: Store leftovers in an airtight container for up to 3 days. The crust softens in the fridge, especially under gravy.
- Freezer: The fried chicken freezes well without gravy. Cool completely, wrap tightly, and freeze for up to 2 months.
- Reheating: Reheat on a wire rack in a 375°F oven until hot and crisp again. Don’t use the microwave unless you’re fine with a soft crust.
Answers to the Questions Worth Asking
Country Fried Chicken
Ingredients
Equipment
Method
- Soak chicken pieces in buttermilk and hot sauce for at least 30 minutes or overnight, keeping the chicken submerged; when ready the coating will adhere better after drying the surface.
- Whisk together all seasoned flour coating ingredients in a shallow dish until the color looks evenly speckled with spices.
- Remove chicken from buttermilk, letting excess drip off, then dredge firmly in the seasoned flour so it clings in an even layer.
- Repeat the dip-and-dredge for extra crunch so the flour forms a thicker, textured crust.
- Heat 2-3 inches of oil to 350°F in a large cast iron skillet and wait until it holds steady at temperature.
- Fry chicken for 10-12 minutes per side until deeply golden and internal temperature reaches 165°F, turning once and avoiding crowding for consistent browning.
- Drain on paper towels until bubbling subsides and the crust looks set and crisp.
- Whisk pan drippings and flour in a skillet over medium heat for 1 minute until it looks smooth and lightly golden.
- Gradually whisk in whole milk and cook until thickened, stirring until the gravy coats the back of a spoon.
- Season with salt and pepper to taste for a balanced, creamy finish.
- Serve chicken immediately with white gravy poured over the top so the gravy pools around the base beside the crisp coating.